Can You Put Wainscoting in a Bathroom? Waterproofing (2026)
Can you install wainscoting in a bathroom? Which materials survive steam, how to seal every edge, and the mistakes that rot panels. 2026 installer guide.
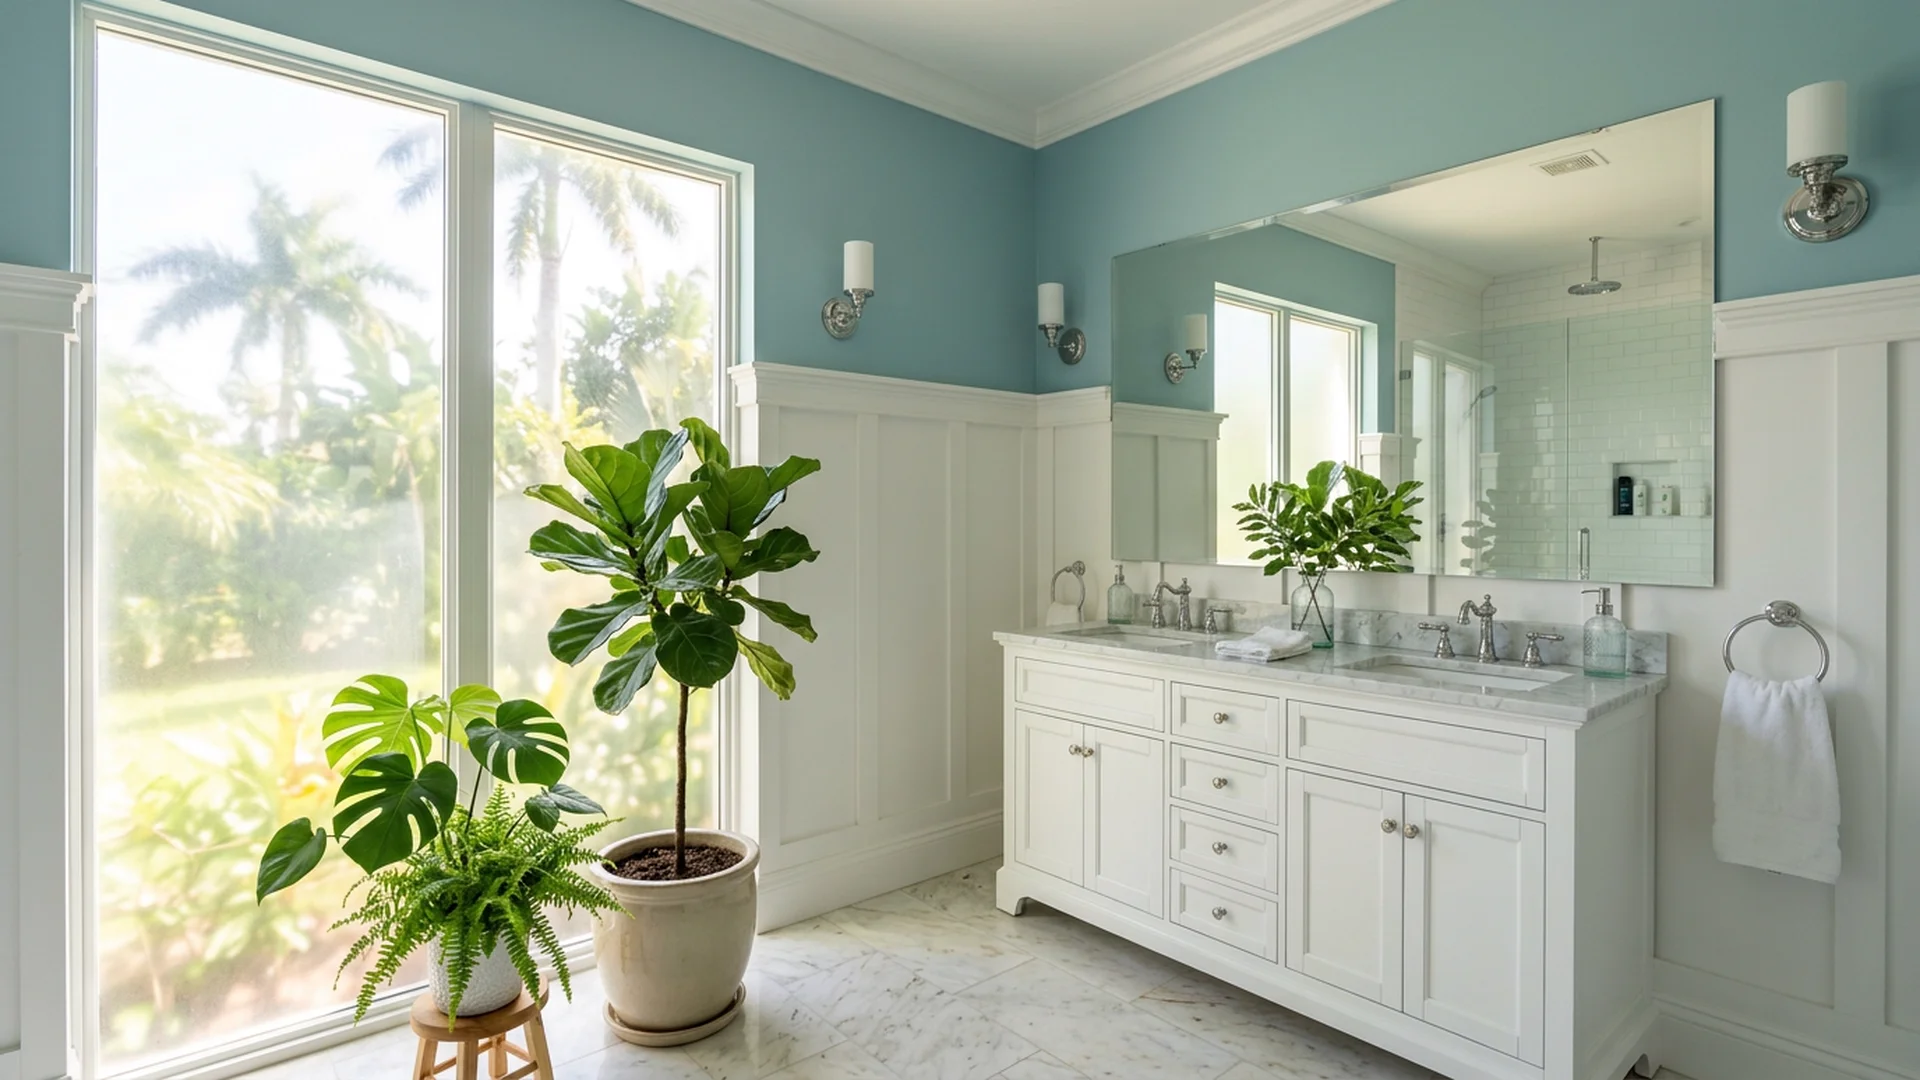
Wainscoting is just decorative paneling on the lower part of a wall – the beadboard or picture-frame molding you see in half the bathroom photos online. And yes, it belongs in a bathroom. The photos are not lying. But a lot of the installs I hear about go wrong within a couple of years, and the failure always looks the same: swollen bottom edges, a paint film splitting in a long horizontal crack, and eventually rot or mold behind the panels.
The good news is the fix comes down to two things: the right material and a sealing sequence. Get those right and wainscoting outlives the paint job. Get either wrong and you have sawdust in a paint jacket.
Below: where wainscoting belongs in a bathroom and where it does not, a material ladder from best to never, why MDF dies in bathrooms, the sealing sequence, caulk rules, ventilation numbers, and the five mistakes that rot panels.
Yes, but not everywhere: the two zones of a bathroom
TL;DR: Wainscoting belongs on the dry-zone walls of a bathroom – the vanity wall, the wall behind the toilet, the wall facing the tub. It does not belong inside the tub or shower enclosure, where building codes require a nonabsorbent finish like tile or solid-surface over an approved backer. Know which zone your wall is in before you pick a material.
A bathroom has two zones and they play by different rules. The dry zone is every wall that is not hit by direct spray: the vanity wall, the wall behind the toilet, the wall across from the tub. Steam and splashes reach these walls, but standing water does not sit on them. Wainscoting does great here with the right material and sealing.
The wet zone is the tub or shower enclosure itself. Here the code gets specific: walls in shower compartments and walls above bathtubs with a wall-mounted showerhead must be finished per IRC Section R307.2, which in practice means a nonabsorbent finish – tile, solid-surface, acrylic – taken to at least 6 feet above the floor (or 70 inches above the drain, whichever is greater). Gypsum board is absorbent – and so is any decorative panel. As designer Trish Whitsel puts it: "For areas exposed to splashes, discuss suitable PVC or tile options with your installer. Decorative paneling should not be assumed to replace a shower's required waterproofing system."
One more code line worth knowing: the approved backers behind tile in tub and shower areas are a short list – glass-mat gypsum, fiber-reinforced gypsum, fiber-cement, and fibermat-reinforced cementitious board (IRC R702.4.2). If a contractor wants to put your wainscoting where tile belongs, you are looking at a code violation. Check with your local AHJ (the building-code authority that signs off work in your area) – Florida jurisdictions layer their own amendments on top of the IRC.
The material ladder: what survives, what swells
TL;DR: Cellular PVC is the best pick for a bathroom – it does not rot or swell. Sealed solid wood (pine, poplar) is a good second if it never sits in standing water and every edge is sealed. Moisture-resistant MDF is conditional and never near the floor or tub. Standard MDF is a never.
Here is the ladder from best to worst, based on manufacturer docs and what installers actually report.
Cellular PVC (AZEK and similar) – foamed plastic board that cuts and paints like wood but absorbs no water. The consensus pick across manufacturers, retailers, and contractors. PVC beadboard resists warping and rot, and retailers position it as the default for bathrooms, kitchens, and mudrooms. The Money Pit notes that AZEK makes beadboard that "won't rot and never needs painting." A contractor on the Fine Homebuilding forum is blunter: "I use azek all the time in bathrooms – works great!" Our own studio line is the same one I published in our Florida humidity guide: bathrooms get PVC, WPC (wood-plastic composite), or polystyrene fluted panels – never MDF. PVC panels will not rot. Like everything else in a bathroom, they still need cleaning and ventilation. One honest caveat from the warranty fine print: AZEK's Lifetime Limited Warranty covers rot, delamination, and excessive moisture swelling, but it excludes mold and mildew as environmental conditions. The panel is not the whole system.
Sealed solid wood (pine, poplar, hardwood beadboard). A good second pick with discipline. A Houzz thread from installers says properly sealed wood beadboard is fine in a bathroom as long as standing water never sits against it. The budget pro pick is solid poplar – it paints like MDF and survives a wet mop. The rule: prime and seal every cut end before the piece goes on the wall, and float the bottom off the floor (more on that in the sequence).
Moisture-resistant MDF (MR-MDF). Conditional. MR-MDF has wax and resin treatments that slow moisture uptake, but it is designed for humid interiors, not wet ones. It can work on a dry-zone wall far from the tub – if the manufacturer finishing requirements are followed exactly. Which brings me to the next section.
Standard MDF. Never in a bathroom. The industry says it plainly through installers and manufacturers alike – one bathroom-products manufacturer (Ozarke) states in its install PDF: "We do not recommend installing in bathrooms or any area with excessive moisture." That line is written about acoustic wood-slat panels with MDF cores, but the chemistry is the same for any standard MDF wainscot. If you are weighing panel types for the dry rooms of the house, I compared fluted and wood-slat options head to head in the fluted vs wood slat guide.
Why MDF dies in bathrooms (and MR-MDF is not waterproof)
TL;DR: MDF swells one way – wet it and dry it and it never returns to thickness. Moisture-resistant MDF slows the process but has limits: the MR grades (MR10/MR30/MR50) and datasheets assume sealed surfaces, and "moisture resistance does not mean waterproofing." If you use MDF anywhere near a bath, every edge must be sealed and the bottom edge must never sit in water.
This is the misunderstanding I see most. The label moisture-resistant sounds like a promise of waterproofing. It is not. Here is the chemistry.
MDF is wood fiber glued under pressure. When it absorbs water, the fibers swell and the compression stresses from manufacturing release. A peer-reviewed study in MDPI Polymers (2021) found that wetting-and-redrying cycles permanently increase MDF thickness – the swelling is one-way. A 2026 MDPI review put numbers on the damage: 30 to 50 percent loss in modulus of rupture (breaking strength) at 15 to 20 percent moisture content, with internal-bond losses (how well the fibers hold together) frequently hitting 60 to 70 percent.
Failure starts at the edges. Anne Whitacre, a professional specifier, notes on the 4specs forum that unpainted MDF edges draw in water faster with every exposure until the panel delaminates. The trade guide Obsessed Woodworking describes the signature failure precisely: moisture wicks into the unsealed bottom edge, the fiber swells while the primed face stays rigid, and the paint film splits "in a long horizontal crack about a quarter inch off the floor." Mop water does it; a kid's bath does it faster. "Once it swells, it never goes back – sanding just opens more raw fiber."
MR-MDF does not change this story, only the timeline. The MDF standard ANSI A-208.2 defines three moisture-resistance classes – MR10, MR30, MR50 – and using the wrong class in a wet room accelerates failure. The MEDITE MR datasheet quotes 24-hour thickness swelling under 8 percent and under 15 percent after EN 321 wet-cycling (a standard soak-and-dry lab test) – better than standard MDF, but the board still requires sealing, priming, and painting on ALL surfaces, and it is not rated for exterior use. Trish Whitsel's line from her October 2026 wainscoting guide is the one I quote to clients: "Standard MDF can swell when it gets wet. Some moisture-resistant MDF products are designed for humid interiors, but moisture resistance does not mean waterproofing."
The waterproofing sequence that actually works
TL;DR: Five steps in order: seal the wall first, back-prime and end-prime every piece before install, float the bottom edge a quarter to half inch off the floor, seal every cut edge and joint, then paint over everything. Skip one step and the skipped step becomes the failure point.
This is the sequence I've pulled together from manufacturer guides and installer practice. Run it in order.
Step 1: Start with a sound wall. Fix the substrate before you decorate it. If there is a leak, a soft spot, or old water staining, new panels will hide it and make it worse. InspectAPedia documents a bathroom where wainscot covered "an extensive mold colony" – the new paneling over prior leaks led to a bigger demolition bill later. Never install wainscoting over a leaking wall.
Step 2: Back-prime and end-prime every piece before it goes on the wall. Back-prime means painting the back face that sits against the wall; end-prime means painting every cut end. Cut ends are the number one water entry path. The Obsessed Woodworking rule: "back-prime and end-prime every piece before it goes on the wall. Five minutes with a brush on the cut ends is the difference between trim that lasts twenty years and trim you replace in six." This applies double to wood and MR-MDF.
Step 3: Float the bottom off the floor. Do not rest wainscot directly on the floor. Leave a quarter to half inch gap, then cover it with baseboard and quarter-round (the small curved trim strip that covers the seam at the floor). A BiggerPockets investor named Jay recommends the same detail: leave a small gap filled with silicone or caulk, so that "if the caulk fails, it shouldn't wick up any water spilled on the floor." A failed caulk line on a floating install is a re-caulk job. A failed caulk line on a floor-resting install is a rot job.
Step 4: Seal every joint as you go. Duramax's own high-moisture procedure for PVC panels calls for a silicone bead inside the tongue-and-groove joints (the interlocking edges of the boards) plus drainage holes in the bottom J-trim. The weak point of a waterproof panel system is never the panel face – it is the glue joint, the drywall behind it, and trapped condensation.
Step 5: Paint over the whole envelope. Two coats of a moisture-resistant paint over a good primer, covering every face, edge, and joint. Paint is your final moisture barrier, and the next two sections explain which caulk and which paint.
One studio note: acclimate the panels in the room for 48 to 72 hours before install, keep the AC running, and leave 3 to 5 mm expansion gaps around the perimeter. The manufacturer install window is 15 to 25 degrees Celsius and 40 to 60 percent relative humidity – a non-AC Florida room blows past 60 percent RH in summer easily. These are the same install conditions from our Florida humidity guide.
Caulk and sealant: silicone here, paintable there
TL;DR: Silicone at the floor line, around the tub, and at plumbing penetrations – it stays flexible and resists mildew. Paintable acrylic or urethane caulk at the chair rail and any joint that must disappear under paint. Silicone under paint is a failure: paint does not stick to it.
Get this wrong and you've found one of the cheapest ways to ruin a good install. Consumer Reports draws the line clearly: "Sealants are a little bit flexible and are better suited for bathrooms, kitchens, and outdoor applications where they may be exposed to moisture, movement, and temperature fluctuations, and are usually made from silicone and cannot be painted. Caulk is made from acrylic or latex and can be painted once cured."
The working rule from DIY practice: GE Silicone II where it touches the tub or shower or never needs paint; DAP DYNAFLEX 230 or similar paintable premium caulk where paint goes over the joint. Tub-and-tile formulations of silicone include a mildewcide (an additive that inhibits mold growth) for wet areas.
Where each goes on a wainscoting install:
- Silicone: the floor line behind the baseboard, the tub-to-panel junction, around plumbing penetrations and valve cutouts, the tile-to-wall junction.
- Paintable caulk: the chair rail (the horizontal trim cap along the top of the wainscoting) to wall joint, inside corners, nail holes, any joint that gets painted.
And the Ask MetaFilter cautionary tale: a homeowner's semi-gloss paint peeled off in strips at the wall-to-tile line until the joint was sealed with a proper primer and a silicone bead at the tile edge. Paint over silicone peels. Caulk under silicone cracks. Match the material to the spot.
Behind the panels: vapor, gaps, and airflow
TL;DR: A sealed void behind panels is a mold trap if moisture gets in: mold grows above 60 percent relative humidity (EPA and UF/IFAS guidance). Leave expansion gaps, do not caulk the bottom shut, and give condensation a way out. Florida bathrooms start at a disadvantage – unconditioned central-Florida homes average 62 to 73 percent indoor RH (Florida Solar Energy Center).
The wall behind decorative panels must be able to dry. When you seal the front face perfectly but leave a damp cavity behind it, you have built a terrarium.
Three rules from manufacturer and trade guidance:
Leave the bottom breathable. Duramax's high-moisture install procedure pairs its silicone-in-the-grooves with drainage holes in the bottom J-trim. The principle transfers to any system: water that gets behind the panels needs a path out at the bottom, not a caulk dam.
Keep expansion gaps around the perimeter. Panels move with temperature and humidity – PVC moves with temperature more than moisture. The manufacturer window is 15 to 25 degrees C and 40 to 60 percent relative humidity for install conditions. Our studio line: 3 to 5 mm perimeter gaps, acclimated panels.
Do not create a sealed sandwich on an already-damp wall. The InspectAPedia case from Step 1 is the warning: wainscot over an old leak hides the mold colony until the remediation bill multiplies.
A separate vapor barrier behind bathroom wainscoting is not the move. In tub and shower compartments the code actually forbids putting water-resistant gypsum over a Class I or II vapor retarder (IRC R702.3.7). The drying strategy is the opposite of trapping: drainage at the bottom, air gaps around the perimeter, and ventilation that dries the cavity between showers.
Why Florida makes this harder: Florida Solar Energy Center measurements found indoor relative humidity averaging 62, 69, and 73 percent across three unconditioned central-Florida homes. The EPA recommends keeping indoor humidity below 60 percent, ideally 30 to 50 percent, and UF/IFAS Extension (July 2026) advises keeping indoor relative humidity around 55 percent or lower – above that, mold grows and building materials take damage. The panels have to win that fight with sealing, gaps, and ventilation.
Ventilation: the part people skip
TL;DR: Bathroom exhaust is code, not a suggestion: the 2023 Florida Building Code requires 50 cfm intermittent or 20 cfm continuous, and it must exhaust to the exterior – never the attic. In South Florida humidity, treat the code minimum as a floor, not a target. Run the fan on a timer for 20 to 30 minutes after every shower.
Ventilation is the least glamorous part of waterproofing and the one that kills the most panels. Every sealing detail I've listed assumes the room can dry between showers.
The code numbers: the 2023 Florida Building Code, Mechanical, 8th edition, Table 403.3.2.3 requires "Bathrooms and toilet rooms – 50 cfm intermittent or 20 cfm continuous." IRC M1501.1 adds the part people violate: exhaust must discharge outside the building envelope – no dumping into the attic, the soffit cavity, or a crawlspace. The Florida code mirrors this: vent directly to the exterior.
The South Florida reality check: a Boca Raton remodeling contractor's 2026 guide argues that a code-minimum 50 CFM fan is technically compliant but almost certainly not enough to prevent mold in a typical bathroom down here. Read that as one contractor's take, not a measured stat – but the direction is right. Size the fan for the room, put it on a timer switch so it runs after the shower without relying on memory, and confirm it actually vents outside. A contractor-dumped fan into an attic is a roof-decking mold project waiting to happen.
Paint as armor: sheen is the moisture barrier you buy
TL;DR: Two coats of satin or semi-gloss enamel over a good primer, on every face and edge. Never flat or eggshell in a bathroom. At the tile-to-wall line, seal with primer first, then a silicone bead – paint alone peels. Angi's paint guide puts it simply: the hard, glossy surface deflects moisture instead of absorbing it.
Paint is the cheapest waterproofing you can buy, and sheen is the spec that matters. Angi's guidance: the best paint for a bathroom has a glossy sheen, such as satin or semi-gloss – the hard surface deflects moisture rather than absorbing it, unlike matte or eggshell paints. A DIY-forum moderator with years of threads behind him says it shorter: always use enamel in bathrooms.
The details:
- Primer first, especially on MDF edges and cut ends – a Kilz-style sealing primer is the forum-tested pick for problem joints.
- Two coats minimum, full coverage on all faces, edges, and joints.
- Never flat or eggshell in a bathroom: the porous surface drinks steam. And the tile-to-wall junction gets silicone, not paint – as the Ask MetaFilter case showed, paint over that line peels off in strips without a sealed bead underneath.
Five mistakes that rot panels
TL;DR: Standard MDF anywhere in the bath. Panels resting on the floor. Silicone under paint. New panels over a leaking wall. Decorative panels where the code wants tile. Each one is a slow-motion failure; together they are a renovation in two years.
1. Standard MDF in the splash zone. It swells, and the swelling is permanent. Even MR-MDF only buys time – and only with every edge sealed. If the panel sits within splash distance of the tub or floor, the material is cellular PVC or sealed solid wood. Our studio rule, already published in our humidity guide: bathrooms get PVC, WPC (wood-plastic composite), or polystyrene fluted panels – never MDF.
2. Panels resting directly on the floor. Any caulk-line failure becomes a wicking event. Float the bottom a quarter to half inch, cover with baseboard and quarter-round, silicone the junction.
3. Silicone under paint. Paint does not adhere to silicone. Silicone goes where paint never goes – floor line, tub junctions, plumbing penetrations. Paintable caulk goes where paint goes. Swapping them guarantees peeling.
4. New panels over a leaking wall. Decorating over active moisture hides the problem and multiplies the remediation bill. InspectAPedia's mold-colony case is the template. Fix the wall first.
5. Treating decorative panels as shower waterproofing. Inside the tub/shower enclosure, the code wants a nonabsorbent finish over an approved backer – tile, solid-surface, acrylic. Wainscoting stops at the enclosure line. Decorative panels are the look; the membrane behind tile is the waterproofing.
Can you put wainscoting over bathroom tile?
TL;DR: Yes on dry-zone walls, with adhesive or mechanical fastening rated for the tile, all the same sealing rules, and extra attention at the tile-to-panel junction. Never over tile inside the shower spray zone. The same material ladder applies – PVC earns its keep here – and the panel-to-tile junction gets silicone, not paint.
Over-tile installs are common in renovations where tearing out tile means a full gut. The rules stack on top of everything above: pick a material from the ladder (PVC is the easiest here – it is light and does not care about the damp tile behind it), use adhesive and fasteners rated for tile substrates, seal the junction where panel meets tile with silicone (the Ask MetaFilter peeling case lives exactly at this line), and keep the whole assembly out of the spray zone.
One height note: if you are tempted to run panels up the wall above a tub with a showerhead, remember the 6-foot nonabsorbent rule. Panels stop where the tile starts. For what the materials and the install typically cost, the numbers live in the cost guide.
Sources
Materials
- The Money Pit, "Bathroom Makeover: Wainscoting" – AZEK beadboard "won't rot and never needs painting" (verbatim); urethane moldings: "Because urethane does not absorb water" (verbatim). moneypit.com
- AIC Millworks, PVC Wainscoting buying guide – PVC vs Wood vs MDF comparison table; PVC "Best rooms: Bathroom, kitchen, basement" (paraphrase). aicmillworks.com
- Plastpro, 2021 Planking/Wainscot flyer (manufacturer claim): "100% mold and rot resistant"; rubber-sealed base moulding; interior/noncommercial note. plastproinc.com
- AZEK Trim & Moulding Lifetime Limited Warranty (manufacturer doc): covers rot/delamination/excessive moisture swelling; excludes mold/mildew as environmental. us.evocdn.io
- Trish Whitsel, beautifullydone.design, "Wainscoting Ideas" (Oct 2026) – "Standard MDF can swell when it gets wet. Some moisture-resistant MDF products are designed for humid interiors, but moisture resistance does not mean waterproofing." (verbatim); decorative paneling is not a substitute for shower waterproofing (verbatim). beautifullydone.design
- MDPI Polymers 2021 (peer-reviewed) – wetting-redrying cycles permanently increase MDF thickness (paraphrase). mdpi.com
- MDPI Forests 2026 review (peer-reviewed) – 30-50% modulus-of-rupture loss at 15-20% moisture content, internal-bond losses frequently 60-70% (paraphrase). mdpi.com
- 4specs specifier forum – ANSI A-208.2 MDF moisture classes MR10/MR30/MR50 (George A. Everding, AIA/CSI/CCS); unpainted edges draw in water faster with every exposure; panels delaminate (Anne Whitacre, FCSI CCS) (paraphrase, practitioner reports). discus.4specs.com
- MEDITE MR datasheet (manufacturer) – 24 h thickness swelling under 8%, under 15% after EN 321 wet-cycle; seal/prime/paint ALL surfaces; not rated for exterior use (paraphrase). cworkshop.co.uk
- Ozarke acoustic panels install PDF (manufacturer guidance) – "We do not recommend installing in bathrooms or any area with excessive moisture" (verbatim). cdn.shopify.com
- InspectAPedia – bathroom wainscot covering "an extensive mold colony" (verbatim); paneling over prior leaks raised remediation cost (paraphrase). inspectapedia.com
- WOW Walls Studio, "Wall Panels in Florida Humidity: MDF vs PVC – What Actually Survives (2026)" – bathrooms = PVC/WPC/PS fluted only, never MDF; acclimate 48-72 h; 3-5 mm perimeter gaps; 15-25 degrees Celsius / 40-60% RH window (paraphrase, studio-published).
Techniques
- Obsessed Woodworking, "Trim and Molding Choices You'll Regret" – "back-prime and end-prime every piece before it goes on the wall. Five minutes with a brush on the cut ends is the difference between trim that lasts twenty years and trim you replace in six." (verbatim); paint film splits "in a long horizontal crack about a quarter inch off the floor" (verbatim); "Once it swells, it never goes back – sanding just opens more raw fiber." (verbatim); cellular PVC baseboard and solid poplar picks (paraphrase). obsessedwoodworking.com
- Duramax PVC Panels install guide (manufacturer) – silicone bead inside panel grooves; drainage holes in bottom J-trim (paraphrase); "FDA-compliant panels are warrantied to never mold, rot or absorb moisture" (manufacturer claim). duramaxpvcpanels.com
- Consumer Reports, "Best Caulks and Sealants" – "Sealants are a little bit flexible and are better suited for bathrooms, kitchens, and outdoor applications where they may be exposed to moisture, movement, and temperature fluctuations, and are usually made from silicone and cannot be painted. Caulk is made from acrylic or latex and can be painted once cured." (verbatim). consumerreports.org
- FactsFacts DIY guide – GE Silicone II if it is in the tub or shower, DAP DYNAFLEX 230 Premium if it has to be painted; mildewcide tub-and-tile formulations (paraphrase). factsfacts.com
- Angi, paint sheen guide – satin/semi-gloss "deflects moisture rather than absorbing it, unlike matte or eggshell" (paraphrase). angi.com
Codes
- 2023 Florida Building Code, Mechanical, 8th ed., Table 403.3.2.3 – "Bathrooms and toilet rooms – 50 cfm intermittent or 20 cfm continuous" (verbatim). codes.iccsafe.org
- IRC M1501.1 (via buildingcodegeek.com) – bathroom exhaust must discharge outside the building envelope; no attic/soffit/crawlspace discharge (paraphrase). buildingcodegeek.com
- IRC R702.4.2 Table (via codes.iccsafe.org) – approved tile backers in tub/shower areas: glass-mat gypsum (ASTM C1178), fiber-reinforced gypsum (ASTM C1278), fiber-cement (ASTM C1288 / ISO 8336 Cat C), fibermat-reinforced cementitious (ASTM C1325) (paraphrase). codes.iccsafe.org
- IRC R702.3.7.1 / R702.3.5 (via codes.iccsafe.org) – water-resistant gypsum not allowed with direct water exposure or continuous high humidity; no gypsum board directly exposed to water (paraphrase). Same URL.
- IRC R307.2 / P2710.1; IPC 417.4.1 commentary (via codes.iccsafe.org and thebuildingcodeforum.com) – tub/shower walls finished with smooth, corrosion-resistant, nonabsorbent materials to 6 ft / 70" above drain (paraphrase). codes.iccsafe.org
Florida humidity
- Florida Solar Energy Center (UCF) – unconditioned central-Florida homes averaged 62%, 69%, 73% indoor RH (paraphrase). fsec.ucf.edu
- U.S. EPA – keep indoor humidity below 60%, ideally 30-50% (paraphrase). epa.gov
- UF/IFAS Extension (July 2026) – keep indoor RH around 55% or lower; above that, mold grows and materials take damage (paraphrase). blogs.ifas.ufl.edu
Community / practitioner reports
- BiggerPockets forum, "Wainscoting in Bathroom Prone to Rotting?" – Jay (Winnipeg): leave a small gap filled with silicone or caulk so that "if the caulk fails, it shouldn't wick up any water spilled on the floor"; "I personally wouldn't use MDF wainscoting, as if there is any penetration, it will swell and be quite noticable" (both verbatim, community opinion). biggerpockets.com
- Houzz forum, "PVC Wainscoting" – sealed wood beadboard floated a quarter to half inch off floor with clear silicone at wall-floor junction (paraphrase, community opinion). houzz.com
- Fine Homebuilding forum – "I use azek all the time in bathrooms – works great!" (verbatim, community opinion); MDF beadboard "Just don't use it if there's any excessive dampness" (verbatim, community opinion). finehomebuilding.com
- Boca Raton remodeling contractor (2026) – a code-minimum 50 CFM fan is technically compliant but almost certainly not enough to prevent mold in a typical bathroom in South Florida humidity (paraphrase, contractor opinion). bocaratonremodelingfl.com
- Ask MetaFilter, "Help me paint my bathroom" – homeowner's semi-gloss paint peeled off in strips at the wall-to-tile line; thread advice: sealing primer plus a silicone bead at the tile edge (paraphrase, community opinion). ask.metafilter.com