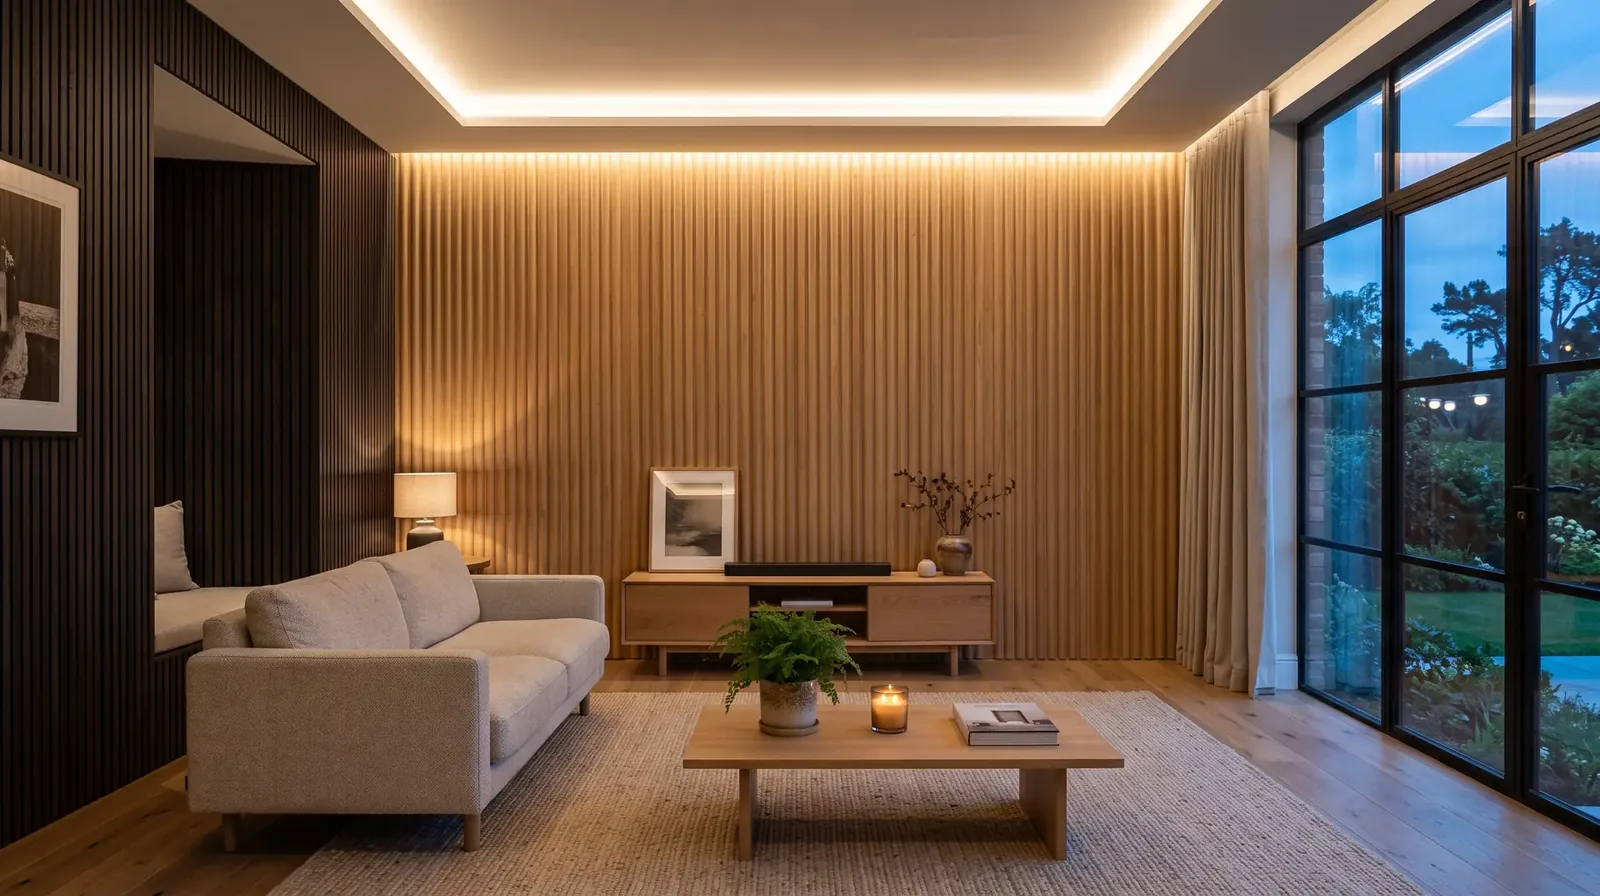
Why this look keeps winning in 2026
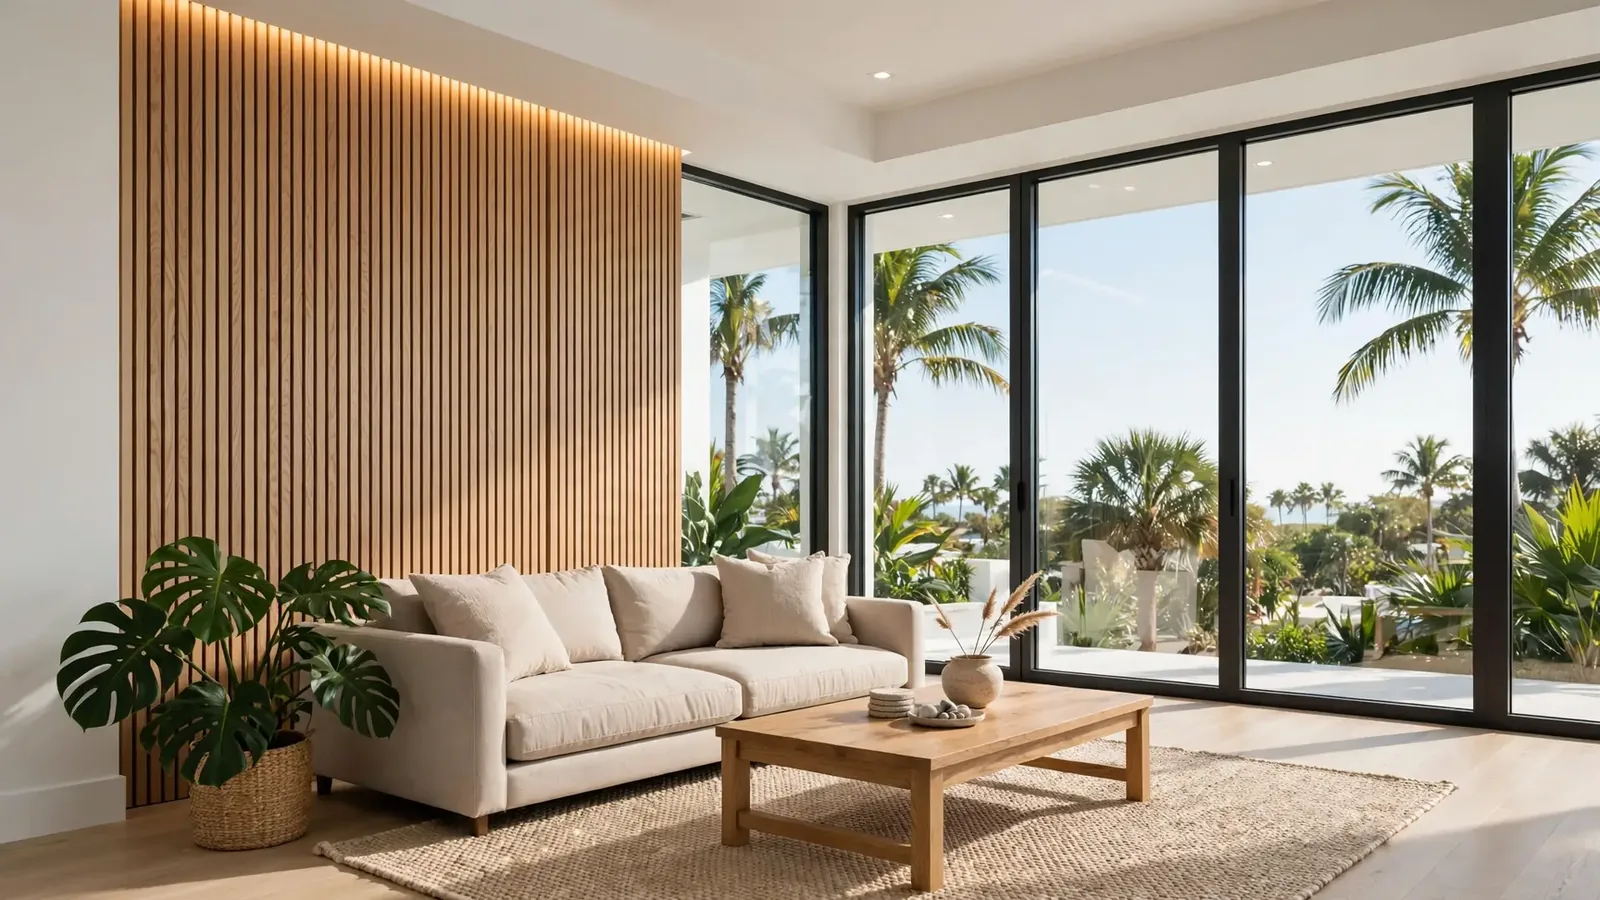
TL;DR: Vertical wood slats plus warm LED backlight is the TV wall combo dominating feeds right now. It works because it hides a plain wall, softens the black rectangle of the TV, and the glow makes the whole room feel finished. This guide covers the parts that actually matter: materials, safe wiring, cables, mounting, fireplace rules, Florida humidity, and real prices.
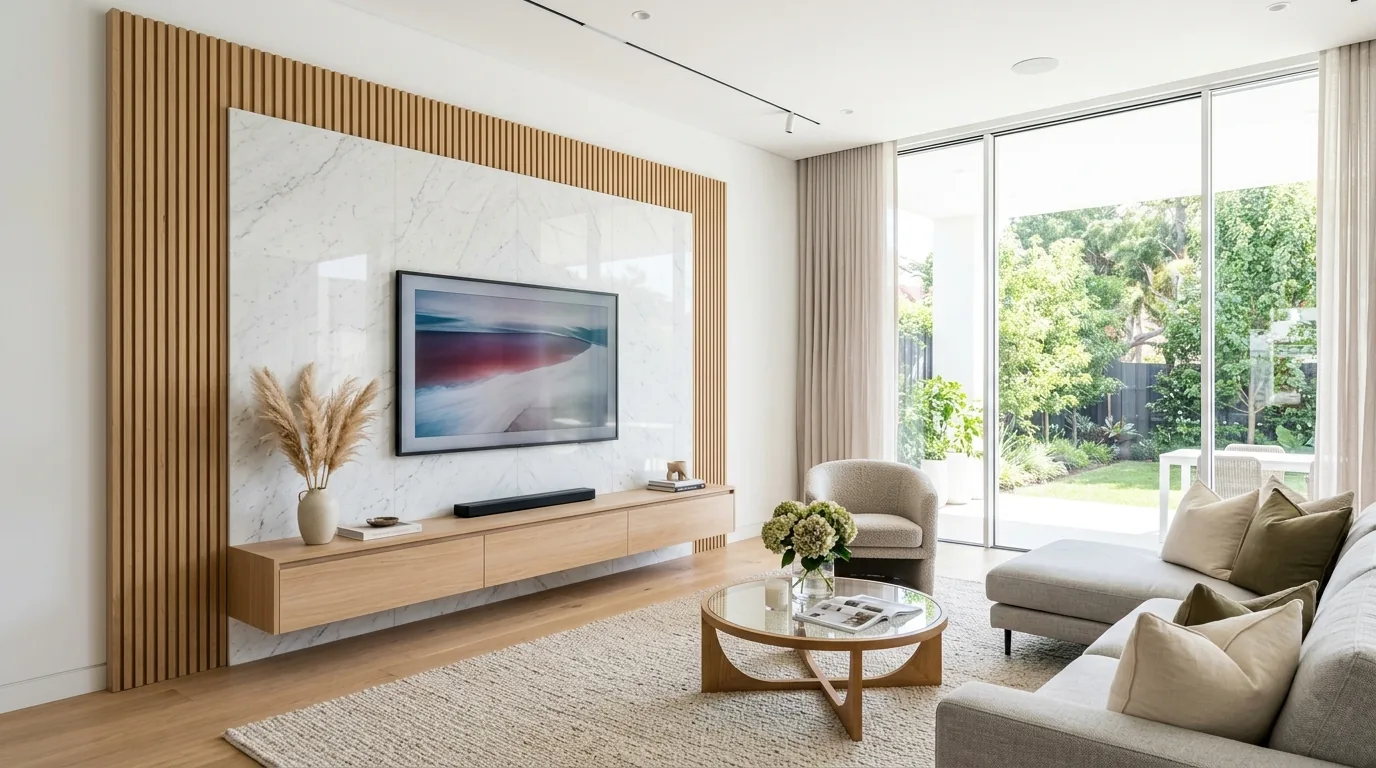
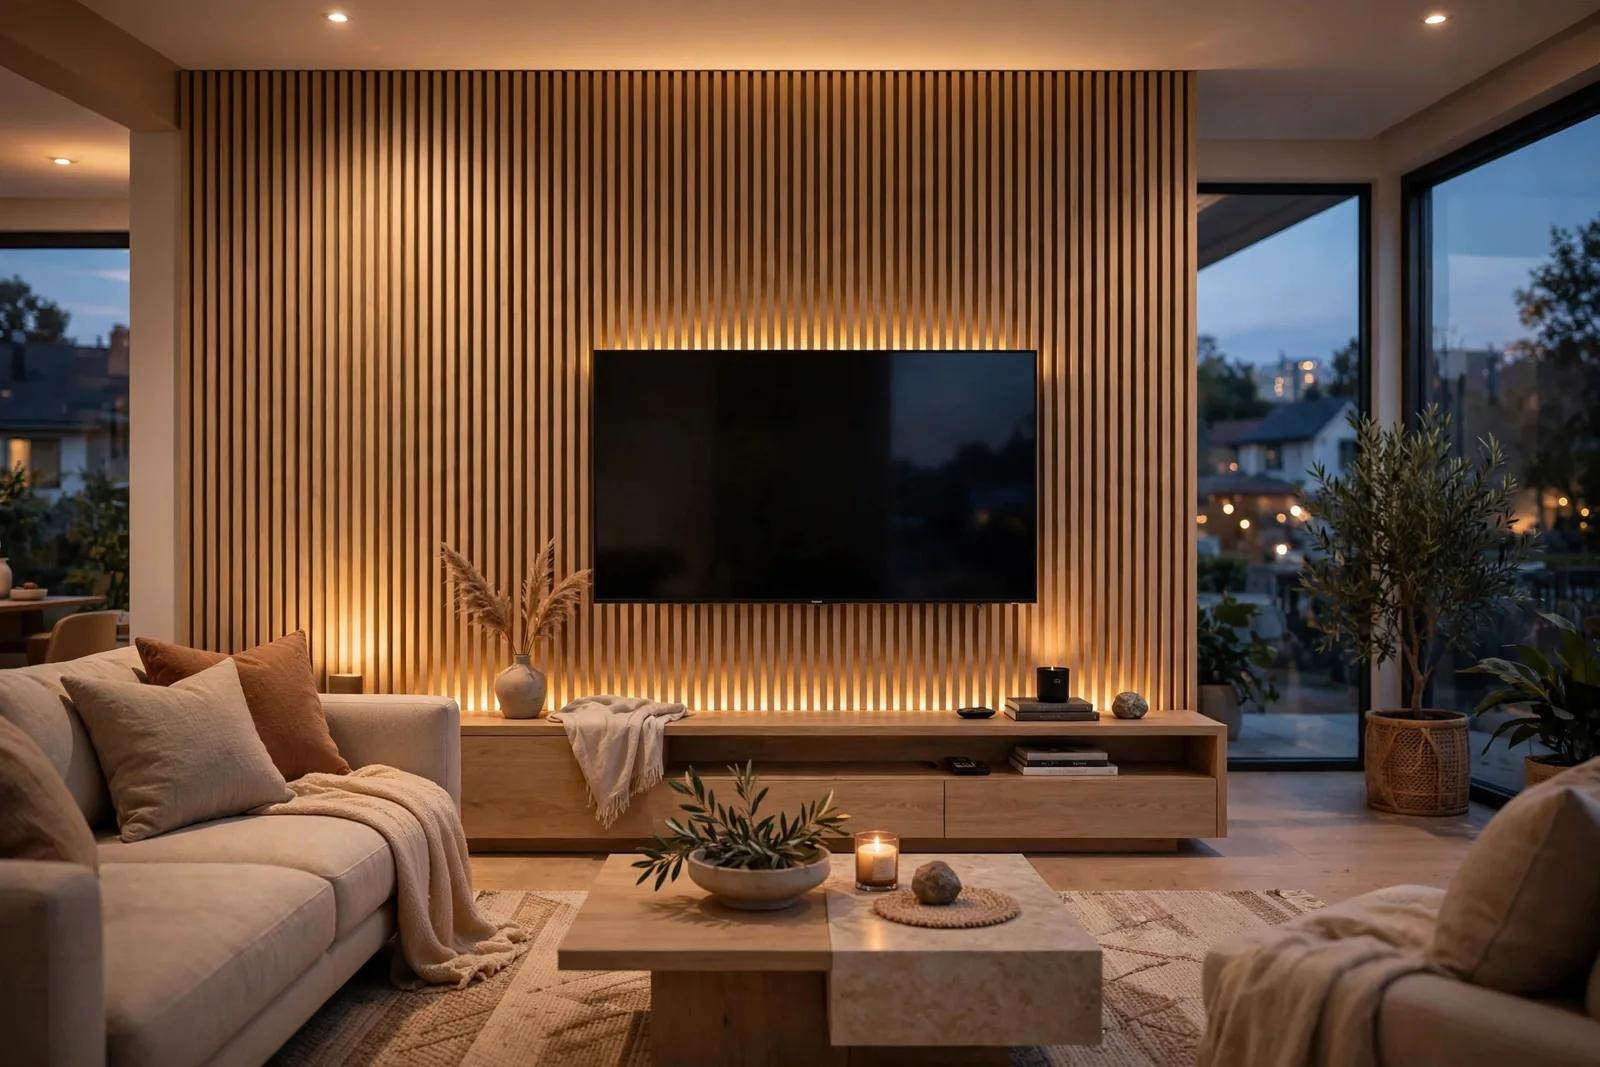
You have seen the wall. Vertical wood slats, the TV floating in the middle, a warm glow bleeding out from behind the panels. In mid-September 2026, two DIY reels of this slat-TV style each passed 200,000 likes, and a third—slats plus mirror plus LED—hit 630,000. It photographs well, but more importantly it solves a real problem: a big TV on a bare wall looks like an appliance, while the same TV on a slat wall looks like a design choice.
What most online guides skip is the boring stuff that decides whether the wall still looks good in two years: what the panels are made of, how the LED wiring stays safe, where the cables go, and how South Florida humidity treats the whole thing. That is what this guide is about.
What slat panels are actually made of
TL;DR: Most slat panels are MDF strips (a pressed wood board) with a wood-look face, glued onto a dark felt backing. The felt plus the air gap behind the wall does the acoustic work—it calms echo in the room. It does not soundproof anything, despite what some listings imply.
A typical slat panel is not solid wood, which is why shopping for TV accent wall panels means reading the specs, not just the photos. It is narrow strips of MDF (medium-density fiberboard, basically pressed wood fibers) with a wood veneer or printed wood-look face, bonded to a backing of recycled PET felt—the dark material you see in the gaps between slats. Suppliers also sell versions in PVC (plastic, better against moisture), and solid-wood options cost more. Fire ratings on supplier spec sheets often read ASTM E84 Class A (the standard US fire-spread rating), but treat that as a per-product claim worth verifying, not a blanket guarantee.
Now the acoustic question everyone asks. Manufacturers claim NRC ratings (noise reduction coefficient—the share of sound the panel soaks up instead of bouncing back) of roughly 0.55 to 0.85, depending on installation. As the trade guide DecoSoundPanel puts it: “Wood slat acoustic panels also have strong NRC ratings, usually around 0.55–0.85, depending on how they're installed.” What that buys you in practice: less echo, clearer speech, a room that feels calmer. What it does not buy: soundproofing. Absorption (NRC) and blocking (STC, the sound-blocking rating) are different standards, and thin slat panels do not block sound. Any listing that calls them “soundproof” is overstating it.
The felt and the air gap do the real work. DecoSoundPanel again: install panels “over insulation or with air gaps behind, as these factors will increase the sound absorption qualities of the acoustic panels.” MDF slats alone mostly reflect sound. So if echo control is your goal, the mounting method matters as much as the panel.
Will the panels survive Florida humidity
TL;DR: In a normally air-conditioned South Florida home, indoor humidity sits right in the safe range for wood-based panels, so a living-room slat wall is low-risk. The danger zone is non-conditioned space: garages, lanais, and homes left closed up. Let panels acclimate in the room for 2–5 days before install and leave small expansion gaps.
This is the question our South Florida customers ask first, and it is a fair one. Here is the answer, built from manufacturer install guides and University of Florida research rather than marketing copy.
Panel makers want wood-based panels installed in conditioned space. WallDesign's install guide says to store panels in the room for 48 to 72 hours before install and that “the relative humidity of the room must not be less than 30% or more than 50%.” Stikwood tells installers to leave panels stacked in the room for 2–5 days. One strict guide (Rustic Grove) demands the HVAC running, 35–55% humidity held for 72 hours before, during, and after install, and adds bluntly: “Do not install in areas subject to moisture.”
Florida's side of the story: UF/IFAS Extension writes that “indoor relative humidity should generally remain around 55% or lower,” and that “most molds will do best at over 60% relative humidity… It often favors cellulose materials, such as wood, paper, and cardboard.” A continuously air-conditioned South Florida home typically holds 40–55% humidity—inside every panel maker's safe range. That is why an indoor slat wall in a lived-in home is a low-risk project as long as the AC actually runs.
Where the risk concentrates: garages, screened lanais, pool-adjacent walls, and seasonal homes left closed up without AC. In those spots, choose moisture-resistant materials (PVC panels are listed by Angi's 2026 cost data as “moisture resistant, easy to clean”) and keep wood-based panels out.
Two install details that matter in our climate. First, acclimation: let the panels sit in the room for at least 48 hours before anyone touches a nail gun. Second, expansion gaps: leave 3–5 mm around the perimeter so panels can move with humidity swings—the gaps hide under trim later. Skip the gaps and panels can buckle or pop off the wall.
LED backlighting without the fire risk
TL;DR: LED strips run on low voltage (12V or 24V), but low voltage is not no-risk: bad power supplies and sloppy wiring behind wood panels can overheat. Use a Class 2 driver loaded to 80% of its rating max, mount strips in aluminum channels, never cover them, and have a licensed electrician handle the line-voltage side.
The warm glow behind the slats is the whole point of this look, so let us get the wiring right. LED strips themselves run on 12 or 24 volts DC, which sounds harmless. It is not. HitLights' safety checklist warns: “LED strips can still draw significant current, especially in high-lumen applications or longer runs. If connected to an inadequate power supply or poorly insulated wires, you risk overheating, sparking, or even electrical fires.” Behind wood slats, that warning matters twice: “Incorrect installation near flammable surfaces (like wood paneling or fabric) without heat management can lead to heat buildup.”
The non-negotiables, straight from a UL-listed tape-light installation guide and LED driver makers:
- Power only from a Class 2 DC constant-voltage driver. A Class 2 driver is a low-voltage power supply with built-in energy limits—the correct, code-recognized way to feed LED tape. The guide is explicit: “Only install with a Class 2 DC Constant Voltage LED driver.” Never connect strip directly to line voltage, and have a licensed electrician do the 120V side per national and local electrical code.
- Size the driver with headroom. LED Montreal's rule: “always make sure that the load given to your power supply does not exceed 80% of its maximum rating.” A 24W driver carries about 20W max. Big wall, big run—split it into zones with separate drivers instead of overloading one.
- Mount strips in aluminum channels, not stuck straight onto surfaces. HitLights: “Use heat-dissipating aluminum channels or profiles rather than sticking strips directly to surfaces. This prevents overheating and prolongs LED lifespan.” Never cover the strip with materials, and never power it while it is still coiled on the spool.
- No extension cords behind the wall. This one comes up constantly in DIY builds. As DIY builder Evgeny Gubsky puts it in his 2026 media-wall guide: “Do not use an extension cord behind the wall. It is a fire hazard and a code violation. Have a dedicated 15-amp or 20-amp outlet installed inside the future bump-out cavity.”
- Match voltages. A 12V strip on a 24V driver will die fast. Double-check every strip against its driver.
- Keep drivers accessible and ventilated. Put the driver where you can reach it later—a removable panel or a utility niche—not sealed forever inside the cavity.
One engineering note for long walls: 24V strips waste less power as heat and suffer less voltage drop over long runs than 12V (roughly 13% vs 25% lost in current-limiting resistors, per Suntech LEDs). The trade-off is cut flexibility: 12V strips cut about every inch, 24V about every two inches.
Hiding every cable (and reaching them later)
TL;DR: Plan cable routes before the first slat goes up: in-wall power kits or brush-plate pass-throughs for the low-voltage lines (HDMI, ethernet, optical), a proper recessed outlet behind the TV for power, and a way back in—removable panels or a service hatch—because something will need attention eventually.
A slat wall with visible cables is just an expensive mistake. The clean builds you see online all do the same thing: nothing shows except the TV and the soundbar.
The standard DIY method is an in-wall cable kit: two wall ports joined by a certified in-wall cable, one low near your existing outlet, one behind the TV. SlashGear's walkthrough notes the practical tip: “The easiest way to perform the installation is to position your ports in a vertical line. This ensures that there aren't any studs between your ports that you would have to navigate a cable through.” Cut with a hole saw (it works on wood paneling too), breaker off first.
The rule people get wrong: those pass-through plates are for low-voltage lines only—HDMI, ethernet, optical, antenna. As one Blu-ray Forum install write-up warns: “DO NOT run the TV power cord through this. That does not meet electrical construction code. LOW VOLTAGE LINES ONLY!” Power needs a real recessed outlet box behind the TV, installed by an electrician.
Plan for the future while the wall is open. PromoteProject's install-mistakes guide: “Always plan for access—whether through removable panels, trap doors, or other flexible installation methods. This foresight saves time, money, and frustration down the road.” Drivers fail, HDMI standards change, and you will want that access. We design every TV wall with a service path built in, so a dead driver does not mean tearing the wall apart.
Soundbar placement deserves one line of planning too: frame a shallow recessed niche between the fireplace or console and the TV, sized a little wider than today's soundbar, so the next one fits as well.
Floating shelves—the other classic pairing. “TV accent wall with floating shelves” is a real Google Suggest query, and one of September's viral reels paired tall slats with LED-lit shelves. One structural fact first: there is no such thing as a bracketless shelf—the bracket is a concealed steel bar hidden inside the shelf itself (Shelfology's installation guide). That makes the bracket the load path, so mount it into studs: Shelfology is blunt that drywall anchors alone never replace stud fastening. Plan shelf positions—and any LED lines for under-shelf lighting—before the first panel goes up, so the wiring takes the same hidden routes as the TV cables.
Mounting the TV on slats
TL;DR: The mount's bolts must pass through the slats and bite into the wall studs—decorative panels carry zero weight. Center the screen about 40–42 inches off the floor, and leave the ventilation space your TV's manual asks for: Sony's guideline is 2–6 inches behind and about 4 inches at the sides.
This is structural work wearing a decorative costume. Home Depot's mounting guide says it plainly: “Locate the studs for the wall mount using a studfinder… Screw the mounting plate into the wall studs.” On a slat wall that means long lag bolts through the slats and any mounting battens (furring strips), anchored in the studs. The European Home fireplace-chase guide states the principle that applies equally here: “The entire weight of the electronic device must be supported by the chase or a separate framework”—never by the decorative panels or the fireplace.
Height: the center of the screen at seated eye level, which Home Depot puts at “usually 40" to 42" from the floor,” echoed by HelloTech at around 42 inches. Higher than that and necks start complaining.
Ventilation is the part slat-wall builds get wrong. A TV boxed tight against panels traps heat. Sony's official support guidance: “As a general guideline, the rear of the TV should be 2 to 6 inches away from the wall and the sides of the TV should have about 4 inches of ventilation space.” No TV maker publishes a clearance spec specifically for “mounted over wood slats,” so use the general guideline plus whatever your TV's own manual says—the manual wins.
One install tip from HelloTech worth stealing: use a power drill for the wall plate, but “only use a screwdriver to install the brackets on your TV. Otherwise, you risk damaging the screws or the screw holes on your TV.”
Fireplace under the TV, wood slats around it
TL;DR: Electric fireplaces pair well with TV walls because most are zero-clearance at the sides and back, but the gap above the unit depends entirely on your fireplace model—one Touchstone manual says 8 inches to the TV, an older one says 24. Choose a front- or bottom-heat unit, follow that unit's manual, and verify with an infrared thermometer.
The slats-plus-fireplace-plus-TV stack is the most complex version of this wall, and it is where you must slow down. There is no universal “safe number of inches” for wood near a fireplace, because the risk with electric units is heat discoloration of the finish, not ignition—and it varies wildly by model.
Look at how much manuals disagree. Touchstone's current Sideline/Forte manual (rev. November 2025) lists minimum clearances from the front glass as: top to mantel 8 inches, top to TV 8 inches, top to ceiling 8 inches. Their older wall-mount manual (rev. January 2023) demands 24 inches to the mantel and 24 inches to the TV. Same brand, triple the distance—because heat direction differs by model. Dimplex takes yet another approach: with normal heat mode, “surfaces 7" (18 cm) above the fireplace will not exceed 40°C [about 104°F], as long as installation procedures are followed and heater inlet and outlet are not obstructed.”
Practical rules that hold across models:
- Pick front- or bottom-heat for under-TV placement. MagikFlame's guidance is direct: “Bottom and front heat fireplaces are best for under the TV.” Top-heat units throw warmth straight at your electronics.
- A mantel or shelf between fireplace and TV works as a heat deflector, pushing rising warm air out along the wall face instead of into the TV.
- Test, don't guess. Run the fireplace, then check the wall above it with an infrared thermometer. Editorial guidance from Fireplace Choice: “If the readings stay below 100°F, it's generally safe for mounting.”
- Read the TV warranty angle. Travis Industries warns: “Most television manufacturers instruct the homeowner to not place the television above a heat source. Doing so may negatively affect the longevity of the television and may negate the warranty.” Worth knowing before you commit.
- Wires near the chase (the framed enclosure around the fireplace) get special treatment. AMS Fireplace / European Home: “Wires connected to electronics must be wrapped in non-combustible insulation when running inside the chase (if within 26" of the top of the fireplace).” Keep about an inch of clearance around electronics in the niche.
Gas fireplaces are a different animal entirely—combustible finishes need non-combustible board behind them and the front of the unit runs hot enough to discolor materials. If your plan involves gas, that is a conversation with the fireplace manufacturer first, panel choices second.
What it really costs
TL;DR: Big-box slat panels run about $4.50–$9.60 per square foot for materials alone (September 2026 listings). Professional installation of wall paneling generally runs $7–$25 per square foot installed depending on type, with labor at $40–$100 per hour—but nobody publishes a slat-TV-wall-with-LED price, so treat any exact quote you see online with suspicion.
Prices below are observed September 20, 2026, on Home Depot and Wayfair. Retail prices move, so date-stamp anything you compare against.
Materials. Wood slat acoustic panels at big-box retail land between roughly $4.50 and $9.60 per square foot: a Wellco 2-pack at $139.99 works out to about $4.53/sq ft, an MSI Harmony 2-pack at $134.54 to about $5.40, and MSI's Tawny and Umber lines at $209.17 and $239.16 per case to about $8.40 and $9.60 respectively. That is panels only—no LED strips, drivers, channels, outlets, or labor.
Installation. Angi's 2026 cost data for wall paneling in general (not slat TV walls specifically): shiplap $7–$16 per sq ft installed, tongue-and-groove $8–$18, fabric/acoustic-style $8–$18, PVC $7–$20, wainscoting $10–$25. Labor rates run $40–$100 per hour, or roughly $3–$10 per square foot for standard installs, more for custom layouts—and Angi notes urban and high-cost markets price higher. Permits add $50–$300 where structural or fire-rated work is involved.
The honest gap: we found no published per-square-foot price for a wood-slat TV wall with LED, niche framing, and in-wall wiring from any contractor or marketplace. Anyone quoting you one flat internet number for that scope is guessing. A real quote accounts for wall size, panel material, LED zones, outlet work, and whether a fireplace is in the mix.
See it on your wall before you commit
TL;DR: The hardest part of this project is picturing the finished wall in your room. Start with a design consultation—we plan the wall around your space and the materials below.
The biggest worry for most homeowners is simple: what if the tone is wrong, the slats too dark, the glow too cold? Start with a design consultation—we talk through the materials, lighting, and layout for your room before anything gets ordered.
The materials we install are the ones in this guide's family: a light oak acoustic slat panel over a dark backing for the classic look, a dark gray-brown fluted panel when you want more drama, a medium-brown wood-grain veneer panel for flat sections, and H-profile metal joint trims in black, silver, and gray for clean panel-to-panel seams.
Start with a consultation, then we plan the install, design, and build. The wall you keep seeing online stops being someone else's reel and becomes your living room.
Sources
Trend signals (internal scan, September 6–20, 2026): DIY reel pairing wood slats, arched mirror, and warm LED—630K likes, 2.2K comments (Sep 13); self-adhesive slat panels behind TV—310K likes, 12K comments (Sep 6); TV wall with tall slats, stone, and LED shelves—220K likes, 630 comments (Sep 17). Real Google Suggest queries observed September 2026: “tv accent wall with wood slats”, “tv accent wall panels”, “tv accent wall with fireplace”, “tv accent wall with floating shelves”, “wall panels cost per sq ft”.
LED safety: LED strip current and fire risk, aluminum channels, flammable-surface warning—HitLights, “LED Strip Lighting Safety: Installation Checklist and Safety Tips” (hitlights.com). Class 2 driver requirement, no in-wall leads, no covering strips—UL-listed 12/24V DC tape-light installation instructions (USESI). 80% driver load rule—LED Montreal Class 2 driver pages (ledmontreal.com). 12V vs 24V trade-offs—Suntech LEDs (suntechleds.com). Low-voltage wiring discussion—Mike Holt professional electrician forums (forums.mikeholt.com). Extension-cord warning—Evgeny Gubsky, “The DIY Media Wall Guide”, Medium, Feb 2026 (medium.com).
Cables: In-wall kit method, vertical port alignment—SlashGear, Nov 2025 (slashgear.com). Low-voltage-only rule for pass-through plates—Blu-ray Forum user install write-up (forum.blu-ray.com). Cord covers—HIDEit Mounts blog (hideitmounts.com). Recessed outlet kits—Amazon/Celendor listings (amazon.com). Maintenance access—PromoteProject, “Common Mistakes when Installing Wood Acoustic Paneling” (promoteproject.com). Fireplace-chase wiring—European Home “Cool Wall Installation Guide” (europeanhome.com). Floating shelf mounting: concealed bracket structure, studs over drywall anchors—Shelfology, “The Ultimate Guide to DIY Floating Shelves” (shelfology.com).
TV mounting: Screen-center height 40–42"—Home Depot wall-mount guide; HelloTech “TV Mounting Dos and Don'ts”, around Aug 2024 (hellotech.com). Ventilation 2–6" rear, about 4" sides—SonyListens, Sony support, Best Buy Q&A, 2024. Weight on structure, not finishes—European Home Cool Wall guide.
Fireplace + TV + wood: Touchstone Sideline/Forte clearances (8" to TV)—manual rev. Nov 2025; older wall-mount clearances (24")—manual rev. Jan 2023 (touchstonehomeproducts.com). 40°C at 7" above unit—Dimplex installation guide via Home Depot. Front/bottom-heat recommendation, 3 ft / 1.5 ft clearances—MagikFlame, updated around May 2026 (magikflame.com). 100°F thermometer test, 8–12" guidance—Fireplace Choice (fireplacechoice.com). TV warranty warning, 1" air gap, mantel deflector sizing—Travis Industries 864 TV 40K manual, Aug 2019. Non-combustible chase wiring—AMS Fireplace / European Home TV-above guide (amsfireplace.com).
Materials and acoustics: Panel construction, NRC 0.55–0.85, air-gap effect—DecoSoundPanel, “Acoustic Panels: A Comprehensive Guide”, Sep 10, 2024 (decosoundpanel.com). Supplier NRC and fire-rating claims—GlobalSources XCM145; EUROYAL via Made-in-China. PVC moisture resistance—Angi, “How Much Does It Cost to Install Wall Paneling? [2026 Data]”, updated around Mar 2026 (angi.com).
Florida humidity: Acclimation 48–72h, RH 30–50%—WallDesign installation guide via Lowe's. Acclimation 2–5 days—Stikwood (stikwood.com). HVAC conditioning 35–55%, “do not install in areas subject to moisture”—Rustic Grove install guide, Feb 2023. Expansion gaps 3–5 mm—PromoteProject. Indoor RH guidance and mold thresholds—UF/IFAS Extension, Jul 31, 2026 and Oct 30, 2024 (blogs.ifas.ufl.edu). Mold prevention on ventilated assemblies—lupanpanel, Medium, Jul 2026.
Pricing: Panel listings and per-sq-ft math—homedepot.com and wayfair.com, observed Sep 20, 2026 (MSI Tawny $209.17/24.92 sq ft; MSI Umber $239.16/24.92; MSI Harmony $134.54/24.93; Wellco $139.99/~30.94; COMFORTHOMI $169.99/33 sq ft; 4pc 106×12.6 $202.95/37.1). Installed ranges, labor rates, permit costs—Angi 2026 data (angi.com). City labor estimates—TownContractors 2026 (towncontractors.com).