Can Wall Panels Go Over an Existing Wall? (2026)
Can wall panels go over tile, drywall, paint, texture or wallpaper? Per-substrate answers, the flatness rule, moisture checks and when demolition wins.
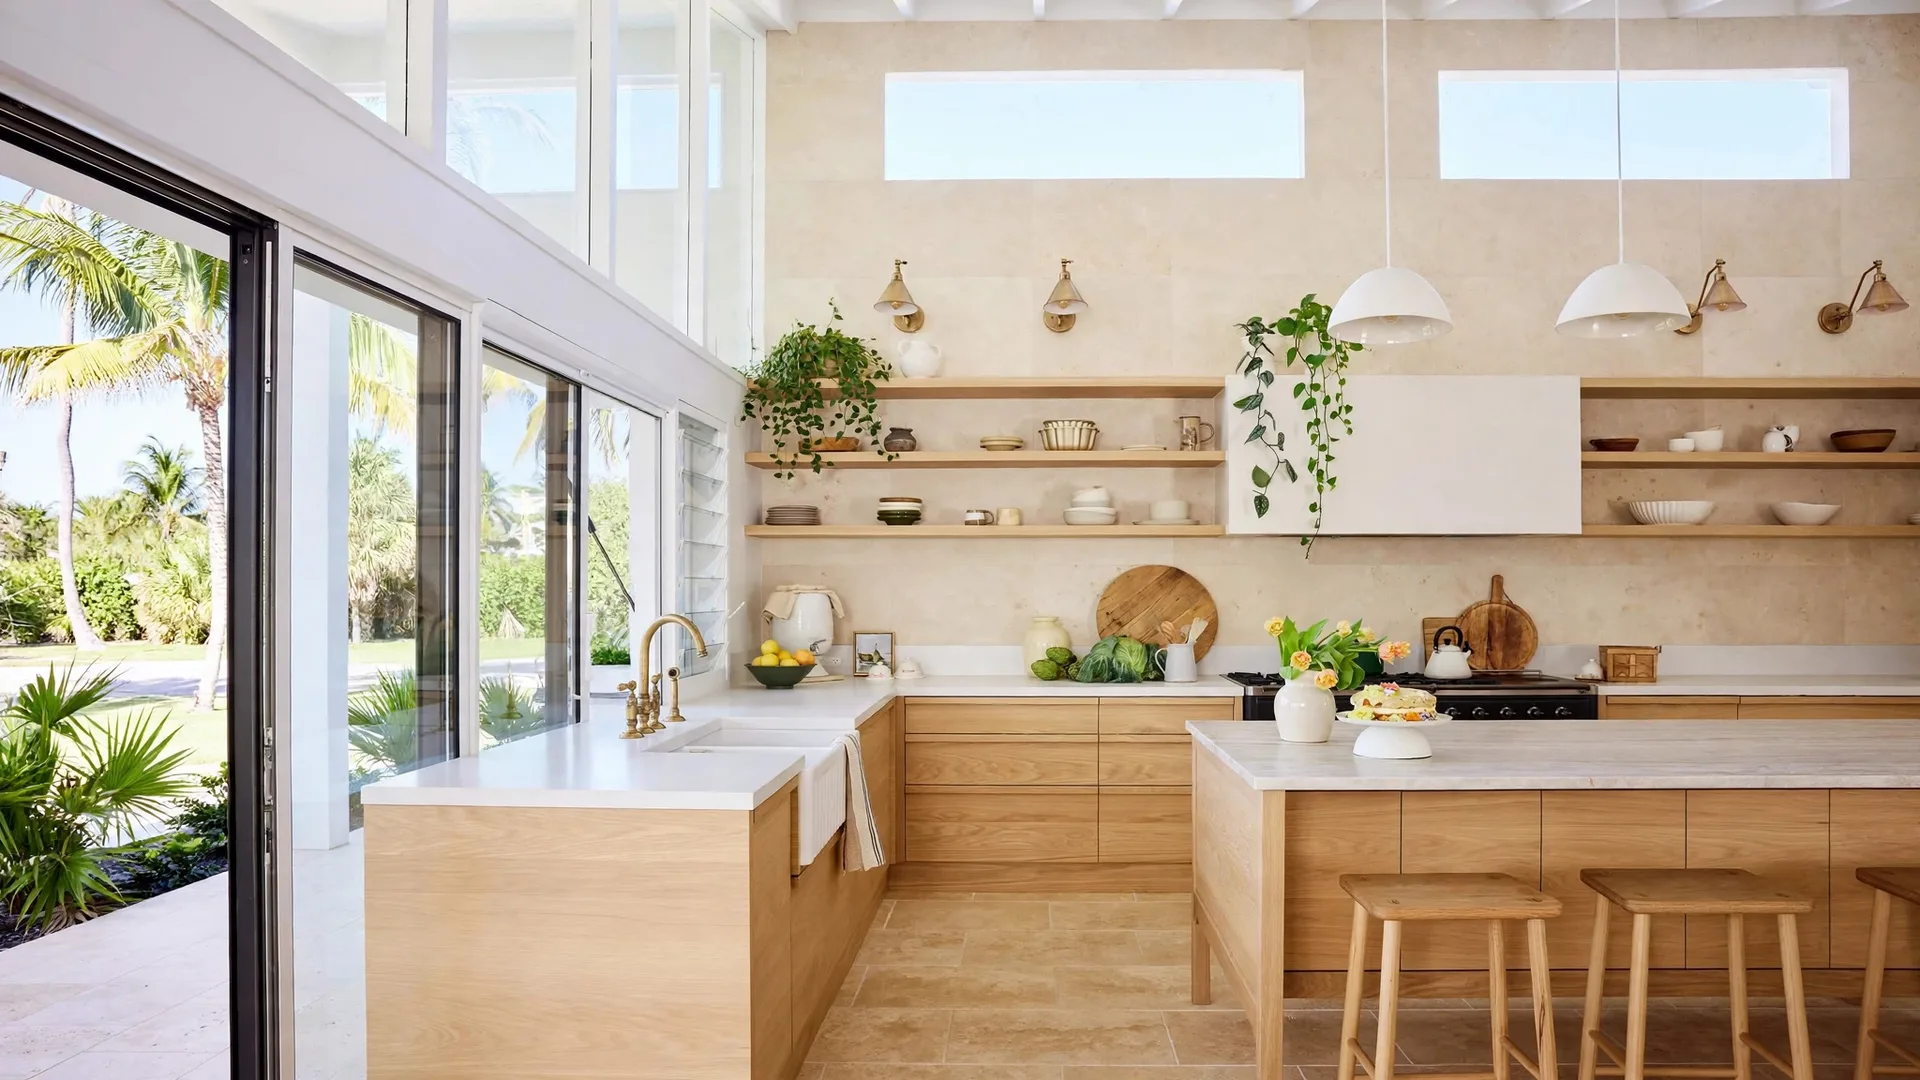
I hear this question on almost every measure visit, usually while the client looks at the wall they want gone. The tile is dated. The paint has been repainted twice. The texture belongs to another decade. Ripping it all out means dust, debris, days of work and a second trade to rebuild the wall before my trade even starts. So the question is fair: can the new panels simply go over what is already there?
The honest answer is a list. It changes with every surface under the panel. Sound drywall is one answer. Sound paint is another. Tile gets a careful third answer, and wallpaper gets a plain no. One rule sits underneath the list and decides more jobs than any surface name: a panel bonds to the wall you have, and covering a wall never repairs what is behind it. A damp wall stays damp behind a beautiful sheet. A loose tile stays loose, with a panel now glued to the thing that is letting go.
I install decorative panel walls across South Florida – Palm Beach, Broward and Miami-Dade – and my own sheet is a bamboo-composite panel, 48 by 108 inches and 5 mm thick, carrying a finish such as a marble look, a travertine look, a stone look, a porcelain look, real-wood veneer (a thin layer of real wood over the core sheet), leather or velvet. This article grades the question twice. First, by what panel makers and the U.S. Environmental Protection Agency (EPA) publish for panel systems generally, with each claim attached to the system it belongs to. Second, by the answers my studio has already published for its own sheet. A permission printed for one maker's shower kit is a fact about that kit. It is never a promise about my sheet.
The short answer first
TL;DR: Over sound, flat, dry drywall – yes, that is the normal case. Over sound paint – yes, after loose paint comes off, glossy paint is sanded for grip and bare or chalky (powdery) areas are primed (primer is a preparatory coating that seals a porous surface). Over wallpaper – no, the paper comes off first. Over light texture – a rigid sheet covers it, provided the wall still passes a flatness check. Over tile or an old panel layer – I give no yes or no in advance for my own sheet, because each added layer moves the wall face forward and eats into trim, outlet depth and door clearances; that call is made standing in front of the wall, at the measure visit. Over anything damp, moldy, loose or bowed – no, on any system, until the wall underneath is repaired and dry.
| Existing surface | Go-over answer | Condition that decides it |
|---|---|---|
| Sound drywall | Yes – the normal case | Flat, dry, sound; deviations filled and sanded |
| Sound paint | Yes, with prep | Loose paint off, glossy paint sanded, chalky areas primed |
| Tile | System-specific; for my sheet, decided at the measure visit | Tile must be solidly bonded; added thickness at trim, outlets and doors |
| Light texture (orange-peel – the faint bumpy finish like orange skin, patch edges) | Covered by a rigid sheet | Wall must still pass the flatness check |
| Heavy texture, popcorn (a coarse sprayed finish) | No maker authorizes it by name in my research | Sanding flat, skim-coating (a thin plaster layer leveled over the surface) or a strapping build (a framework of thin strips fixed to the wall to create a flat plane) are the published routes |
| Wallpaper | No | Paper is a weak layer; it comes off first |
| Damp, moldy, loose or bowed wall | No | Repair and drying come first, whatever the finish |
That table is the whole article in one screen. Below is the evidence for each surface, the checks I run before I agree to cover anything, and the short list of walls where demolition stops being optional.
The rule underneath every answer: flat, dry and sound
TL;DR: Panels bond to the wall you have, so the wall has to be flat, dry and sound before a sheet touches it. Flat is checked with a 2-meter straightedge (a long rigid bar laid against the wall to reveal bows and dipped areas): one experienced guide cited in my installation guide puts the working tolerance at deviations over 3 mm getting filled and sanded flat. Dry means the moisture source is fixed and the wall has dried. Sound means nothing under the panel is loose, soft or crumbling. Covering a wall that fails any of the three hides the failure; it never fixes it.
I published that rule in our installation process guide, and every go-over answer in this article is the rule applied to a named surface.
Flat first. A large-format sheet is rigid. It cannot follow a bow, and it cannot bridge a hollow (a dipped area the sheet spans without touching). Later, that hollow shows up as a soft spot when a hand presses the wall, or as a lifted edge, because the adhesive (the bonding compound that holds the sheet to the wall) never made full contact there. The straightedge check finds the bows, in several directions. Where the bar rocks or shows daylight, that section gets filled and sanded before install day, or the job is quoted with the repair as its own line. Tolerances are small across trades: the tile standard ANSI A108.02 (ANSI is the American national standards body) works to 1/8 inch in 10 feet for large tiles, and Fibo, a panel maker, prints plus or minus 2 mm over 2 m for its own screw-fixed system. Each figure belongs to its own system. The shared lesson is simple: somebody measures before anything goes up.
Dry second, and dry comes before flat in my own sequence. A panel over a damp wall hides the problem until the adhesive lets go. The moisture section below carries the EPA rules in full; the short version is that the source gets fixed first, and wet material dries within 24 to 48 hours where the EPA's guidance applies.
Sound third. Adhesive bonds to the surface it touches. On a painted wall it bonds to the paint, and paint that lets go takes the panel with it. On tile it bonds to a tile that is itself bonded to the wall, so the chain is only as strong as its weakest layer. Loose material comes off, low spots get filled, anything soft or crumbling is rebuilt. The new surface can only be as sound as what it sits on – the sentence I would keep if this article had to shrink to one line.
Over sound drywall: the normal case
TL;DR: Clean, dry, sound drywall is a listed substrate (the surface a finish is applied to) in panel makers' own guides, and it is the wall my sheets are planned around. The work is inspection and prep: fill and sand deviations the straightedge finds, prime bare or chalky plaster and joint compound (the filler used over drywall seams) so the wall does not drink the moisture out of the adhesive before it sets, and respect the 28-day cure a paneling guide puts on new plaster before adhesive work.
Drywall is the case most readers actually need, and it comes with the least drama of any surface on the list. In most South Florida living rooms, bedrooms and dining rooms, the existing wall is painted drywall in fair condition. That wall is the standard starting point for a panel job: no demolition, no rebuild. The old surface stays and becomes the base.
Two prep details decide whether the simple case stays simple. The first is the flatness pass from the section above: seams between drywall boards, old patch edges and the gentle bow many stud walls (walls built on a frame of vertical timbers) carry all show up under the straightedge, and each one is a fill-and-sand job measured in minutes rather than a wall rebuild measured in days. The second is new plaster. Fresh plaster holds moisture the eye cannot see, and the paneling guide cited in my installation article puts its cure at a minimum of 28 days before adhesive work. Rushing that traps moisture behind a brand-new wall. Fresh joint compound needs its own drying time too, and a patch that is still dark with moisture is not ready, whatever the calendar says.
Conditioning belongs here too. One laminate (a hard decorative skin material) panel maker's guide cited in the installation article calls for components conditioned at 70 to 75 degrees Fahrenheit and 45 to 50 percent relative humidity (the amount of water vapour in the air compared with what the air can hold) for 72 hours before assembly, with packaging removed. In plain terms, that is about three days in a normally air-conditioned room. My bathroom guide carries a studio note in the same spirit: panels acclimated in the room for 48 to 72 hours before install, air conditioning running.
Over painted walls: yes, with three prep steps
TL;DR: Over sound, flat, well-bonded paint – yes, that is the published answer in both my installation guide and our panels vs paint guide. The prep is specific: loose or flaking paint comes off, glossy paint gets sanded with 120 to 180 grit sandpaper (grit is the coarseness grade of the abrasive) rough enough for the adhesive to grab, and bare or chalky plaster and joint compound get primed. Panel makers add their own versions of the same discipline – Swan requires a primer or sealer (a coating that seals the surface), fully dried, over sheetrock (a common name for drywall board) in its system, and Wallplanks requires chalked paint cleaned before its planks go up.
For bonding, paint is the wall. The adhesive touches paint, holds paint, and inherits whatever the paint is doing. Sound paint bonded tight to sound drywall is a good base. Paint that is peeling at an edge, chalking (rubbing off as powder on a hand) or blistering over an old damp patch is a weak layer, and a weak layer under a rigid sheet is a scheduled failure.
Work through the three prep steps in order. Loose paint is scraped and sanded back to a firm edge, because an edge that lifts today lifts wider under a panel that cannot flex with it. Glossy paint – the shiny enamels kitchens and bathrooms often wear – is sanded dull, because a smooth glossy face gives adhesive little to grip. The 120 to 180 grit range from my installation guide is rough enough for grip and fine enough to leave no scratches that matter under a sheet. Chalky or bare areas get primer, because a thirsty wall pulls moisture out of the adhesive before it sets, and a starved bond is a weak bond even on a flat wall.
One honest limit belongs here. I found no maker adhesion test for painted walls in my research: no published procedure that certifies a given painted wall as bondable. Makers publish prep instructions, of the kind above. So the painted-wall verdict on a real job comes from eyes, a hand on the surface and a scraper at the worst edge, standing in front of the wall.
Over tile: the answer splits by system
TL;DR: Some panel systems are published as going over existing tile, under their own conditions: Palisade lists existing tile among its bases for dry rooms and allows covering ceramic tile in a shower with no additional preparation, while requiring a waterproof substrate (a water-resistant layer behind the finish) in a shower where no tile exists; Swan allows its solid surface (a dense material with the colour running all the way through) over solidly adhered ceramic tile, requires loose ceramic tile to be removed or reattached, and requires all plastic tile to be removed. For my own decorative sheet I give no blanket answer: the tile call is made at the measure visit, because the added layer moves the wall face forward and eats into trim, outlet depth and door clearances.
Tile is where copying a permission from one system to another does the most damage. So I keep the systems separate, sentence by sentence.
Start with what the makers publish themselves. Palisade, a rigid PVC (a rigid plastic) system, prints the most permissive position in my research: existing tile is a listed base, and in a shower its sheets may cover ceramic tile directly, with a bead of sealant (the flexible sealing compound used in joints) in the tongue-and-groove connections (edges shaped to slot into each other) and a waterproof substrate required only where the sheets do not go over tile. Dumaplast takes a narrower line: its sheets glue directly only onto an even, dry base free of dust and grease, with an MS-polymer adhesive (a modified-silane polymer glue) or a two-component polyurethane adhesive (a two-part resin glue) named as the bonding chemistry. Swan, whose Swanstone is a solid surface, draws the condition that matters most: the tile underneath must be solidly adhered. Loose ceramic tile comes off or gets reattached. Plastic tile always comes off. Three makers, three rulebooks, one shared floor: nobody in my research authorizes covering loose tile.
Bonding to glazed tile (tile with a glassy fired coating, the shiny kind) is where the makers openly disagree, and the disagreement is the useful fact. Swan requires belt-sanding the tile with 60-grit abrasive and then a primer or sealer before its sheets go on. Palisade prints no scuffing step at all in the guide I read, and instead names four adhesives for its system: Loctite Power Grab Ultimate in the white formula only, Titebond Titegrab Ultimate, Liquid Nails Fuze It and Manus 75-AM HV. Dumaplast names a chemistry and no tile-specific preparation. There is no universal scuffing rule. There is the manual for the system in your hand.
Now the studio position, narrower than all three, and deliberately so. My sheet is a decorative dry-zone panel (dry-zone means the walls that take humidity and splashes, never direct water). It stays out of the shower – our shower panels vs tile guide grades rated shower systems and tile as other products' work and keeps my sheet on the bathroom walls around the shower. On a dry-zone wall faced with tile – a kitchen wall, a fireplace surround, an old tiled feature wall – the question reaches my measure visit with two checks attached. The first is soundness: tile that moves, or tile with crumbling grout (the filled seams between tiles), is a demolition line rather than a base, and a tile that sounds hollow when tapped is a warning sign that gets that wall assessed tile by tile before any go-over decision. The second is thickness, which gets its own section below. A sound tiled wall that passes both checks is a wall I will price as found. A wall that fails either one gets the removal written into the quote as its own line, priced separately, exactly as my installation guide already states.
Over texture, orange-peel and popcorn: what a rigid sheet hides, and what it cannot
TL;DR: A rigid panel sheet does not follow a wall's small texture at all: orange-peel texture (the faint bumpy finish most drywall has, like orange skin), patch edges and minor unevenness disappear behind it, as our panels vs paint guide already states – provided the wall still passes the flatness check. Heavy texture and popcorn are a different case: no maker in my research authorizes covering them by name. Swan sands textured or swirled plaster smooth in its manual, Wallplanks requires heavy texture to be block-sanded or skim-coated, and then primed, in its prep instructions, and Dumaplast and Duramax prescribe a lattice or furring build (a framework of thin strips fixed to the wall to create a flat plane) for uneven bases.
Texture confuses the question because one word covers two different properties. Surface texture – the small bumps a fingertip feels – is irrelevant to a rigid sheet, which bridges over all of it. Wall shape – the bows and hollows the straightedge finds – decides the job. A wall can be heavily orange-peeled and dead flat. A wall can be glass-smooth and bowed like a sail. The first takes a panel happily. The second gets filled, skimmed or rebuilt first, no matter who finishes it.
Popcorn texture (the coarse sprayed ceiling-style finish some older walls also carry) sits at the far end of the scale, deep enough that the bumps stop being surface and start being shape, and fragile enough that the texture itself can shear off under load. I state the research result plainly: in the manufacturer guides I read, nobody authorizes covering popcorn by name, and nobody authorizes covering orange-peel by name either – the light-texture answer above is the rigid-sheet property my own published guides state. The published routes for heavy texture are removal routes wearing prep clothes: sand it flat, skim-coat it level, or build a strapped flat plane over it and accept the thickness that plane adds.
Skim-coating is the middle route readers hear about most. A skim coat levels texture and shallow unevenness in one pass, and afterwards the wall is graded exactly like the drywall in the earlier section: flat under the straightedge, cured, dry, primed where it is chalky.
Over wallpaper: the plain no
TL;DR: No. Paper is a weak layer that humidity lifts, and it comes off first – the published answer in both my installation guide and the panels vs paint guide. Maker manuals land in the same place with different strictness: Swan requires all wallpaper removed and the wall sealed with two coats of primer or sealer in its system; Wallplanks allows only well-bonded smooth wallpaper under its prep rules. For my sheet the answer stays no, because the bond chain is only as strong as the paper layer, and Florida humidity is the force that tests it.
Wallpaper fails the sound test by design. It is a decorative skin held on by paste, made to be removable, in a state where summer humidity works on every seam and edge for months. Gluing a rigid, heavy, effectively permanent sheet to a layer engineered to let go is building in a failure with a fuse of unknown length. When the paper lifts – at a seam, at a corner, over a damp patch it was hiding – it takes the panel's bond with it.
Removal is also a chance to inspect. Wallpaper hides a wall's history better than any other finish: old patches, hairline cracks, the outline of a damp episode from years ago. Stripping is the moment those things become visible, while fixing them is still cheap. A wall that comes out of stripping flat, dry and sound has earned its panel. A wall that comes out stained or soft has told us something worth knowing before anything covered it again.
Moisture and mold: the check that happens before any covering
TL;DR: The EPA's mold guidance opens with one sentence: the key to mold control is moisture control. Its rules travel straight into a go-over decision – fix the water problem first, because cleaning alone does not hold if the moisture stays; dry wet or damp materials within 24 to 48 hours; never paint or caulk (caulk is the everyday word for sealant) over a moldy surface; keep indoor humidity below 60 percent, ideally between 30 and 50 percent. The EPA also names the hidden locations plainly: mold can grow on the back side of drywall, wallpaper and paneling when moisture gets behind them. A panel covers a wall's face. It does nothing to a wall's moisture, except hide the evidence.
This is where Florida grades the decision. A South Florida home starts most days with outside air already above the EPA's indoor target – our Florida humidity guide measured that problem in detail. A home that sits closed and unconditioned for weeks in summer holds indoor humidity in the range where mold does its best work. The question is never only whether a wall looks dry on the day I visit. The question is what the wall has been living in.
The moisture check runs in a fixed order. Look first: staining, bubbling paint, grout that stays dark, baseboards swelling at the floor line, a musty smell when the room has been closed. Each sign points at a source – a plumbing line, a roof or window leak, condensation, a shower on the other side of the partition. Fix the source. The EPA is blunt that mold cleaned off a still-wet wall returns, and a panel over a still-wet wall is that same sentence with a more expensive ending. Dry second, on the EPA's 24 to 48 hour clock after the cause is fixed. Only then does the wall rejoin the normal queue: flatness check, soundness check, prep, panel.
My wall panel care, cleaning and repair guide carries the mirror image for a wall that already wears panels: a musty smell means the sheet comes off, the wall dries on the same EPA clock, and the cause gets fixed before the sheet goes back. A panel wall is cladding (a decorative skin over a structure), never a waterproof membrane (a continuous water-blocking layer), and cladding over moisture is a hiding place with good lighting.
One more EPA point answers a question clients ask directly: a mold test cannot clear a wall for covering. The EPA notes there are no federal limits for mold and that sampling is no substitute for inspection and moisture control. The clearance a wall needs is a dry wall with its source fixed, verified by looking, touching and time.
When demolition is mandatory
TL;DR: Covering stops being an option in five situations: tile that is loose or moving (a hollow sound under a tap gets the tile assessed, and tile confirmed loose joins this list); moisture damage in the wall itself – soft, stained or moldy material with a live source; a wet zone, where the wall takes direct water and needs a rated system rather than a decorative sheet; a failed substrate, where drywall or plaster is crumbling, delaminating (splitting into layers) or too bowed to level; and wallpaper, which is removal rather than demolition, yet just as non-negotiable. In each case the finish comes off, the wall gets repaired and dried, and only a sound wall earns a panel.
My default is against demolition. Most panel walls need none of it, because the existing wall stays, and my published quote scope says exactly that. This section is the exception list, short on purpose. Each entry shares one property: the thing under the finish has failed, and a panel bonded to a failed layer inherits the failure on a delay.
Loose tile is the clearest case. Swan's manual requires loose ceramic tile to be removed or reattached before its own sheets go over tile. A hollow sound under a tap is the warning sign that starts that assessment – it tells you the bond under that tile deserves a closer look before anything is asked to hold onto it, and tile the assessment confirms as loose comes off or gets reattached, on any system. Moisture damage is the second case, governed by the EPA rules above – the finish comes off so the wall can dry and the source can be fixed. The wet zone is the third: inside a shower, and on walls that take direct spray daily, the wall needs a rated waterproof system of the kind the shower guide grades. A decorative sheet has no water rating of its own, and no substrate underneath it lends it one.
Failed drywall and plaster close the list. Drywall soft under a thumb, plaster that crumbles at a scraper, a wall bowed beyond what filling and skimming can level: none of these is a base. The repair is ordinary wall work: cut out the failed section, pack missing areas level, let new plaster cure its 28 days, prime, and measure again. Slower than covering, and the only version of the job I can stand behind: the alternative is a beautiful wall with a known defect sealed inside it, and the defect sends its invoice later.
The thickness bill: doors, outlets and trim
TL;DR: Every layer you keep adds its thickness to the wall face, and the panel adds its own on top. Panel systems in my research print their thickness plainly – Trusscore and Duramax both publish 1/2 inch for their boards – and my sheet adds 5 mm before adhesive. The bill arrives at four places: outlet and switch boxes, which must sit near flush with the new face; door jambs and casing (the trim framing a doorway), where the wall can grow past the woodwork; baseboards, where the new face has to meet the floor trim cleanly; and any door that swings close to the wall. This is the practical reason tile gets a measure visit instead of a printed yes.
A tiled wall is already a built-up wall: tile, mortar (the cement-based bed that bonds tile to the wall) and board together stand proud of the drywall plane in the next room. Add a panel over it and the face moves forward again by the sheet and its adhesive bed. None of that is fatal. All of it has to be planned, not discovered on install day.
Outlets and switches come first, because they are governed by fit rather than taste. Palisade and Duramax both require cut-outs for outlets in the sheets, and a Georgia-Pacific panel guide instructs adjusting the outlet box to the panel thickness. An electrical box left recessed deep behind the new face is a safety problem rather than a cosmetic one, and box extenders (sleeves that bring a recessed box forward to the new face) are the standard fix where the depth allows. I found the exact electrical-code setback text only in secondary sources during this research, so I print no code number here; the working rule needs no number – devices finish near flush with the finished face, and the electrician's part, where one is needed, is priced as its own line.
Doors and trim come second, and I keep this at the level the evidence supports. The published record names the consequence; the measure visit prices the specific fix for the specific doorway. A door jamb and its casing (the trim framing the doorway) are built around one wall thickness, so a wall face that grows forward changes how the panel meets that trim, and a door swinging close to the wall has less clearance than it had. Baseboards meet the new face along every wall, so their finish has to be decided rather than improvised – Palisade recommends a baseboard or cove (a curved trim profile) finish at the bottom row in its own system, and its L-trim (an L-shaped edge trim) is that system's published answer to the visible step where a panel ends beside the old tile plane. None of these items is expensive alone. All of them are expensive as surprises, which is why they are measured, named and priced before a sheet is cut.
What the decision costs
TL;DR: The only clean market range for the panel side in my research is Angi's national wall paneling figures, updated 30 October 2026: professional installation at $1,200 to $6,000, average $2,800, with paneling at $5 to $25 per square foot overall and labour at $3 to $10 per square foot. My studio publishes three anchors for panel projects only: a stock design from $850, a design fitted to your wall usually $2,200 to $2,700, and full custom turnkey projects (complete and ready to use, handled by one provider from design to finished wall) from $9,999, every figure preliminary and confirmed after a specialist measures your wall. Demolition of an old finish, wall repair and leveling sit outside those anchors – assessed on site and priced separately when they apply.
Put the two scopes side by side and the go-over saving becomes honest. Skipping demolition saves the removal line and the rebuild line where the wall is sound – that saving is real, and it is why the question is worth asking carefully. The saving evaporates where this article's exception list begins: a wall that needs its finish removed, its damage repaired and its plaster cured costs the removal anyway, plus the repair. My installation guide's published scope draws the same line: the quick estimate assumes a prepared, flat wall, and wall repair and leveling sit outside it.
Three cautions belong with any cost paragraph. Angi's figures are national platform ranges, attributed and dated – South Florida labour, condo work rules and the wall's condition move a real job outside them. No source in my research publishes a clean go-over price against a demolish-then-panel price for the same wall, so I print no saving percentage; a tidy percentage would be built from two different scopes. And per-square-foot figures describe other people's paneling work generally – my studio publishes no per-square-foot price. The anchors above are the numbers I stand behind, and the wall in front of us decides which one a real quote resembles.
How I decide on your wall
TL;DR: The decision is a sequence, and it happens standing in front of the wall: identify the existing finish, test its soundness, run the straightedge, check for moisture and its sources, measure the thickness consequences at outlets, doors and trim, and only then name the scope – go over as found, go over after named prep, or remove and repair first. The exact price is confirmed after that measure, because the wall, not the catalogue, sets the scope.
My installation process guide walks the standard visit – width and height recorded, outlets, switches, vents and fixtures marked, baseboard and crown lines (the trim where the wall meets the ceiling) noted, the seam plan drawn on paper. A go-over wall adds the substrate examination in front of all that: what is this finish, what is it bonded to, and what condition is the bond in?
The verdict comes in three forms. Go over as found: the painted drywall in good order, with prep limited to the standard sanding, priming and flatness pass. Go over after named prep: wallpaper stripped, loose paint cut back, texture skimmed, a tile wall whose soundness passed and whose thickness plan is written down. Remove and repair first: the five cases in the demolition section, quoted as their own job with the panel wall following it. I will not collapse the three verdicts into one printed yes for a wall I have not seen. Every condition that separates them belongs to a specific wall, and you can only see it from inside the room.
I sell panel walls, and a go-over job is usually the easiest one to sell. Publishing the conditions under which I refuse one – damp, mold, looseness, failure, wet zones – is still the cheapest trust I can buy. A panel wall that fails over a bad substrate fails with my name on the invoice.
Frequently asked questions
Can wall panels go over existing tile?
Some systems can, under their makers' conditions: Palisade allows its sheets over existing ceramic tile, and Swan allows its solid surface over solidly adhered ceramic tile, with loose ceramic tile removed or reattached and all plastic tile removed. For my studio's decorative sheet the call is made at the measure visit, standing in front of the wall, because the added thickness affects trim, outlet depth and door clearances – and because loose tile is never a base, on any system, while a hollow sound gets the tile assessed before any decision.
Can I put wall panels over drywall?
Yes – sound drywall is the normal case. The wall must be flat, dry and sound: fill and sand the deviations a 2-meter straightedge finds (one guide's working tolerance is anything over 3 mm), prime bare or chalky plaster and joint compound, and give new plaster its 28-day cure before adhesive work.
Can wall panels be installed over painted walls?
Yes, over sound, flat, well-bonded paint, with prep: loose or flaking paint comes off, glossy paint is sanded with 120 to 180 grit for grip, and bare or chalky areas are primed. Adhesive bonds to the paint itself, so paint that is letting go takes the panel with it – soundness of the paint layer is the whole test.
Can you panel over textured or popcorn walls?
Light texture, yes in practice: a rigid sheet does not follow small texture, so orange-peel, patch edges and minor unevenness disappear behind it, provided the wall passes the flatness check. Heavy texture and popcorn have no maker authorization by name in my research; the published routes are sanding flat, skim-coating level, or building a strapped flat plane over the texture.
Do I need to remove wallpaper before installing wall panels?
Yes, for my sheet. Paper is a weak layer that humidity lifts, and it comes off first. Swan's manual requires the same in its system, plus two coats of primer or sealer on the stripped wall. Stripping also exposes the wall's history – old patches, cracks, damp outlines – while fixing it is still cheap.
Can I cover a damp or moldy wall with panels?
No. The EPA's rule is to fix the moisture source first and dry wet materials within 24 to 48 hours; cleaning or covering a still-wet wall lets mold return behind the finish, and the EPA names the back of paneling among the places hidden mold grows. A damp or moldy wall is a repair job first. The panel conversation resumes when the wall is dry and the source is fixed.
How flat does a wall need to be for wall panels?
Flat enough that a 2-meter straightedge does not rock or show real daylight against it. The working tolerance one experienced guide puts on it is to fill and sand any deviation over 3 mm, because a thin rigid panel cannot bridge a hollow – the hollow returns later as a soft spot or a lifting edge. Bows beyond repair by filling get skimmed or rebuilt first, quoted as wall repair.
Will panels over tile cause problems at outlets and doors?
They can, which is why tile gets a measure visit rather than a printed yes. Each kept layer plus the panel moves the wall face forward – my sheet adds 5 mm, several published systems add 1/2 inch – and the consequences land at outlet boxes, which must finish near flush with the new face, at door jambs and casing, and at baseboards. All are plannable and priced in advance; all are expensive as surprises.
Sources
- U.S. EPA, "A Brief Guide to Mold, Moisture and Your Home" – moisture control is the key to mold control; fix the water problem; dry wet materials within 24 to 48 hours; do not paint or caulk over moldy surfaces; indoor humidity below 60 percent, ideally 30 to 50 percent; hidden mold behind drywall, wallpaper and paneling. epa.gov
- Palisade (ACP), installation guide – existing tile as a listed base; named adhesives for the system; outlet cut-outs; L-trim and baseboard finishes. acp-professional.com
- Palisade, tub and shower tile installation guide – covering ceramic tile in a shower with sealant in tongue-and-groove connections and a waterproof substrate required where sheets do not cover tile. palisade-tiles.com
- Dumaplast, Aquawall installation guide – direct gluing only on an even, dry, dust- and grease-free base; MS-polymer or two-component polyurethane adhesive; lattice build for uneven bases. interiorpanelsystems.co.uk
- Swan, Swanstone installation guide (re-hosted) – solidly adhered ceramic tile only; loose ceramic tile removed or reattached; all plastic tile removed; belt-sanding glazed tile with 60 grit plus primer or sealer. manualshelf.com
- Swan, Swanstone installation guide (re-hosted) – primer or sealer fully dried over sheetrock; all wallpaper removed plus two coats of primer or sealer; textured plaster sanded smooth. manualshelf.com
- Fibo, wall panel installation instructions – flatness tolerance of plus or minus 2 mm over 2 m for its screw-fixed system. fibo.no
- Trusscore, Wall and CeilingBoard submittal sheet – board thickness 1/2 inch as printed. trusscore.com
- Duramax, PVC panel installation guide – board thickness 1/2 inch as printed; outlet cut-outs; strapping for uneven bases. duramaxpvcpanels.com
- Wallplanks, installation page – chalked paint cleaned before installation; heavy texture block-sanded or skim-coated, and then primed; well-bonded smooth wallpaper only under its rules. wallplanks.com
- Georgia-Pacific, decorative wall panel manual (re-hosted) – adjust the outlet box to the panel thickness. manualsdir.com
- Ceramic Tile Foundation, ANSI A108.02 explainer – substrate flatness of 1/8 inch in 10 feet for tile with an edge of 15 inches or more. ceramictilefoundation.org
- Angi, wall paneling cost page (updated 30 October 2026) – professional wall paneling $1,200 to $6,000, average $2,800; $5 to $25 per square foot overall; labour $3 to $10 per square foot. angi.com
- WOW Walls Studio, published guides on this site – installation process (flat, dry and sound; 2 m straightedge and 3 mm working tolerance; 28-day plaster cure; glossy paint sanded 120 to 180 grit; conditioning figures as cited), panels vs paint (over sound paint yes with prep; over wallpaper no; rigid sheet covers texture), Florida humidity (EPA targets), shower panels vs tile (decorative sheet out of the shower; Swan and Palisade over-tile permissions belong to those systems), care and repair (musty-smell protocol).