Wall Panel Installation: What Happens, How Long, How Messy (2026)
How wall panel installation actually runs: the measure visit, wall prep, cutting, fitting, dust, timelines and what is not included in the quote.
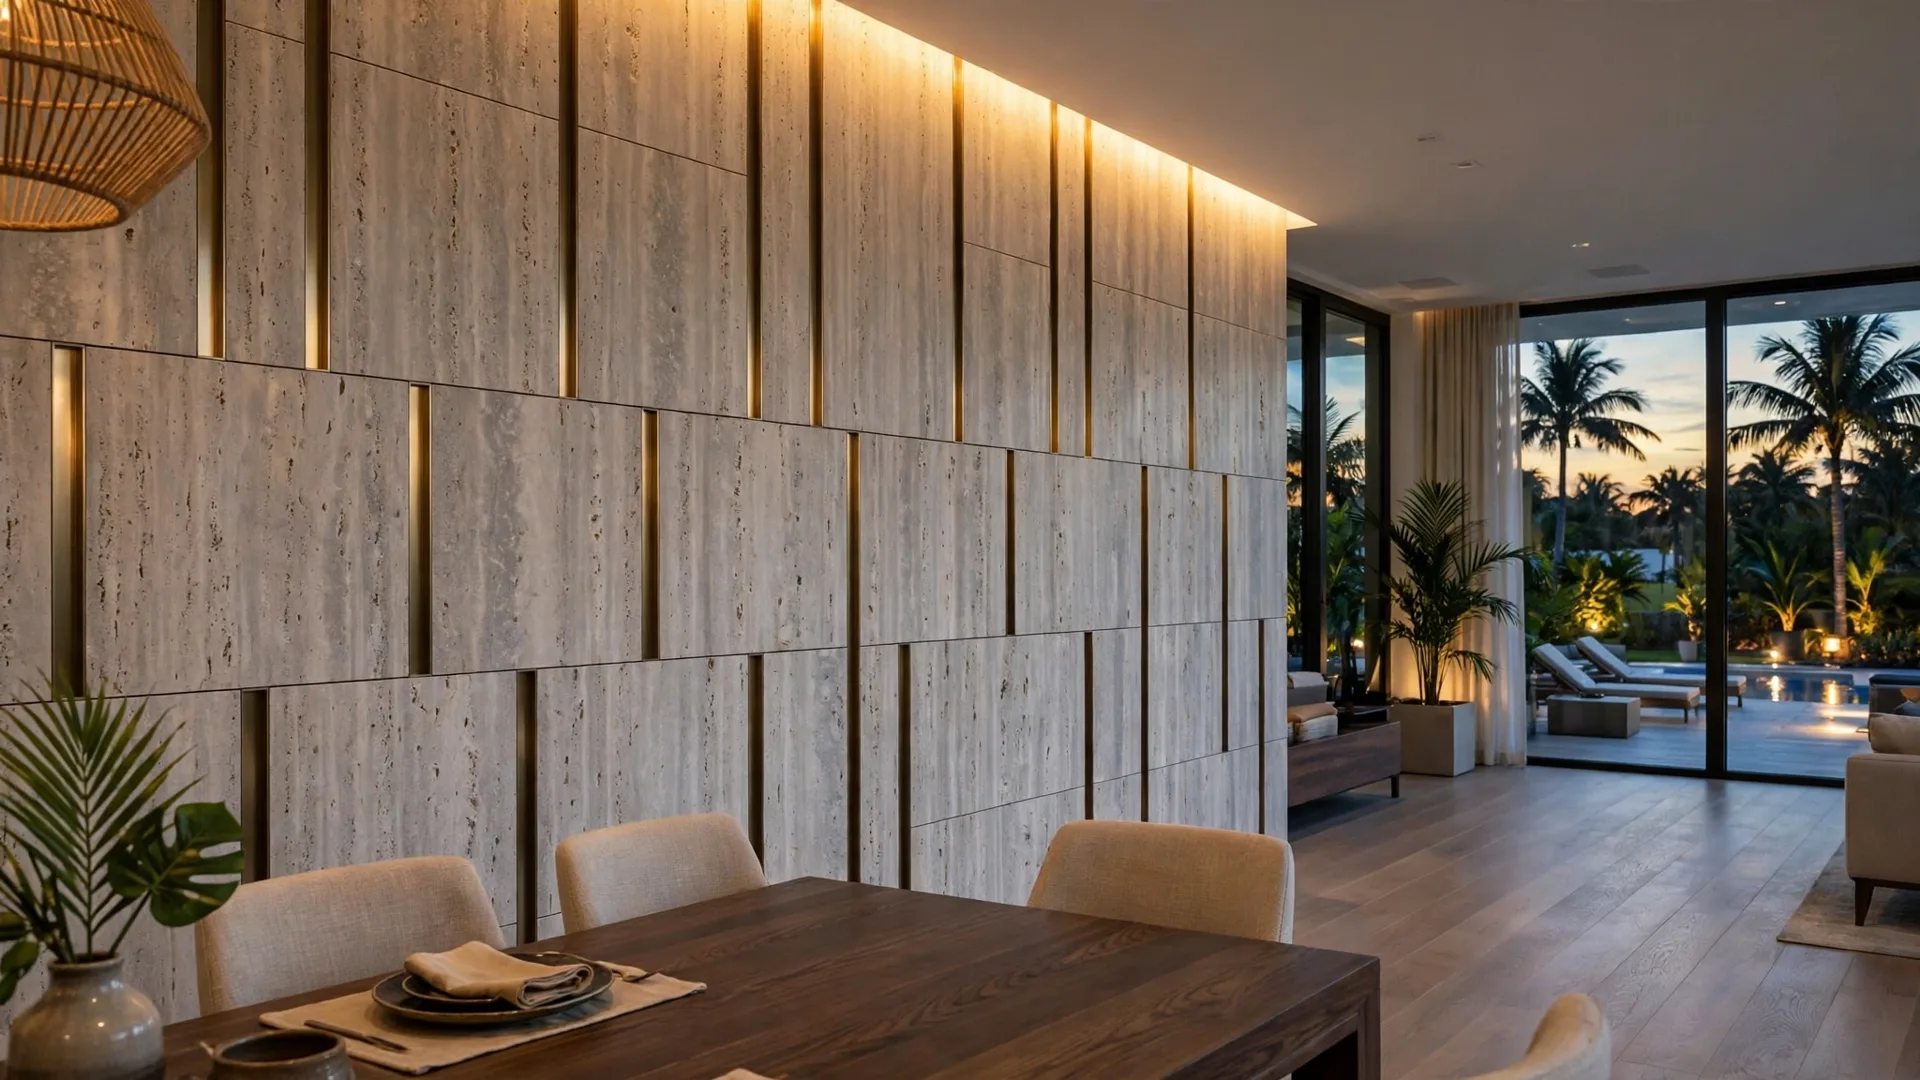
Most people who call me about a panel wall ask about the finish first and wall panel installation second, and by the second call the order flips. The questions get practical: what actually happens on the day, how long the room is out of use, how much dust there will be, and who moves the outlet that sits right where a seam wants to land. This guide answers those questions in the order a real job runs, from the measure visit to the handover. It also covers the part nobody puts in a brochure: what is not included in the quote, and the few findings that legitimately add days.
I install large-format composite panels for WOW Walls Studio here in South Florida. The panels are big, thin sheets – 48 by 108 inches, 5 mm thick, with a bamboo-composite core and a finished face in a travertine look, a marble look, stone, porcelain-look, real-wood veneer, leather or velvet. A wall of them works like neither tiling nor hanging pictures. It runs as a sequence, and the sequence is why one wall goes up calmly in a day while another turns into a week of surprises. Most surprises were already visible at the measure visit, which is where this guide starts.
What a panel installation actually is
TL;DR: A panel installation is the fitting of a small number of large, pre-finished sheets to one prepared wall, in a planned order, with adhesive, slim trim profiles at the joints and edges, and cutouts worked around outlets and fixtures. There is no mortar, no grout and no wet trade drying on your wall – which is why the job usually fits inside days. Preparation matters more than the fitting itself.
Start with the arithmetic of the sheet. One panel covers 48 by 108 inches – a 12-foot wall at 9-foot ceilings is three sheets and two vertical seams. Tiling the same wall means hundreds of pieces and a grid of grout lines; a panel wall means a handful of pieces and a few placed seams, each one decided on paper before a saw comes out. The finish is already on the sheet when it arrives – honed (matte-finished) travertine look, Calacatta marble look, walnut veneer – so there is no painting, sealing or grouting stage after fitting. What the day is really made of is measuring, preparing, cutting accurately, and pressing large sheets home in the right order.
That structure explains both the speed and the risk. On speed: large sheets cover ground fast, because the Panel Hub's install guide puts a standard feature wall at "anywhere from a few hours to a full day, depending on the panel type, wall size, and your experience level". The risk runs the other way: a sheet this size forgives nothing – a wall that bows, a seam planned onto an outlet, a cut made to a wrong measurement are all visible at full height. The rest of this guide is the sequence I use to keep the risk in the planning stage, while changes still cost pencil marks instead of sheets. For the material itself – what the core is, how the finishes behave – see my bamboo composite wall panels guide.
Step 1: the measure visit decides most of the job
TL;DR: The measure visit does far more than size the wall. I record the wall's width and height, check how flat it is, mark every outlet, switch, vent and fixture, note the baseboard line (where the wall meets the floor) and the crown line (where it meets the ceiling), and draw the seam plan – where each of the few seams will fall. The quote, the timeline and the cut list all come out of this one visit, which is why a price given without it can only be preliminary.
Here is what I actually do on the visit. First, the raw dimensions, twice, in two directions, because South Florida walls are rarely the rectangle the floor plan promises. Second, a straightedge (a long, perfectly straight bar laid against the wall to show bumps and hollows) run across the wall in several directions to find bows and hollows – the prep question, covered in the next section. Third, the obstacle map: outlets, switches, thermostats, vents, a TV mount position if the wall will carry a screen, sconce positions if lighting is planned. Every one of those has to land either inside a sheet, where we cut around it, or clear of a seam, and deciding that on paper costs nothing while deciding it mid-install costs a sheet.
Fourth, the seam plan itself. On a 12-foot wall I have two seams to place, and I place them where the eye forgives them – aligned with a door casing, a TV edge, a change of finish – not wherever the sheet arithmetic happens to drop them. If the design mixes finishes, say a travertine-look field with a fluted band (ribbed boards) beside the TV, the visit is also where the boundary between finishes gets fixed to the inch. Fifth, access: a 9-foot sheet has to travel from the truck to the wall, and a tight condo corridor or a stair turn can change how a job is cut and sequenced. In a condo, the visit is also when building rules enter the picture – elevator reservations, work hours, and any association paperwork belong to the schedule, not to the install day.
What you get from the visit is a confirmed price and a realistic schedule. The studio's published prices are preliminary until then, in its own words: a specialist confirms the exact price after measuring your wall. That sentence exists because of this visit: the price firms up once the wall has been seen and measured.
Step 2: wall prep – the verdict nobody can skip
TL;DR: Panels bond to the wall you have, so the wall has to be flat, dry and sound before a sheet touches it. A straightedge check finds the bows; loose paint comes off, glossy paint gets sanded for grip, chalky or bare plaster gets primed, and any damp or mold is solved at its source first – a panel over a damp wall hides the problem until the adhesive lets go.
The flatness check is simple and unforgiving. The Mr Building Materials guide for decorative paneling describes the check this way: run a 2-meter straightedge across the wall in several directions, and fill and sand flat any deviation over 3 mm – because a thin panel cannot bridge a hollow, and the hollow shows up later as a soft spot or a lifting edge. Treat that 3 mm as one experienced guide's working tolerance rather than a universal rule: the point is that the tolerance is small, and it gets checked with a straightedge on the day. My version of the same rule on site: if the straightedge rocks or shows daylight, that section gets filled and sanded before install day, or the job is quoted with the repair included as its own line. The quick estimate on the pricing page assumes a prepared, flat wall, and wall repair and leveling sit outside it. The pricing page lists exactly those as assessed on site – and I check them at the visit, which is where this boundary comes from.
Dry comes before flat. Moisture guidance is blunt on the same point, from the panel guide to the U.S. EPA's mold guide: if the wall has visible damp patches, efflorescence (the white salt bloom that pushes through paint) or mold, solve the moisture problem before any panel touches the surface. The EPA puts the underlying rule plainly for paint, and it applies double to a covering sheet: never coat or cover a moldy surface – clean the mold and dry the surface first, because the covering only hides the defect until it fails or peels. In South Florida this is the single most common reason I postpone a job – a wall that backs onto a bathroom, a sliding-door track that lets rain creep in, an AC condensate line sweating inside the wall. The panel is not a waterproofing layer over a damp wall, and an installer who treats it as one is selling you a job that will fail and bring him back to fix it. If humidity is the bigger worry at your house, my guide to wall panels in Florida humidity covers which materials survive our climate and which do not.
Sound is the third test. Loose or flaking paint has to come off – adhesive bonds to the paint, and paint that lets go takes the panel with it. Glossy paint gets sanded with 120 to 180 grit sandpaper, rough enough for the adhesive to grab, and bare or chalky plaster and joint compound (the filler used over drywall seams) get primed so the wall does not drink the moisture out of the adhesive before it sets. I work the same way the drywall trade's own guidance describes for adding new gypsum (the mineral drywall is made from) layers over existing walls – the Gypsum Association's GA-216: loose material comes off, low spots get filled, and missing sections get packed level with shims (thin wedges used to level a surface). The new surface can only be as sound as what it sits on. New plaster is its own case: the paneling guide puts its cure at a minimum of 28 days before adhesive work, and rushing that is a classic way to trap moisture behind a brand-new wall.
Can panels go over an existing finish at all? Over sound, flat, well-bonded paint – yes, that is the normal case, with the sanding and priming above. Over tile or an old panel layer, I will not give you a yes or no here: each added layer moves the wall face forward and eats into trim, outlet depth and door clearances, so that call is made standing in front of the wall, at the measure visit. Over wallpaper – no on my jobs: paper lifts in humidity, and it comes off first.
Step 3: acclimation, cutting and dry-fitting
TL;DR: Sheets rest in the room first – acclimation (letting them settle to the room's temperature and humidity) – before they are cut. Cuts are made to the measure-visit plan, most of them outside the finished room, and every sheet is dry-fitted (held up against the wall without glue, to check the fit) before adhesive is opened. The dry fit is the last free chance to catch a wrong cut, a seam landing on an outlet, or a finish running the wrong way.
Acclimation sounds like a ritual until you price the alternative. Panels that travel from an air-conditioned warehouse through Florida heat into your room need time to sit in the room's own temperature and humidity so the material is stable when it is measured and cut. Panel manufacturers formalize this: one laminate panel maker's installation guide calls for all components to be conditioned at 70 to 75 degrees Fahrenheit and 45 to 50 percent relative humidity for 72 hours before assembly, with packaging removed. In plain terms: about three days sitting in a normally air-conditioned room. The exact hours vary by product, but the principle does not – cut a sheet that is still adjusting and the fit you made in the morning is not the fit you have at handover.
Cutting is where the plan earns its keep. The cut list comes straight off the seam plan: full sheets where the wall allows them, trimmed sheets at the ends, and cutouts for outlets, switches and fixtures marked from the obstacle map. Most cutting happens outside the room being finished – a garage, a driveway, a balcony – for a simple reason covered in the mess section below: cutting makes the dust, and the dust should happen somewhere that is not your living room. On a condo job with no outside work area, cuts are batched and the room is sealed and vacuumed between batches, which is slower and is one reason condo installs live or die by their schedule.
Dry-fitting means each cut sheet is offered up to the wall, checked against its neighbors, and only then set aside in fitting order. Grain and veining direction get checked here too – a marble-look sheet hung with its veining running against the design reads wrong at full height, and adhesive is a bad place to discover it. When the dry fit is clean, fitting day is mostly execution. When it is not, we are still in the cheap stage of the job.
Step 4: fitting – adhesive, seams and trim
TL;DR: Sheets go up in the planned order, first sheet level and plumb, each one bonded with panel adhesive and pressed firmly across its whole face, seams closed with slim aluminum trim profiles or tight butt joints (two sheet edges pushed tight together, with no trim over them) where the design calls for them. Panel adhesives of the class used for this work set in about 20 minutes and need at least about 24 hours to cure – which is why fitting day ends with a wall you do not load, lean on or drill until the cure has run.
The first sheet sets the geometry of the whole wall. It goes in level and plumb (perfectly vertical), because every later sheet references it, and a small lean at sheet one is a wide gap at sheet four. Adhesive is applied to the sheet or the wall in the pattern the product specifies, the sheet is pressed home firmly across its full face – hollow spots behind a large sheet are tomorrow's flex and noise – and the level is checked again before the adhesive grabs. One adhesive maker's guidance for panel work gives the working rhythm: a common panel adhesive takes about 20 minutes to set and at least 24 hours to cure, and can bridge small gaps as it sets. Treat that 24 hours as a minimum: the adhesive on your job sets the real wait. That rhythm is the real schedule of fitting day: enough open time to adjust each sheet, then no touching.
Seams are finished two ways. Where the design wants a defined line, a slim aluminum trim profile sits in the joint – it covers the cut edges, gives the wall its drawn geometry, and comes in the metal finishes the design uses. Where the design wants a quiet field, sheets butt tightly and the seam reads as a hairline. Edges, outside corners and the meeting with baseboard, crown or a return wall (a short side wall the field wraps onto) get their own trim pieces, cut on site. Outlet and switch cutouts are finished with the plates refitted over the new wall face, sitting flush on the panel instead of the old paint line.
A note on fixings: adhesive does the work on a sound, flat wall. A sheet is held and braced while its adhesive sets, and the finished face carries no grid of screws. If an installer proposes face-fixing a finished sheet as the main method, ask why the wall or the adhesive is failing to do its job.
The electrical line: what we can and cannot touch
TL;DR: Fitting panels around existing outlets and switches is panel work. Moving an outlet, adding one, or running a new circuit for backlighting is electrical work, and in Florida that work belongs to a licensed electrical contractor. The practical rule: decide every electrical change before fitting day, because after the sheets are up, the wall is closed.
Here is where the line sits. Cutting a sheet around an existing outlet, refitting the plate, fitting a TV mount through the panel into the studs (the wooden framing inside the wall) – that is installation work, and it is in my scope. Pulling new wire, adding a circuit, relocating a box, or extending a circuit to feed an LED driver (the power supply that runs the LED strips) in a new position changes the wiring itself. In Florida that is a licensed electrician's job: Florida reserves installing, altering, repairing or adding to a wiring system for a state-certified or registered electrical contractor. Sources argue about the small end of the scale – whether like-for-like fixture or outlet swaps count as minor repair or already need a licensed electrician – and I am not going to settle that argument in a panel article. Where a job touches that boundary, we confirm who must do it before the work is scheduled. My crew works to the clear side of the line – when a design needs new electrical, a licensed electrician does that part, scheduled before us, and the studio's pricing says the same thing in print: new electrical circuits are outside the quick estimate and are assessed on site.
Florida's residential electrical rules sit on the National Electrical Code, adopted into the Florida Building Code, which is why outlet spacing, GFCI protection (the outlets that cut power instantly on a ground fault, required near water and in garages and bathrooms) and circuit sizing are not matters of installer taste. None of this needs to slow a panel job down – it needs to be sequenced. The classic failure looks like a design problem and turns out to be a sequencing problem: a client falls for a backlit wall late in the design, the LED driver and its feed were never planned, and now the choice is a visible wire or reopening a finished wall. Backlighting decided at the measure visit is a drawing and a scheduled electrician visit; backlighting decided after fitting is surgery. If your wall includes light, my LED backlit wall panels guide covers drivers, dimming and wiring in depth – read it before the design is frozen, not after.
TV walls have their own version of the same rule. The screen, its mount, and the question of where the cables live – behind the panel field, in a planned channel, or in a cabinet below – are measure-visit decisions. The panel wall itself goes up the same way either way; what changes is what has to happen behind it first.
How long it really takes, stage by stage
TL;DR: Installer guides for decorative paneling put a single feature wall at a few hours to a full day of fitting and a full room at about two days, and the adhesive then needs at least about 24 hours to cure before the wall is loaded or drilled. Electrical or repair findings add their own days in front of fitting, not during it.
The honest way to read timelines is by stage, because each stage has its own clock:
| Stage | Typical span | What sets the pace |
|---|---|---|
| Measure visit and design | One visit | Wall size, obstacles, design decisions |
| Panel acclimation | Up to about 3 days, before fitting day | Sheets resting in the room's conditions; runs before fitting, not during it |
| Wall prep | Hours on a sound wall; days if repair or drying is needed | Flatness findings, paint condition, moisture |
| Fitting one feature wall | A few hours to one working day (installer-guide figures) | Sheet count, cutouts, trim design |
| Multi-wall or full room | About two days for most rooms (installer-guide figures) | More sheets, corners, joint and trim finishing |
| Cure before normal use | About 24 hours after fitting | Adhesive cure; no loading or drilling |
| Electrical or permit steps, if any | Scheduled before fitting | Licensed electrician's calendar, building rules |
Those spans line up with what installer guides publish for decorative paneling generally: a complete step-by-step guide puts a single bedroom feature wall at one working day for one installer including cutting and cleaning, and a full living room at usually two days – one for layout and installation, a short second visit to finish joints, trims and cleaning. Those are generic figures, quoted as generic. My sheets are larger than most, which cuts both ways: fewer pieces to fit, and more care per piece. A wall that mixes finishes, carries a TV build-out, or wraps a fireplace takes the longer end of any range, and a full custom project – panels with lighting, cabinetry and storage built as one composition – is a multi-visit build from the outset. The schedule for your wall is the one confirmed after measuring, and the findings that can move it are the ones in the next two sections – which is exactly why they are surfaced at the visit, not on fitting day.
The room itself has a clock too, and households forget it more often than the wall's. Furniture comes out or gets moved and protected before fitting, and goes back once the cure discipline allows. Plan to clear the room for the fitting day and to treat the wall gently the day after, while the cure finishes.
How messy it really is – dust, noise and protection
TL;DR: A panel install is a dry job – no mortar mixing, no grout haze, no demolition unless you agreed to remove something first. The real mess is cutting dust and packaging, both of which are controllable: cuts happen outside the finished room where possible, floors and furniture are protected before work starts, and cleanup is a line to pin down in the quote before anyone starts. Expect a working room for a day, with a tidy house around it.
Let me be specific about each mess, because "messy" is really four questions. Dust: cutting composite sheets makes fine dust, closer to the dust from cutting fiberboard than to the wet sludge a tile saw throws off. The control is location and extraction – cut in a garage, driveway or balcony with the door shut between the cutting area and the house, or, where a condo leaves no outside option, batch the cuts, seal the room, and vacuum between batches. What you should not accept is a saw running all day in the middle of a furnished living room with the AC pulling dust through the house; in Florida the AC stays on, so the cutting plan has to respect the air handler (the indoor AC unit that circulates air through the house), not fight it.
Noise: saw noise, in bursts, during cutting hours – think circular saw, not jackhammer. There is no demolition noise unless something is being removed, and drilling is limited to fixings and mounts. In condos, building work hours govern when the bursts can happen, which is another schedule input from the measure visit.
Debris: offcuts, packaging and the old trim or finish if any was removed. Get debris removal into the quote in writing. "We install" and "we clean" are separate sentences in some quotes, and a pile left by the door is what happens when nobody asked.
Spills and marks: adhesive squeeze-out should be wiped before it cures (cured adhesive comes off mechanically, which is the hard way), floors on the work path are covered, and furniture that stays in the room is moved to the center or out and sheeted. Hold the crew you hire to a standard agreed up front: a normal household vacuum and dust after the job is realistic; needing a construction cleanup of your own means the cleanup line was never settled.
How does this compare with the alternatives people weigh? Tiling the same wall adds demolition of the old surface in many cases, mortar and grout work across several days with curing gaps, and grout dust that gets everywhere. Paint is cleaner still, and it also delivers less: a color change on the same flat wall. Panels sit between: a real installation, with real cutting, compressed into a short, controllable window.
What is not included – and when it adds days
TL;DR: A panel quote covers the wall as agreed: design, panels, delivery and installation by our own crew. It does not silently cover demolition of an old finish, repairing or leveling a wall that failed the prep check, new electrical circuits, or permits – our pricing FAQ lists exactly those as assessed on site. Each one is legitimate work; the failure is only in surprising you with it.
A quote that claims to include everything, from a contractor who has not measured your wall, holds until it meets your wall. The four usual exclusions each have a reason. Demolition: removing tile, stone or an old built-out wall is its own job with its own debris, and most panel walls need none of it because the existing wall stays. Wall repair and leveling: the prep check decides, and a wall that needs a skim coat (a thin layer of plaster spread over the wall to level it) or a section rebuilt needs drying time too – that is where added days actually come from, not from the fitting. New electrical: licensed work, separately priced, as the section above explains. Permits: whether your project needs a permit is one of the assessed-on-site answers, condo and association approvals are a separate gate again, and electrical additions can carry requirements of their own. A blanket no-permit answer given before anyone has seen the job is a guess, whoever gives it.
When do these add days rather than dollars? Repair that must dry, plaster that must cure, an electrician whose visit must land before fitting, a building that only allows work in set windows. The timing matters more than the size: a half-day repair discovered at the measure visit costs the schedule nothing, because it is planned before fitting day; the same repair discovered with sheets already cut costs a rebooking. That difference is the whole argument for the measure visit, and for treating any quote given without one as preliminary until the wall has been seen.
Handover: cure, care and what to check
TL;DR: At handover, walk the wall with the crew in daylight and in the room's own lighting, and check seams, trims, cutouts and plates. Then the cure discipline: for about 24 hours after fitting, do not load the wall – no TV hung, no shelves drilled, no leaning furniture. Take 24 hours as a minimum: the crew's instruction for the adhesive actually used on your wall wins over any number in this article.
The walkthrough has a method. Stand where you will actually sit or stand, not with your nose on the seam – a panel wall is read from the room, and a hairline that vanishes at six feet is a finished seam, while a step or a shadow line that survives at room distance is not. Check the trim lines for straightness. Run a hand lightly over the sheet faces for hollow spots – a dull flex or a drum sound over a wide area is worth raising there and then. Confirm every outlet and switch works and sits flat. Then look at the wall once in daylight and once under its evening lighting: a backlit or cove-lit wall (lit by a hidden light recess at the top of the wall) shows different flaws at night. On my jobs, anything on that list gets fixed while the crew and the tools are still in the house.
Care after that is the easy part owners overthink. The finishes wipe clean with a soft cloth; veneer wants the same gentle treatment as veneer furniture, and stone-look and marble-look faces take normal household wiping without sealers or polishes. Cleaning rarely shortens a panel wall's life. The things that do are water getting behind it from an unrelated leak, repeated furniture knocks on one unprotected corner, and DIY drilling by someone who does not know where the adhesive is spread and where the studs are. If you want to hang something heavy later, ask first: the answer is a planned fixing that reaches the studs, worked out before the drill comes out.
What an installed wall costs
TL;DR: My studio publishes three ways to buy a wall: a stock design from $850, a design fitted to your wall at usually $2,200-$2,700, and a full custom turnkey project from $9,999 – and every price is preliminary until a specialist confirms the exact price after measuring your wall. The installation process in this guide is the same sequence at each level; the design scope is what grows.
Here is what each tier actually buys. The stock design is a finished studio design installed as designed – the shortest path through every stage above. The fitted design re-composes a proven design around your wall's proportions in your finish, which is measure-visit and seam-plan work. Full custom brings surfaces, lighting, a TV niche, cabinetry and storage into one composition, which is the multi-visit build with the electrical sequencing this guide describes. What moves a specific wall inside those bands is what the stages surface: wall size, finish, lighting and electrical scope, custom details, and site conditions – the same list our pricing page gives. For the full breakdown of materials and install pricing across the market, see my wall panels cost guide, and for how room choice changes the job, my living room wall panels guide walks the biggest room in the house.
Frequently asked questions
How long does it take to install wall panels on one wall?
On a wall that has passed prep, a single feature wall is typically fitted inside a day and a full room takes a second day for joints and trims – the stage table in this article breaks the spans down stage by stage. Add at least about a day of adhesive cure before the wall is loaded or drilled. Electrical changes or wall repair add their own scheduled days before fitting.
How are large wall panels attached – glue, nails or screws?
Mainly adhesive. Each sheet is bonded to the prepared wall with panel adhesive and pressed firmly across its full face. Sheets are held and braced while the adhesive sets; plan on about a day before loading the wall. Face screws through a finished sheet are not the method – if they are proposed, ask what problem they are solving.
How flat does my wall need to be for panels?
Flat enough that a 2-meter straightedge does not rock or show real daylight against it. An installer guide for decorative paneling puts the working tolerance at filling and sanding deviations over 3 mm, because thin panels cannot bridge hollows. Bows beyond that get filled, skimmed or rebuilt first – which is wall repair, quoted separately from the panel install.
Can wall panels be installed over paint, wallpaper or tile?
Over sound, flat paint – yes, after loose paint is removed and glossy paint is sanded for grip, with primer on bare or chalky areas. Over wallpaper – no; paper is a weak layer that humidity lifts, and it comes off first. Over tile or an old panel layer – decided at the measure visit, standing in front of the wall, because the added thickness affects trim, outlet depth and door clearances.
How messy is wall panel installation, honestly?
The dust is cutting dust, and it is made where the cutting happens – ideally a garage, driveway or balcony, not the finished room. Inside, expect protected floors, sheeted furniture and saw noise in bursts during cutting. Cleanup and debris removal are lines to settle in the quote before work starts. There is no demolition dust, mortar or grout mess unless an old finish is being removed by agreement.
Do I need an electrician for a panel wall with LED backlighting?
If the design only fits around existing outlets and switches, no. If it adds or moves an outlet, or runs a new circuit or feed for the LED driver, that part is electrical work for a licensed Florida electrical contractor, scheduled before fitting day. Decide backlighting at the design stage – retrofitting it behind finished panels is the expensive version.
When can I hang a TV or shelves on the new wall?
After the adhesive cure – plan on at least about 24 hours – and only with fixings planned into structure, not into the sheet alone. A TV mount position is best marked at the measure visit so blocking, cable routes and the mount itself are settled before fitting day, while the wall is still open.
What is not included in a wall panel installation quote?
On my studio's pricing, the quote covers design, panels, delivery and installation by our own crew. Demolition of an old finish, wall repair or leveling, new electrical circuits and permits are assessed on site and priced separately when they apply – most walls need none of them.
My verdict
Book a panel wall the way you would book any good contractor: the visit first, the verdict on your wall second, the date third. If an installer will quote your wall from a photo, promise a completion time before seeing it, or fold electrical changes into a panel quote without a licensed name attached, you have learned something worth knowing before money moves. The install itself, on a sound wall with a drawn plan, is the calmest part of the whole project. The wall goes up, the cure runs its course, and the room reads finished. Most of what this guide describes exists to keep it that way.
Sources
- Mr Building Materials – "How to Install Decorative Wall Paneling: A Complete Step-by-Step Guide" (surface preparation, flatness tolerance, plaster cure, install timelines). mr-buildingmaterials.com
- The Panel Hub – "How To Install Wall Panelling In Your Home" (feature wall install time). https://www.thepanelhub.com/blogs/news/how-to-install-wall-panelling?srsltid=AfmBOorezsiLCU3F2zE7ioXtVSktov3TlT96tTfabK0K4XcjP_a0Fxs8 and "How Much Do Wall Panels Cost? (2026 Price Guide)". thepanelhub.com
- U.S. EPA – "A Brief Guide to Mold, Moisture and Your Home" (never coat or cover a moldy surface; fix the moisture source and dry first). epa.gov
- InSoFast – "Adhesive Attachment" (panel adhesive set and cure times). insofast.com
- FRL Wall Protection Panel Installation Guide, via Manuals.plus (panel conditioning and wall preparation). manuals.plus
- Walls & Ceilings – "Application of Gypsum Panel Products Over Existing Interior Walls and Ceilings" (Gypsum Association GA-216 guidance). wconline.com
- Infinite Electric – "Licensed Electrician Vs Handyman Florida: Why It Matters" (Florida licensing boundary). infinitefl.com
- Housecall Pro – "Handyman License Requirements in Florida" (stricter DBPR position on minor electrical work – the reason this article does not present like-for-like swaps as settled). housecallpro.com
- Hoffman Electrical – "Florida Residential Electrical Code" (NEC basis in the Florida Building Code, GFCI locations). hoffmanelectrical.com
- WOW Walls Studio – Pricing page and FAQ (public price anchors, what is included and assessed on site, panel specification). wowwallsstudio.com