Marble-Look Wall Panels: Calacatta Styles, Honest 2026 Guide
Marble-look wall panels by a South Florida installer: technologies, Calacatta styles, costs vs real stone, sample tests, and TV media walls.
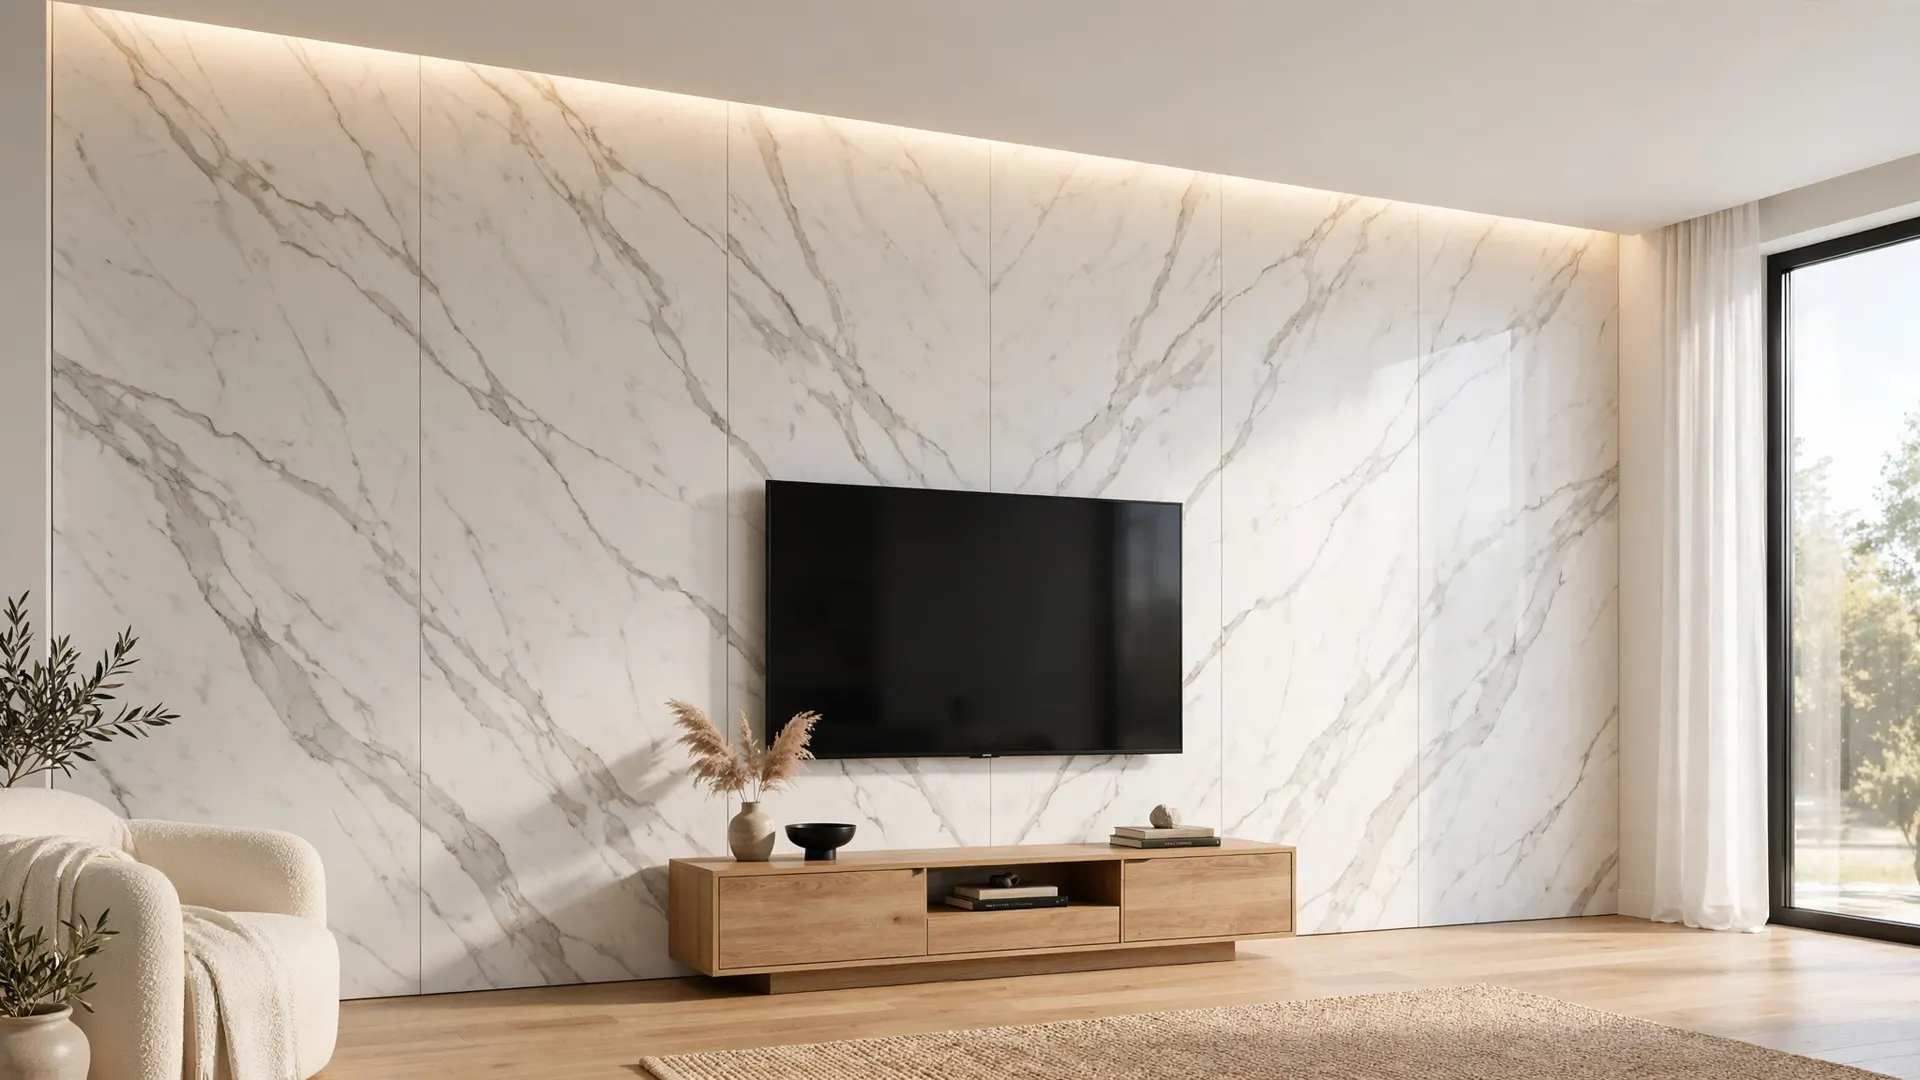
Walk into any new construction in Broward and you will see marble-look wall panels on a full wall: white, veined like Calacatta (the famous white Italian marble with bold gray veining), behind a floating TV or a console. Half the people who call me think it is real stone. It is a product category of its own. I install wall panels for WOW Walls Studio here in South Florida, and I am going to walk you through what marble-look panels actually are, which finishes read expensive, where they fail, and where real stone still wins. No showroom talk.
Here is the position I take with every client. Marble-look panels are a different product from marble: they deliver the look where real stone does not make sense: on drywall, on a schedule, in a South Florida condo. If you want that, keep reading. If you want the cold slab under your knuckle, save for the real thing.
What you are actually buying: the three technologies
TL;DR: Three products share the shelf: thin PVC sheets (the budget 4x8-foot sheet), bamboo-composite panels (a fiber-and-polymer board with a printed marble finish, this is what we install), and porcelain slabs (fired ceramic, the closest faux to stone). They differ in weight, install method, and how real they read. The names on the box matter less than these three facts.
PVC marble-look sheets. The workhorse of the category. Standard format: 48 by 96 inches, 3 mm thick, covering 32 square feet per sheet, with the marble pattern printed under a UV-cured high-gloss coating (the ink is hardened with ultraviolet light, which resists fading) (NewGen Depot). They are absurdly light for the coverage: one installer reports roughly 22 pounds per 4x8 sheet (one person can hang it), while the NewGen listing says 41 pounds; both agree it is under a tenth of stone's weight (Bigelow Designs; NewGen Depot). US retail lands around $2.19 per square foot: NewGen Depot sells a Calacatta 4x8 sheet for $70, down from a $119 list price (NewGen Depot). Broader US pricing guides put PVC wall panels at $1-$6 per square foot, mid-tier $2-$3, with pro installation adding $2-$5 for an all-in spend of $3-$8 (Coohom). Honest friction from real buyers: one Wayfair reviewer found liquid nails let panels slip while they were going up, and a nail gun splintered the plastic. The real method is adhesive plus careful support (paraphrase, Wayfair). And a trade-forum installer warns 3 mm sheets warp at large sizes: use 5 mm or thicker (paraphrase, uksignboards).
Bamboo-composite panels with marble finish. This is the product class my studio works with, so I will describe it plainly. The core is an extruded composite of bamboo fiber, PVC, wood powder, calcium powder, and additives: not real bamboo, and I say that to buyers straight (Consmos). Common sizes are 1220 by 2400, 2800, or 2900 mm in 5, 8, or 18 mm thicknesses (Consmos; BestSuppliers). The thick board interlocks with tongue-and-groove edges (a ridge on one board slots into a groove on the next) for flat or V-groove seams (a shallow V-shaped channel at the joint), and one manufacturer claims a carpenter can hang 20-30 square meters a day (vendor claim, FindSupply). What I like about this class on real jobs: it is a rigid board, so it reads solid at edges, and the thicker sections take mechanical fasteners instead of glue alone. The catch is transparency on pricing: China B2B wholesale listings show these at roughly $4.50-$20 per panel, factory prices, and what an installed Florida price adds on top is unknown until you get a local quote (Alibaba). US retail is dominated by plain PVC sheets; bamboo-composite marble panels have no well-documented US retail price. For that product, cost honesty means getting an installed quote from an actual local crew.
Porcelain slab panels. The premium faux. Large-format gauged porcelain (gauged = made to a consistent thin thickness), 48 by 96 inches and up: thin fired ceramic, the hardest and most convincing imitation of stone (NewHomeSource). US pricing: $8-$15 per square foot materials plus installation, against marble at $9-$24 (NewHomeSource). Porcelain is thinner than marble slabs, much lighter, needs no sealant, and resists stains. Installer Ken Davis of Davis Stone: "Installers love it. It's easy to cut and easy to install, if you know what you're doing" (NewHomeSource). The caveat is the labor: large-format tile work runs $5-$15 per square foot in the US (DAD Improvement), so the material price is only half the story. Porcelain is the most durable faux: scratch and chip resistant, non-porous. But it is heavy next to PVC, it needs a skilled setter with thinset (the cement-based adhesive tile setters trowel on) and wet-saw work (a water-cooled saw for cutting tile), and even its print "can still repeat on close inspection" (Medium).
So: PVC for budget and speed, bamboo-composite for a rigid installed board with options, porcelain when you want the closest thing to stone and will pay for the crew. Three different products. Know which one your quote is selling you.
The Calacatta names, decoded
TL;DR: Oro means warm gold veining, Gold is often a supplier's sibling name for the same look, Belga is the cool gray-blue one, Statuario is the bright-white high-contrast one, Viola is the burgundy statement. The names are supplier conventions. Put two samples side by side and pick the veining you like; ignore the word on the sticker.
Buyers google these names, so here is how I tell them apart at a sample counter. All are trade names borrowed from natural marbles quarried around Carrara, Italy: panel makers print the same looks.
- Classic Calacatta: white background, bold dramatic veining in light gray with gold undertones. The veining is the point: wide, expressive, varied (Acemar Stone).
- Calacatta Gold: classic Calacatta plus gold or beige undertones in the veins: warmer, more opulent; milky white with taupe veining occasionally combined with gold highlights (Acemar Stone; Amso deck via SlideServe).
- Calacatta Oro: soft milky white background with dramatic honey-colored veining (Amso deck via SlideServe). One important note: Oro and Gold are distinct trade names: marble.com notes "Calacatta Oro typically features more gold" (marble.com). In practice, though, names vary by supplier: one company's Gold is another's Oro. My guidance stands: do not fight over the name. Put two samples side by side and pick the gold tone you like.
- Calacatta Belga: medium gray cobweb veining with a graceful appearance (Amso deck via SlideServe). The cool, moody one: in my experience it hides everyday dust and fingerprints better than bright white varieties (trade opinion).
- Statuario: brighter, cleaner white with a few thick dark-gray "bastoni" veins (bastoni = bar-like streaks, Italian for "sticks"); monochromatic, very limited gold (Acemar Stone). The design-magazine one. Warning from the trade: on a big wall, high-contrast Statuario shows every install imperfection: less forgiving than busier Calacatta patterns (trade opinion). Statuario also takes the top price spot among real marbles (Acemar Stone).
- Calacatta Viola: deep purple, burgundy, and wine-colored veins on white or cream; thicker and bolder than classic Calacatta, rarer and typically pricier (Elsa Home & Beauty; Acemar Stone). A bonus name you will see in 2026: Calacatta Monet, with green, gold, and gray veining: softer and more painterly (Acemar Stone).
Practical rule for all of them: judge samples vertically at arm's length. Flat on a table hides what the wall will show. Check them in your own room's light; showroom light flatters everything. I will give you the full test battery in a few sections.
The honest cost math vs real stone
TL;DR: Real Calacatta installed is a five-figure wall; marble-look panels are a three-figure wall. One designer's documented projects put a 10x8-foot accent wall at $400-$900 all-in in premium PVC versus $12,000-$18,000 in real Calacatta. Broader sources confirm real stone cladding runs $50-$400 per square foot installed. The order of magnitude is the honest part; the exact numbers depend on the stone, the crew, and your wall.
I never invent prices, so here is what published sources actually say, caveats attached: Designer Bigelow Designs, after three client projects in 2026, reports a 10-by-8-foot accent wall in premium PVC lands "between $400 and $900 all in, with delivery in 5 to 7 days and installation in an afternoon": "genuinely DIY-friendly. No wet saws, no specialty trades, no permits" (Bigelow Designs). The same designer states real marble runs "$150 to $400 per square foot installed" and that the same wall in real Calacatta costs "about $12,000 to $18,000 once you've added slab, fabrication, delivery, structural prep, and installation," with a 3-6 week lead time (Bigelow Designs). That project example is single-source, so treat it as one designer's documented experience and nothing more. Cross-checks: the American Stone Center puts marble wall cladding at $50-$150 per square foot including stone, labor, cutting, and support structures (American Stone Center). Material-only figures: Calacatta $175-$200 per square foot, Statuario $50-$125, Carrara $40-$50, before installation (Medium). Coohom's US guide cites marble flooring installed at $8-$25 per square foot, national average around $15 (Coohom).
The takeaway: $150-$400 installed sits at the high end and fits Calacatta specifically, whose material alone runs $175-$200. Simpler marble cladding lands at $50-$150. Even at the low end, real stone costs an order of magnitude more than PVC marble-look at $3-$8 per square foot all-in (Coohom). The designer's summary line: PVC delivers "90% of the visual impact at roughly 5% of the cost" (Bigelow Designs). Porcelain sits between the two: materials $8-$15 plus $5-$15 per square foot of large-format labor (NewHomeSource; DAD Improvement). For the full installed-cost picture, see my cost guide.
What reads fake at six feet
TL;DR: From across the room your eye reads pattern scale and surface behavior. What betrays a print: visible repetition, a seam cutting dead straight through "natural" veining, mirror gloss that triggers the laminate-countertop memory, and heavy black-on-white veining that reads cold. What reads real: large irregular veining, satin gloss, and panels sequenced so nothing repeats in a grid.
Where faux marble fails is well documented by designers. Interior designer Natalia De Arteaga, via The Spruce: "The tiles that feel tacky to me are the oversized ones that imitate marble, especially the glossy white versions with heavy black veining" (The Spruce). Her point, paraphrased: heavy black-on-white veining chosen for a "luxurious" effect instead produces cold, impersonal spaces (paraphrase, The Spruce).
From my jobs and from the trade literature, the practical rules are these:
- Choose subtle patterns. "Very busy faux-marble printing can quickly make a wall look artificial": the key is a subtle marble pattern (BestBuy93). On a full wall, very busy printing reads as noise.
- Kill the repeat. Older PVC generations were betrayed by "the loop-repeating pattern you'd spot": current high-resolution UV prints are designed to match "the irregular drift of real Calacatta and Statuario" (Bigelow Designs). One faux-material guide lists "Pattern repeats on close inspection" as a core con (Medium). In my experience, visible repetition is the number-one giveaway of a print, so we sequence panels to avoid a repeating grid.
- Respect raking light. "Real grain has depth that printed film can't fake – you notice it most in raking evening light, when wood glows and PVC flattens into a repeating pattern" (Residence Supply). Side light across the surface is the lie detector. If a sample only looks good under ceiling cans, be suspicious.
- Mind print quality up close. "Blurry or pixelated prints can make the backsplash look fake" and thin tiles "might look cheaper" (KitchenSty). Zoom your phone camera into the sample and look at the vein edges.
- Use scale. Designer Adriena Daunt prefers "large porcelain slabs that will cover the entire wall... for a more realistic finish": fewer repeats, continuous veining (paraphrase, The Spruce). This is the strongest argument for floor-to-ceiling panels over tile grids: scale is what stone has, so scale is what you imitate.
- Gloss, chosen on purpose. Gloss "catches light the way polished stone does, so the wall reflects rather than absorbs. That's the visual cue your brain reads as 'real'" (Bigelow Designs). But gloss punishes sloppy prep because "gloss finishes reveal everything underneath them": skim-coat the dents first (a thin layer of filler) (Bigelow Designs). My trade opinion: for the big living-room wall I steer buyers toward satin-to-medium polish. Mirror gloss on a printed panel triggers the "laminate countertop" memory. Most buyers over 40 have seen a cheap high-gloss printed surface. Satin diffuses reflections, hides minor install imperfections, and reads more like honed stone (honed = matte, unpolished finish). High gloss has its place (a powder-room wall, a backlit bar niche), but for the main wall, satin is the safer read.
The sample tests that prevent regret
TL;DR: Never approve from a photo or one small sample. Run five tests: the light test (window vs warm lamp), the distance test (10-12 feet back), the repeat test (two sheets butted edge to edge), the seam test (does the joint vanish at 6 feet), and the fingernail test (is the finish a peelable film or bonded). If a sample fails two, walk away.
One rule that every experienced buyer learns the hard way: never approve from a photo or a single small sample alone. A Houzz forum regular puts it plainly: "Don't rely on a single sample tile; if you can, buy a whole box and lay them out to see the variation." And be "very skeptical of the install pictures shown in the tile marketing sheets and online" (Houzz).
The light test. Take the sample to a window, tilt it against the light, then check it under a warm indoor lamp. Cheap prints fail here: the surface glares flat or the veins look painted on. A good finish keeps its contrast in both lights: watch whether warm gold veins stay warm gold under daylight bulbs or shift greenish. Sample viewed "under lighting similar to the project" is the only honest read; a sample "can't establish how a larger installation will read" otherwise (FGD Glass). Warm lighting enriches beige and cream finishes; cool lighting emphasizes white and gray veining (Medium).
The distance test. Hold the sample at arm's length, then have someone hold it across the room: 10 to 12 feet. That is how you will see it on your wall. If it reads as stone from across the room, it will read as stone installed. If it only looks good at six inches, the veining is too fine or too repetitive (Bigelow Designs; Residence Supply). On real jobs, this is the single most useful test a buyer can run.
The repeat test. Butt two sheets edge to edge: if you can spot where the pattern restarts, you will see it on the wall (Medium). That is your wall in miniature.
The seam test. Ask for two samples and butt them together. Does the veining rhythm break at the joint, and does the seam shadow disappear or stand out at 6 feet in living-room light? Also ask whether the wall panels are book-matched (two panels mirroring each other at the seam so the veining flows symmetrically like an open book) or simply continuous. Book-matching is the high-end stone-shop look, and it is a layout decision: the payoff depends entirely on the installer aligning the mirror joint. The trade standard for seams comes from stone fabricators: a Houzz fabricator says a very well done seam "has to be looked for to notice it is there," kept "very very tight (the thickness of a razor blade or less)" (Houzz). Fabricator Montrose Marble agrees: "A seam will never be 100% invisible," but a good one is under 1/16 inch wide (Montrose Marble). For panels the job is a tight, straight, level butt joint. And one homeowner's hard lesson: approve the book-match layout before anything is cut, or you get "weird noticeable seams in almost all locations" (paraphrase, Houzz).
The fingernail test. Run a fingernail lightly across the surface and along the veins. You are checking whether the finish is a thin film that could peel at a nicked edge, and whether subtle embossing follows the veining: physical texture over the print helps it read as stone.
Five tests, no lab equipment. A seller whose samples pass all five is a seller worth talking to.
How installation works, and the TV question
TL;DR: Panels go onto a flat wall with adhesive plus mechanical fasteners in a day or two of actual hanging. But the wall is drawn first: seam positions, the TV mount location on structure (never on the panel), and the cable path are all decided before the first panel goes up. Retrofitting cables after panels are up means visible raceways (surface channels that hide cables).
A stone wall takes a stone crew and a wet saw. Panels are the drier install: adhesive, fasteners, a level first row, precision cutting. They go up dry and fast, but a crooked first row still ruins the wall. Here are the three planning points I walk every buyer through before we touch a wall:
-
Cable channels. Decide the cable path before the first panel goes up. The cleanest approach: a recessed channel or conduit behind the panels from the TV position down to the media console: HDMI, power, low-voltage in one run. Plan cables while the wall is still bare.
-
Mounting the TV. The mount does not hang on the panel – it hangs on the structure behind it. Lag bolts (heavy-duty screws) go through the panel into studs (the vertical wood framing behind your drywall) or blocking (extra wood added inside the wall for the mount) installed for the purpose. The mount position is fixed before the panel layout, ideally with plywood blocking behind the drywall at that spot. A 65-85 inch TV is a real load; "the panel will hold it" is not a sentence I ever say.
-
Built-in shelves and lighting. This is what separates a panel wall from a slab of marble. The media wall gets built as furniture: floating shelves recessed into the panel layout, LED coves (recessed channels that hide the light strip) above and below, the TV floating on the stone-look face with cables concealed in planned channels. Planned on paper first: shelf depths, LED channel positions, and panel seams coordinated so a seam never lands mid-niche. This is how we build them: the drawing comes first (seams, shelves, light lines, the TV position), and the panels follow it.
One honest aside on prep: gloss punishes sloppy walls. Large thin sheets need a genuinely flat substrate (the wall surface underneath): one trade-forum installer warns 3 mm sheets warp at large sizes and recommends 5 mm or thicker (paraphrase, uksignboards). A TV recessed tight into a sealed niche still builds heat, so leave breathing room and do not seal a niche airtight. If your project is a fireplace wall specifically, the heat and planning rules are different enough that I wrote them up separately in my fireplace accent wall guide.
South Florida humidity and the grout-free advantage
TL;DR: Humidity is the deciding factor in South Florida more often than budget. PVC and composite panels do not absorb water, so they do not swell or feed mold. But edges and cut ends still need sealing, and the finish is never the humidity risk; the core underneath is. And the quietest win over real marble: no grout lines to collect dirt and mildew.
The practical rule I repeat on every job: worry about the core underneath; the finish handles moisture on its own. PVC and WPC (wood-plastic composite)/bamboo-composite cores do not absorb water the way wood, MDF (medium-density fiberboard), or drywall do. One WPC cladding guide states the composite "doesn't absorb water, so it won't swell or degrade over time," positioning it for "coastal or tropical climates" (WallPanelPVC). A manufacturer FAQ puts it plainly: the waterproof substrate "effectively avoids swelling deformation unlike natural solid wood panels," with "excellent waterproof and anti-mold performance" for "humid seaside buildings" (vendor claim, RunTai WPC). Another vendor claims panels "won't warp, crack, or absorb moisture – perfect for humid areas" (vendor claim, HYSmartHome). On mold: PVC's non-porous surface "prevents moisture absorption, helping keep the wall surface dry". Mold needs moisture to grow (YouTube). I keep "moisture-resistant" and "waterproof" as two different words for composite cores: moisture-resistant for living rooms, bedrooms, and hallways; genuinely waterproof PVC or WPC where steam or splashing is in play.
Florida-specific guidance I give every client: a home sitting unconditioned for weeks in a South Florida August stresses any panel system at the seams: adhesives, caulk lines, and especially MDF cores. Keep the AC at a reasonable setpoint when you are away. And the panel face handles moisture, but edges and cut ends still need sealing per the manufacturer's instructions.
Now the grout-free advantage, which buyers underestimate. Real marble and porcelain tile mean grout lines, and grout is cement-based and porous: "over time, it can absorb water, crack, and degrade"; panels with sealed edges "form a continuous, impenetrable barrier" (Minty Tunnel). No grout means "no mold, no mildew, no scrubbing" plus faster installation (ShowerPanLiners), and grout-free is called "the number one advantage" of panels over tile (CoralToday). In my experience grout is what dates a "marble" wall fastest. It collects dirt and changes color, while our large-format panels run floor to ceiling with a tight butt joint that reads invisible from normal viewing distance.
For the full material logic (which core goes in which room, and why MDF-core panels only belong in continuously air-conditioned rooms), see my humidity guide.
Fire ratings and heat near electric fireplaces
TL;DR: Fire ratings are where sellers get slippery. "B1" on a Chinese spec sheet is the Chinese GB 8624 classification, NOT ASTM E84. The two are not interchangeable (ASTM E84 definition per CSICreative; interior-finish rules per ICC IFC 2015 Ch. 8). One US vendor claims Class A for its PVC panels, but I have not verified the certificate; ask to see it. Near electric fireplaces, follow the manufacturer's clearances and buy a unit that blows heat forward or down.
Let me give you the honest fire-rating picture, because this is where marketing gets vague. Class A (Class I) under ASTM E84 means a flame spread index of 0-25 and smoke developed of 0-450: the strictest interior-finish class (CSICreative). The International Fire Code (2015, Chapter 8) requires interior wall coverings, including expanded vinyl, to carry Class A or pass NFPA 265/286 tests with the actual mounting system and adhesive (ICC). What do sellers actually put on their spec sheets? NewGen Depot states its PVC marble panels are "certified with a Class A fire rating": a vendor claim, and I would ask to see the certificate before repeating it (NewGen Depot). Bamboo-composite sheets cite B1 and E1 (E1 = the low-formaldehyde-emission grade) on Chinese manufacturer spec sheets (Consmos; Novadecors). And here is the sentence to memorize: B1 is a Chinese GB 8624 classification on these sheets, NOT ASTM E84 Class A. Not interchangeable. One WPC marble spec also lists -40C to 60C temperature resistance (vendor claim, Ecer). Temperature resistance is not a fire rating. Keep those in separate columns in your head.
For electric fireplaces on media walls: most built-in units output up to 2 kW with flame-only modes; guides recommend the manufacturer-specified clearance between TV and fireplace, "usually 30-45 cm" (Electric-Fireplace.co.uk). Heat damage is real but gradual: it "shortens component lifespan, degrades screen quality, and can warp the plastic or adhesives inside the TV": a mantel or heat shield deflecting rising heat is the standard mitigation (Tom's Guide). Buy a unit that blows forward or down (paraphrase, Medium), keep panels out of the direct heat wash, and use flame-only mode when heat is not needed.
LED backlight: what glows, what looks cheap
TL;DR: Warm LED (2700-3000K) behind or around a marble-look wall can double the drama. But the light must be indirect and even. What looks cheap: a visible strip at the edge, RGB color-cycling behind marble, backlighting a fully opaque panel, or one section glowing while the next does not. If the panel does not glow evenly in a sample test, light it from the front instead.
LED and marble-look panels is a combination I get asked about constantly, and it has a narrow band between gorgeous and tacky. Everything below is my trade opinion, drawn from field notes rather than lab data.
What looks good: warm LED behind a panel with some translucency in its lighter areas: the panel glows softly and the veining stands out in silhouette. Coves, floating niches, the gap behind a floating TV panel. The light must be indirect, so only the glow shows. 2700-3000K warm white keeps marble finishes looking like stone; cool white (5000K+) turns warm Calacatta Oro greenish and clinical in my experience.
What looks cheap: a visible LED strip at the panel edge: a hard line of light instead of a glow. Backlighting a fully opaque panel: a halo around the edges with no glow through the face, which reads as a mistake. RGB color-cycling behind marble, which reads as a gaming setup. Uneven backlight where one section glows and the next does not. My rule: if the panel does not glow evenly in a sample test, do not backlight the wall. Light it from the front with spots instead.
One more installer note: backlighting a book-matched wall doubles the drama and doubles the visibility of install imperfections. Backlit walls need the flattest substrate and the tightest seams in the house. If your wall is wavy, fix the wall first or skip the backlight.
Colored marble vs the safe choice
TL;DR: Plain Carrara-style is the safe choice: soft gray veining on white fights with nothing and you will not tire of it. The 2026 momentum is with dramatic colored stone: deep green, burgundy Viola, black-gold, warm beige with bold veins. My trade opinion: colored finishes work as one accent wall in a quiet room; as all four walls they are a commitment most buyers regret by year three. Viola is the colored finish I am most comfortable recommending for a main wall.
Plain Carrara-style, soft gray veining on white, is the safe choice, and I say so openly. Least likely to fight with your furniture, your art, or a future paint color. Carrara-style is where I steer the unsure buyer.
But the 2026 design momentum is with dramatic, colored stone. PureWow calls "veined green marble... [emerald's] grown-up, architectural successor": Calacatta Turquoise, Verde Alpi, blue-green marbles (PureWow). A 2026 trends piece points to dark and colored marble ("black, deep gray, green, or multicolored") on feature walls as a visual anchor (Medium). In Florida, an Orlando remodel guide lists emerald, burgundy, royal blue, amber, and gold trending: "deep green marble with brass hardware" (Revive Design and Renovation). Calacatta Viola's burgundy veining is called out as a 2026 kitchen trend: worktop, splashback, full-height cladding (Ideal Home). And the warm shift: "travertine, warm beige marbles... golden, burgundy, or forest-green veining" (Medium). The honest synthesis: plain gray-on-white Carrara reads safe and slightly dated in 2026, while Viola, green, black-gold, and warm beige or taupe are the fashion-forward picks.
My taste guidance, as opinion: colored finishes (green marbles, black with gold veining, warm beige) work best as a single accent wall in an otherwise quiet room and demand discipline in everything around them. A black-gold marble wall behind a TV with warm LED is dramatic; the same finish on all four walls is a commitment most buyers regret by year three. Calacatta Viola sits in between: colorful enough to be a statement, light enough to live with. It is the colored finish I am most comfortable recommending for a main wall. For any bold finish: tape the sample to the wall where the panels will go and live with it for a full week: morning light, evening light, a gray rainy day. Bold veining that thrills on day one can fatigue by day seven. (And a brief texture note from the trade: wood-slat walls were the 2024-2025 texture that defined a thousand living rooms; they are already reading dated, which is exactly why a stone-look wall with staying power is worth the conversation. I compare the two most popular non-marble profiles in my fluted vs wood slat guide.)
Peel-and-stick vs pro-installed: where DIY disappoints
TL;DR: Peel-and-stick marble film is a renter's product. Adhesion fails on textured walls, edges curl, alignment errors of 1/16 inch compound across the wall, and removal can mean flaking tiles off shard by shard. Rigid 4x8 or interlocking composite panels are a different product class: adhesive plus mechanical fixing on a prepped wall, in an afternoon.
The honest gap, from people who lived it. On adhesion: "The adhesive won't stick properly and can lead to peeling over time" on textured walls. Most walls are more textured than owners think (expert Rees, via Realtor.com). Fresh paint needs 2-4 weeks to cure, or the adhesive absorbs moisture and fails (same source). On application: "Try to avoid overstretching the material as you apply it, as this can lead to misaligned patterns, stretching or bubbling" (same source). The cautionary tale: one writer's "slight slippage turned into outright curling at the edges": pieces bubbled, sticky edges became "dirt and crumb magnets," and removal meant flaking tiles off "shard by shard, with the top decorative layer sometimes separating from the base" (Apartment Therapy). On alignment: "Alignment errors of even 1/16-inch will magnify into uneven rows that are readily apparent": dry-fit 10-15 tiles first (Livingetc). The same writer replaced most tiles after a year; a pro says well-laid peel-and-stick lasts "5-7 years before noticeable wear becomes visible" (same source).
The pro difference is a different product class entirely. Rigid 4x8 or interlocking composite panels typically go up with construction adhesive and/or mechanical fixing on a prepped flat wall in an afternoon: planned cable channels, the TV mount on structure, seams sequenced. One is a film you stick on; the other is a wall you build. If you are renting or staging, peel-and-stick is the honest answer. If you are living there for a decade, it is not.
My verdict for South Florida homes
TL;DR: Rigid marble-look panels are the honest buy for conditioned living spaces: satin gloss, sequenced panels, samples tested in your light. Bathrooms want waterproof PVC or composite; fireplace walls want heat planned first; porcelain is the premium faux if you will pay for the crew.
Here is my installer verdict, and it follows everything above.
If your wall is a living room, dining room, or entry in a conditioned home, and you love the Calacatta look without the stone bill, a rigid marble-look panel wall is the honest buy. Choose satin gloss for the main wall, sequenced panels with no visible repeat, and a sample that passed the light test, the distance test, and the seam test. Approve the book-match layout before anyone cuts anything.
If the wall is a bathroom with real steam or a splash zone, stay in PVC or WPC: waterproof, grout-free, no MDF anywhere near water. Details in my humidity guide.
If the wall is behind an electric fireplace or a TV with a fireplace below, plan the heat path first: clearances, forward-blowing heat, the mount on structure, cables in channels before the first panel. I covered fireplace-specific walls in my fireplace accent wall guide.
If you want porcelain's realism and will pay for the skilled setter and the wet-saw work, porcelain slabs are the closest faux to stone. If you want the budget sheet and will do the prep yourself, PVC 4x8 sheets are the entry ticket. Bamboo-composite is the middle path I install: rigid board, interlocking seams, and the thickest edge in the category.
What I will not tell you: that panels are "indistinguishable" from marble (they are not – they read as stone from normal viewing distance, and that is the honest sentence), that any rating on a spec sheet is interchangeable with ASTM E84 (it is not), or that a peel-and-stick film is a ten-year wall (it is not). A wall is a ten-year decision. Make it with your eyes open and samples in your hands.
Sources
- NewGen Depot, Calacatta Manhattan PVC marble sheets (4x8 ft / 3 mm / 32 sq ft; $70, $2.19/sq ft US retail; Class A fire rating claimed – vendor claim, certificate not verified). newgendepot.com
- Bigelow Designs, marble wall panels review (4x8 sheet ~22 lbs; 10x8 ft wall $400-$900 vs real Calacatta $12,000-$18,000; real marble $150-$400/sq ft installed – single-source designer claim; gloss realism and substrate reveal; repeat). bigelowdesigns.com
- Coohom, PVC wall tiles price guide (US: $1-$6/sq ft, mid-tier $2-$3; install $2-$5; all-in $3-$8; NAHB 2024 data cited). coohom.com
- Coohom, marble flooring cost guide (US: $8-$25/sq ft installed, national average ~$15). coohom.com
- CooWin WPC, PVC wall panel pricing (PVC installed $7-$40/sq ft – broad vendor range, vendor claim). coowinwpc.com
- Wayfair, PVC marble panel reviews (customer friction: liquid nails let panels slip; nail gun splintered plastic – paraphrase). wayfair.com
- uksignboards trade forum (installer warning: 3 mm sheets warp at large sizes, use 5 mm or thicker – paraphrase). uksignboards.com
- Consmos, bamboo charcoal WPC marble wall panel (bamboo fiber/PVC/wood powder/calcium powder makeup; 1220x2400/2800/2900 mm, 5/8/18 mm; B1 fire rating is Chinese GB 8624, NOT ASTM E84; E1 formaldehyde). consmos.en.made-in-china.com
- Novadecors, bamboo wood fiber wall panel (high-density bamboo fiber and polymer composites; B1 fire retardant on Chinese spec). novadecors.com
- FindSupply, PVC marble sheet / bamboo veneer WPC panel (tongue-and-groove flat/V seams; 20-30 m2/day per carpenter – vendor claim). findsupply.com
- BestSuppliers, mirror veneer bamboo charcoal WPC panel (slot, U-slot and seamless splicing options). bestsuppliers.com
- BestSuppliers, 4x8 ft bamboo charcoal wood veneer panel (8 mm; $9 wholesale – China factory price, not US installed). bestsuppliers.com
- Alibaba, charcoal panel showroom (China wholesale pricing roughly $4.50-$20/panel – factory prices, not consumer prices). alibaba.com
- Ecer, high-glossy marble texture WPC wall panel (1220x2440/2800, 5/8 mm; -40C to 60C temperature resistance – vendor claim). ecer.com
- NewHomeSource, large-format porcelain slabs (US: $8-$15/sq ft materials plus installation vs marble $9-$24; thinner than marble, no sealant; installer Ken Davis quote). newhomesource.com
- DAD Improvement, bathroom wall tile pricing (US large-format tile labor $5-$15/sq ft). dadimprovement.com
- Edison Stone (Australia), Stile porcelain slab cost (AU: $50-$120/sq ft installed – Australian geography, not US). edisonstone.com.au
- American Stone Center, marble slab cost guide (US marble wall cladding $50-$150/sq ft incl. stone, labor, cutting, support). americanstonecenter.com
- Medium, marble countertop cost factors (Calacatta $175-$200, Statuario $50-$125, Carrara $40-$50 material-only per sq ft). medium.com
- Medium, marble vs marble-look guide (faux pros/cons; pattern repeat on close inspection). medium.com
- Acemar Stone, Statuario vs Calacatta (veining differences; bastoni; Statuario top price). acemarstone.com
- Acemar Stone, Calacatta marble kitchen guide (Calacatta vs Calacatta Gold veining). acemarstone.com
- Acemar Stone, best Italian marble (Statuario top price; veining busy-ness). acemarstone.com
- Acemar Stone, Calacatta Viola kitchen guide (Viola vs Monet veining). acemarstone.com
- Acemar Stone, Calacatta Viola guide (purple/burgundy veining; rarity). acemarstone.com
- marble.com (dev), Calacatta Oro article ("Calacatta Oro typically features more gold"). dev.marble.com
- Amso International deck via SlideServe (Oro honey veining; Gold taupe/gold; Belga gray cobwebs – single-source descriptions). slideserve.com
- Bhandari Marble via Medium (Statuario refined vs Calacatta dramatic/gold). medium.com
- Elsa Home & Beauty (Australia), Calacatta Viola guide (deep purple/burgundy; pricier). elsahomeandbeauty.com.au
- The Spruce, tacky tile trends (designer Natalia De Arteaga quote on heavy-black-vein faux; designer Adriena Daunt on large slabs reading realistic). thespruce.com
- BestBuy93, decorative wall panels guide (subtle pattern key; busy prints read artificial). bestbuy93.in
- Residence Supply, decorative wall panel buying guide (raking light as lie detector; print flattens in raking light). residencesupply.com
- KitchenSty, peel-and-stick backsplash guide (blurry prints read fake; thickness matters). kitchensty.com
- Houzz forum, seam help (fabricator standard: well-done seam looked-for-to-notice, razor-blade tight – semi-public). houzz.com
- Montrose Marble and Granite, precision seams (good seam never 100% invisible; under 1/16 inch wide). montrosemarbleandgranite.com
- Houzz forum, book-match layout advice (approve layout before cutting – paraphrase, semi-public). houzz.com
- Houzz forum, picking tile lessons (single-sample warning; V1-V4; distrust marketing photos – semi-public). houzz.com
- LinkedIn, bookmatching as 2026 luxury trend (mirrored veining, symmetrical composition). linkedin.com
- WallPanelPVC, WPC cladding for harsh weather (composite doesn't absorb water; coastal/tropical climates). wallpanelpvc.com
- RunTai WPC, bamboo charcoal veneer board (waterproof substrate avoids swelling; anti-mold for humid seaside – vendor claim). runtaiwpc.en.made-in-china.com
- HYSmartHome, WPC wall panels (no warp/crack/absorb; humid areas – vendor claim). hysmarthome.com
- Minty Tunnel, the end of grout (grout porous – absorbs water, cracks; panels continuous barrier). mintytunnel.com
- ShowerPanLiners, wall panels vs tile benefits (no grout = no mold/scrubbing; faster install). showerpanliners.com
- CoralToday, modern bathroom wall panels guide (grout-free as the number-one panel advantage). coraltoday.com
- CSICreative, wall cladding fire safety standards (ASTM E84 Class A = flame spread 0-25, smoke 0-450). csicreative.com
- ICC, International Fire Code 2015 Chapter 8 (interior finish rules for wall coverings incl. expanded vinyl). codes.iccsafe.org
- Electric-Fireplace.co.uk, media wall electric fireplace guide (30-45 cm clearance; up to 2 kW; flame-only mode). electric-fireplace.co.uk
- Tom's Guide, TV placement warnings (heat shortens component lifespan, degrades screens, warps adhesives; mantel/heat shield mitigation). tomsguide.com
- Medium, DIY media wall guide (electrics are space heaters; blower position varies; buy forward/down-blowing – paraphrase, 2026). medium.com
- PureWow, greens replacing emerald (veined green marble as 2026 successor; Calacatta Turquoise, Verde Alpi). purewow.com
- Medium, 2026 marble trends (dark/colored marble as natural art; matte finishes reducing glare). medium.com
- Revive Design and Renovation, Orlando marble trends (FL: emerald, burgundy, royal blue, amber, gold trending). revivedesignandrenovation.com
- Ideal Home, Calacatta Viola kitchen trend (burgundy veining as 2026 kitchen trend). idealhome.co.uk
- Floors to Walls, marble wall panels bathroom trends (marble wall panels among top 2026 bathroom trends). floorstowalls.co.uk
- Medium, Australian marble furniture trends (warm palettes: beige, gold/burgundy/green veining 2026). medium.com
- FGD Glass, lightweight marble cladding alternative (view samples under project lighting). fgdglass.com
- Medium, marble tile guide for designers (warm light enriches beige/cream; cool light emphasizes white/gray). medium.com
- Realtor.com, peel-and-stick tips (adhesive failure on textured walls; fresh paint needs 2-4 weeks cure; avoid overstretching). realtor.com
- Apartment Therapy, peel-and-stick marble tale (curling edges, bubbling, dirt-magnet sticky edges, shard-by-shard removal). apartmenttherapy.com
- Livingetc, peel-and-stick floor advice (1/16-inch alignment errors compound; well-laid lasts 5-7 years). livingetc.com
- WOW Walls Studio, Wall Panels Cost 2026 – panel cost context.
- WOW Walls Studio, Wall Panels in Florida Humidity: MDF vs PVC – core-by-room material logic.
- WOW Walls Studio, Fireplace Accent Wall Panels – fireplace-wall heat and planning rules.
- WOW Walls Studio, Fluted Panels vs Wood Slat Panels – the two non-marble profiles compared.