Travertine Accent Wall Panels: Real Stone vs Composite (2026)
Real travertine vs travertine-look composite panels: weight, seams, sealing, humidity, honest costs, and tests that tell them apart.
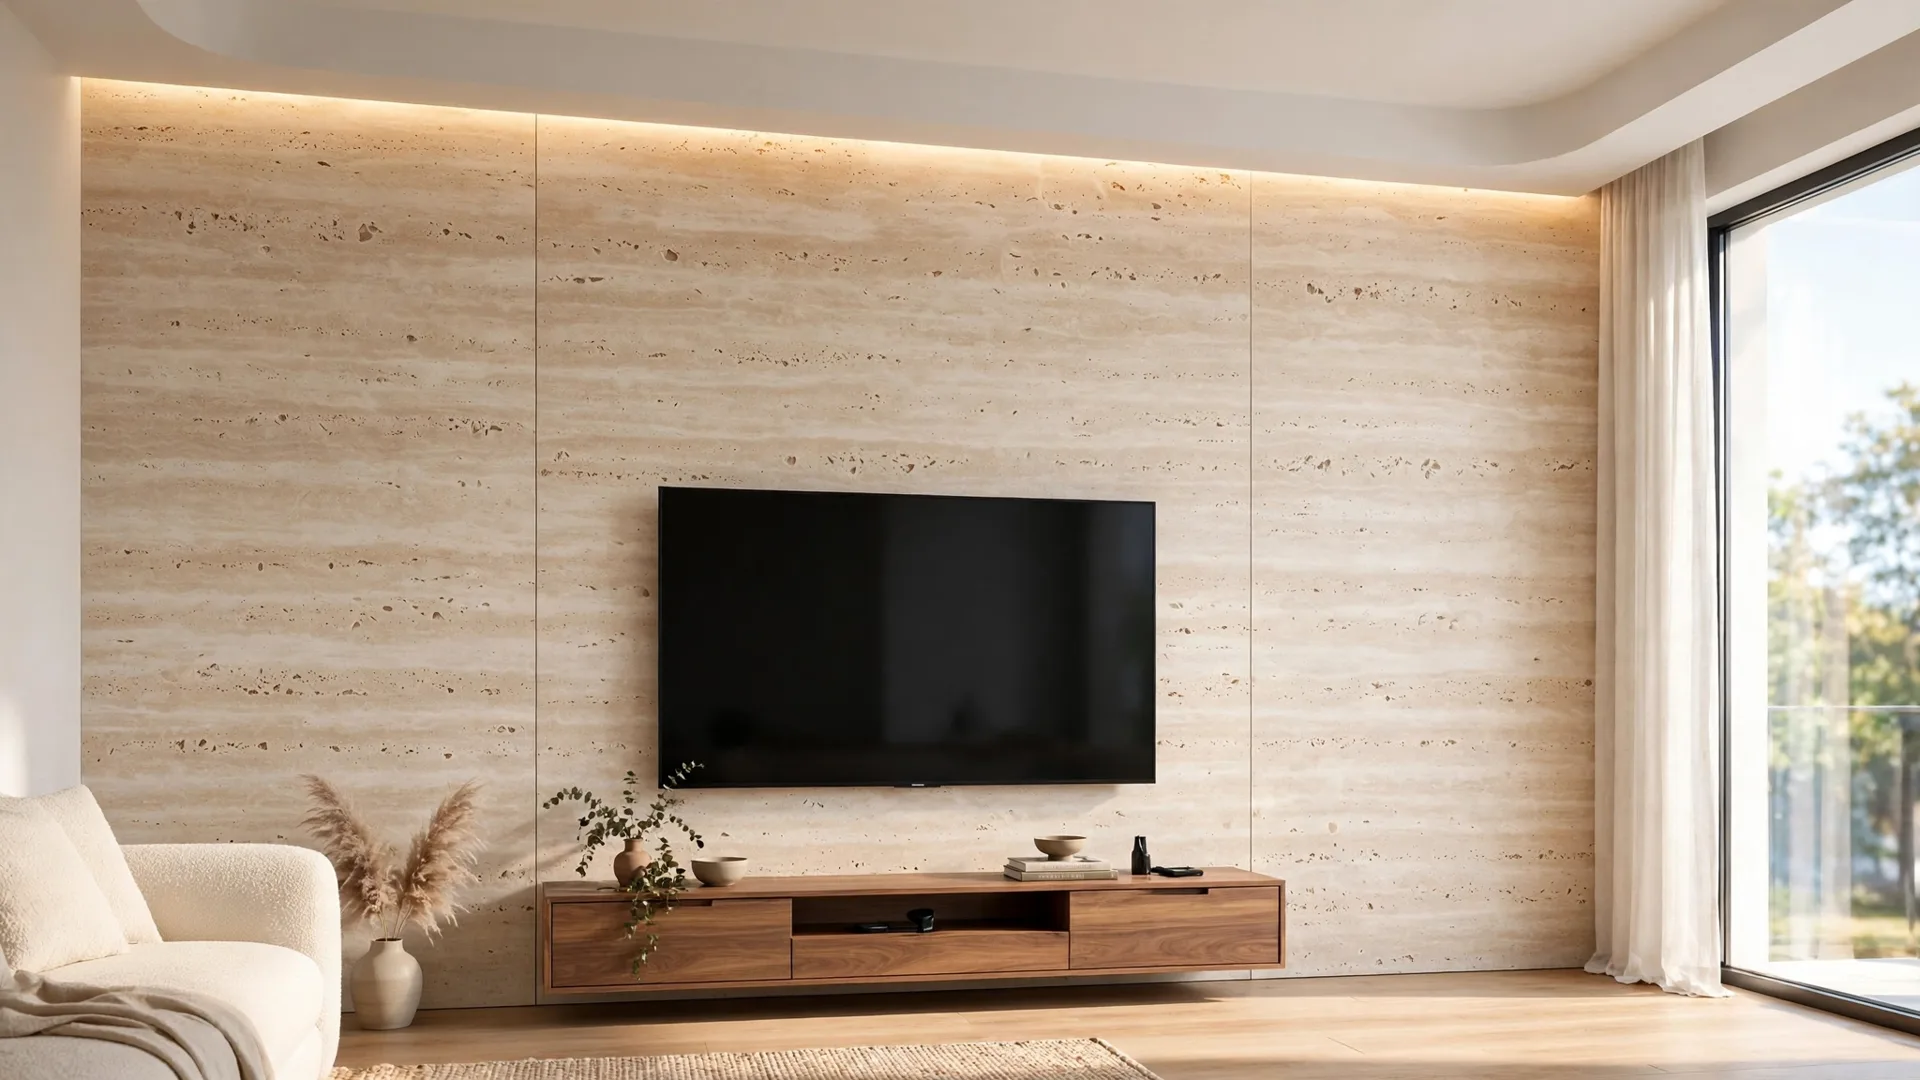
Buyers show me the same photo every month: a warm beige stone wall, floor to ceiling, soft pits in the surface, a TV floating in the middle. Then comes the real question – should that wall be real travertine, cut from a quarry, or a travertine-look composite panel that gives the same read at a fraction of the weight? I install wall panels for WOW Walls Studio here in South Florida, and I sell the panel side of that choice, so read my verdict with that in mind. This comparison covers travertine wall panels in both forms. What I can give you is the evidence, straight: what the stone is, what the panel is, what each one asks of your wall and your weekends, and what the published prices do and do not prove.
My position, up front: travertine itself is a timeless material, and the dated look people fear belongs to a specific era of small tiles, heavy grout lines (grout is the cement filler packed between tiles), and orange-toned stone. A large-format wall in a warm honed travertine read (honed means smooth and matte) is a different animal. The choice between real stone and a look panel is a choice about weight, seams, sealing, and upkeep. I will walk through each one below, with the sources named, so you can decide which set of trade-offs fits your room.
What real travertine is, and why it came back
TL;DR: Travertine is a limestone formed at mineral springs, mostly calcium carbonate, and the small pits in its face are part of how it formed. The stone never really left. What came back for 2026 is the large, quiet format: big pieces, minimal joints, warm matte color, in place of the small busy tile grids people now call dated.
The formation story explains everything else in this article. Travertine is a freshwater limestone deposited around mineral springs, especially hot springs, built by rapid precipitation of calcium carbonate (Wikipedia). The US Geological Survey describes the same chemistry at Yellowstone: the stone consists of calcite and aragonite, both forms of calcium carbonate, precipitating as hot spring water reaches the surface and releases dissolved carbon dioxide (USGS). A Natural Stone Institute handout adds the detail buyers ask about most: the voids in the face come from gases trapped during formation – they are normal in true travertine, and fabricators either fill them or leave them open (Natural Stone Institute handout).
That chemistry sets the personality of the material. Calcium carbonate is a soft, reactive family of stone – the same family as limestone and marble – so travertine is warm and workable, porous by nature, and sensitive to acids. Its colors stay in a warm band: white, tan, and cream are the classic tones, with rusty, gray, gold, and red varieties at the edges (Wikipedia; Better Homes and Gardens). Ivory and cream are the most popular retail colors, silver types lean cool gray, and walnut types lean rich brown (Solidshape).
Why the comeback, then? Trend coverage for 2026 describes a move toward large, unbroken stone surfaces with minimal grout – one bathroom trends guide calls the pattern stone drenching and names travertine, with its natural pits, as a leading material for that look (Hackrea). A tile industry article frames the same shift as a travertine comeback, with the look increasingly re-created in lower-maintenance formats (Why Tile). Read those two together and the pattern is clear: demand is for the travertine read at a larger, calmer scale. Both real stone and good look panels are answers to that demand. They are very different answers, and the next section separates them.
The two ways to get the travertine look
TL;DR: Real travertine reaches your wall as individual stone tiles, 3/8 to 1/2 inch thick, set in mortar with grout joints and sealer. A travertine-look composite panel reaches it as a large light sheet: a bamboo composite core under a travertine film finish, fixed as a planned composition with a few joints and no grout or sealer. Same photograph, different wall.
Real stone first. A travertine wall tile is a slice of the quarry stone itself, with the pits, tonal shifts, and small imperfections the formation left in it. Tiles typically measure 3/8 to 1/2 inch thick, against ceramic wall tile as thin as 1/4 inch (Better Homes and Gardens). Two retail specs land in that band: a filled, honed 12x24 inch tile at 0.38 inch (Solidshape), and a 12x24 inch honed, filled tile at 0.5 inch (Shades of Stone). Every tile is a separate piece of geology, so no two are identical – a point that matters later, when we talk about dry-laying and batch variation.
The panel is a manufactured sheet. The travertine finish is one film family on the bamboo composite core I install: documented finish films for the travertine line include PP, PVC, PET, and metal film, over the same core family that carries marble, wood, solid-color, and 3D designs (E-Well). One maker describes its travertine surface as having layered pores (E-Well). Hold that description at its true size: on a panel, the pores are a printed and embossed pattern that repeats across sheets. On real stone, the pores are actual holes, each one placed by escaping gas thousands of years ago, and they never repeat. That single difference – real voids versus a picture of voids – drives most of the table below. The core itself, its recipe, and its naming maze are covered in my bamboo composite wall panels guide; here I keep the focus on the travertine decision.
| Factor | Real travertine tile | Travertine-look composite panel |
|---|---|---|
| What it is | Quarried limestone, cut into tiles (Wikipedia) | Bamboo composite core with a travertine film finish (E-Well) |
| Pores | Real voids from trapped gas, filled or left open (Natural Stone Institute handout) | Printed and embossed pore pattern, repeats by design (E-Well) |
| Weight | 6.00 lb per sq ft for a listed 12x24 tile (Nest Tile) | 3.0-6.0 kg per sq m for the panel family (Mossen Decor) |
| Joints | Grout grid between every tile | A few planned joints between large sheets |
| Surface protection | Penetrating sealer, before and after grout (Home Depot guide; HomeGuide) | No sealer; the film face is the finished surface (E-Well; Kosmos) |
| Variation | Every tile differs; dry-lay and blend boxes (Nest Tile) | Sheets match by design; watch for visible pattern repetition instead |
| Upkeep | pH-neutral cleaners only, reseal on a cycle (MSI; Nest Tile) | Damp cloth and diluted neutral cleaner (Kosmos) |
| Warranty evidence | No lifespan warranty for tile found in my research | 3 years on the E-Well travertine lines (E-Well) |
One honesty note before we go deeper: a good panel reads as travertine from normal viewing distance, across a room, in warm light. It does not survive a fingertip. Real stone is cool to the touch, sounds dense when you tap it, and shows its geology in the cut edge. I run those checks with clients in the sample tests at the end of this article, and I suggest you run them too – on both materials, with your eyes open about which one you are holding.
Cuts and finishes in plain English: vein cut, cross cut, filled, unfilled, honed
TL;DR: For a modern feature wall, my default specification is filled and honed. Vein cut gives you calm horizontal or vertical lines, cross cut gives you a softer cloudy face, filled means the natural pits are leveled smooth at the factory, unfilled leaves them open as texture, and honed means a smooth matte surface. On the panel side, the same words describe a printed pattern, and matte is the only read I recommend.
Real travertine gives you three decisions, and each one changes the wall.
The cut decides the pattern. Stone is sliced from the block in two directions. Vein cut slices along the natural layers, so the face shows long linear bands and stripes – one supplier describes vein-cut Roman travertine as beige to light brown with parallel veins, made for wall cladding (Acemar Stone). Cross cut slices across the layers, so the face turns cloudy and swirled, with soft circular movement and no dominant direction (Why Tile; Acemar Stone). A second supplier makes the practical point: vein direction can be planned, horizontal to widen a wall visually, vertical to add height (Karimi Stone). My trade opinion: vein cut, run horizontally, is the cut behind almost every calm travertine wall photo clients bring me. If you choose vein cut in real stone, lock the direction before ordering, because every tile on the wall has to agree.
The fill decides how smooth the face is. Filled travertine has its natural holes leveled at the factory with a cement or resin filler, ground flush with the face during finishing (Natural Stone Institute handout). One retailer describes the fill as color-matched cement epoxy, giving a smoother surface that is easier to clean (Nest Tile). Unfilled travertine leaves the cavities open – a textured, rustic face that reads beautifully and collects dust and soap residue in those pits, which is why the same retailer calls it the higher-effort choice indoors (Nest Tile). Angi makes the budget version of the same point: unfilled tile can cost less at purchase and more in upkeep over time (Angi). For a living room or TV wall, filled is my default. Unfilled is a deliberate texture choice, best kept away from splash zones.
The finish decides the sheen. Honed is smooth and matte, with no shine (Shades of Stone; HomeGuide). Polished is smooth and glossy, and it shows veining, light, smudges, and etch marks the most (Shades of Stone). Tumbled softens the edges for a worn, antique look (AGL). Brushed runs a wire brush over the face for a matte, slightly textured feel (HomeGuide; Acemar Stone). For walls, honed is the finish that matches the 2026 read: warm, quiet, low glare under LED light.
Now translate those words to the panel. A travertine-look panel has no cut, no fill, and no honing – it has a photograph of all three, printed on film, sometimes with embossing that follows the pore pattern. That is why I insist on matte for this finish: a glossy travertine print contradicts the stone it imitates, and gloss is where printed finishes usually give themselves away. The sibling finish with the opposite problem – gloss as a live choice, veining as the whole point – is covered in my marble-look wall panels guide.
Weight, seams and installation: a mortar job against a planned panel job
TL;DR: A real travertine wall is a wet trade: heavy tiles at about 6 lb per sq ft (Nest Tile), mortar, a grout grid, and sealer before and after grouting. A panel wall is a dry, planned job: sheets at 3.0 to 6.0 kg per sq m (Mossen Decor), a drawn layout, a few joints placed where the eye expects a break, and loads carried by the structure behind the panel – the same rule as every panel wall I build.
Start with weight, because weight decides the crew, the schedule, and the wall prep. Nest Tile lists its 12x24 inch travertine tile at 6.00 lb per sq ft (Nest Tile). A second retailer spec corroborates it by arithmetic: 12 lb per piece for a 12x24 inch tile, which covers 2 sq ft, is the same 6 lb per sq ft (Shades of Stone). Do the wall math with me: 100 sq ft of real travertine tile carries roughly 600 lb of stone before mortar. The panel family, at 3.0 to 6.0 kg per sq m (Mossen Decor), works out to roughly a fifth to a tenth of that per area. In the same units, real tile at 6 lb per sq ft converts to about 29 kg per sq m (arithmetic from the figures above). One installer can carry a panel sheet. Nobody carries 600 lb of stone tile in one trip, and the wall behind it has to be flat, sound, and ready for that load path.
The installation sequences barely resemble each other. For real stone, Better Homes and Gardens gives the classic order: a clean, level base, tiles dry-arranged first to check alignment and color, then mortar, setting, grout, and sealing (Better Homes and Gardens). Angi adds the working details: a chalk line and a level, a wet saw for cuts, light-colored thinset (the cement adhesive that bonds tile to the wall) or grout to suit the creamy stone, a rubber mallet for setting, and sealer when the job is complete (Angi). Sealing has its own timing: a Home Depot installation guide for natural stone calls for a penetrating sealer before grouting, grout after 24 hours, and grout haze cleaned off right away (Home Depot guide). HomeGuide explains why the labor rate follows the material: the weight demands a level base, the stone chips at cuts, and the porosity needs careful sealer work, often in more than one coat (HomeGuide).
Seams are the visible signature of each system. Real tile shows a grout grid – hundreds of joints on a feature wall, each one a line the eye reads and a channel that holds dust and moisture. Grout color and joint width are design decisions, and on the large-format walls clients want now, the grid is usually the thing they are trying to escape. A panel wall shows a few vertical joints between large sheets. I plan those joints on a drawing before the first sheet goes up, placing them where the eye expects a break: at a shelf line, a niche edge, or a change of plane. The joint never disappears, so I put it somewhere honest. The full method – drawing first, cable channels, LED coves, shelves fixed to structure – is the same one I use on the media walls in my TV accent wall guide.
One rule carries over word for word from every panel job: the panel carries no load. A TV mount passes through the panel into studs or into blocking fitted behind the drywall, planned before the layout. Shelves fix to structure the same way. With real stone tile, the equivalent discipline is the substrate, the wall surface everything bonds to: mortar and stone over a wall that was never leveled or dried will telegraph every flaw and can fail as a system. Different material, same lesson – the finish is only ever as good as the wall behind it.
Sealing and acid: the upkeep real stone asks for
TL;DR: Real travertine is porous, so it gets sealed at installation and resealed on a cycle – and the published cycles disagree with each other, running from every year to every 3 to 5 years. No sealer makes travertine acid-proof: lemon, vinegar, and acidic cleaners etch the surface, sealed or not. The panel face needs no sealer at all, and that gap in upkeep is the strongest practical argument for the panel.
Porosity first. The surface absorbs liquids, so it can stain, and sealing plus regular care are part of owning the stone (Better Homes and Gardens). That is why the sealing sequence in the last section matters: seal before grout so grout pigment stays out of the pores, then seal again after the grout cures (HomeGuide; Nest Tile). A penetrating sealer soaks into the stone and slows absorption, which buys you time to wipe a spill. It does not make the stone stain-proof, and it does not change the chemistry below.
Etching is the limit buyers rarely hear about in the showroom. The consumer site of the Natural Stone Institute, Use Natural Stone, explains the test its experts use: drops of lemon juice or vinegar left on a sample for 5 to 10 minutes, then checked at a low angle for dulling (Use Natural Stone). Stones built from calcite – marble, limestone, travertine, and onyx are its named examples – etch on contact with common acids, and the site states plainly that sealers do not protect a stone from acid, which is why the test works the same on a sealed sample (Use Natural Stone). An etch is a dull mark where acid dissolved a microscopic layer of the surface. On a wall, the practical risks are acidic cleaners, some tile and grout cleaners, and splashes near a bar or a kitchen. Keep every cleaner pH-neutral – MSI advises a pH-neutral cleanser made for natural stone, followed by a thorough rinse and a dry with a soft towel, and no ammonia, vinegar, or bleach products (MSI).
Now the reseal cycle. I am giving it to you the way the sources give it, because they do not agree. Better Homes and Gardens advises resealing annually in its care text, and every 3 to 5 years in the FAQ on the same page (Better Homes and Gardens). MSI advises sealing once a year, more often for lighter tile (MSI). Nest Tile and the HomeGuide FAQ both land on every 1 to 2 years for high-traffic or wet residential use (Nest Tile; HomeGuide). A US sealer brand gives every 1 to 3 years by traffic and exposure, with two field signs that the sealer has worn: water darkening the stone, and water absorbing fast instead of sitting on the surface (Tile Armor). I will not average those into a fake single number. For a dry interior feature wall – no foot traffic, no daily splashing – the longer end of the range is the plausible one, and the water test is your honest gauge: sprinkle water, watch whether it darkens the stone quickly, and reseal when it does. That is judgment built on the Tile Armor signs, labeled as judgment.
The panel side of this section is short. The film face is a finished surface: no porosity to seal, no reseal cycle, no etching chemistry, because there is no calcium carbonate at the surface to react. What the panel asks instead is gentler cleaning, sealed cut edges, and respect for its heat limit – the next two sections. If the sealing calendar above is the moment this decision tips for you, that is a legitimate reason to choose the panel, and I would rather you choose it for that reason than for a photograph.
Florida humidity, bathrooms and fireplaces: where each option belongs
TL;DR: In a conditioned Florida living room, both walls are at home. In splash zones, filled and sealed real stone handles water with discipline, and the panel belongs on bathroom walls outside the wet zone with its cut edges sealed. Inside a shower, both need a real waterproofing system behind the face. Near a fireplace, real stone wins on heat: the panel has a documented care limit of 50 degrees C (Kosmos), and no travertine name changes that.
Humidity is the background condition of every South Florida home, and it tests the system behind the face more than the face itself. Real travertine in a shower can work – Better Homes and Gardens notes that it wipes clean easily in showers and requires thorough sealing to prevent water damage, and that it deteriorates under water exposure without proper care (Better Homes and Gardens). Nest Tile gives the same answer with the finish attached: suitable for bathrooms and showers when properly sealed, with honed or brushed finishes preferred in wet areas (Nest Tile). Read both carefully and the condition is always the system: waterproofing behind the stone, sealed stone and grout at the face, and a home that stays conditioned. Porous stone plus porous grout is a managed system, never a careless one. The core-by-core version of this logic is in my Florida humidity guide.
The panel has the mirror-image warning. Its face shrugs off humid air, and its weakness is moisture arriving from behind or entering at a cut edge. A disadvantages guide for PVC panels warns that moisture trapped behind paneling can support hidden mold growth, citing CDC guidance on concealed mold (Coohom). I apply that warning to any impermeable covering over a damp wall, stone included: fix the leak, dry the substrate, then cover it. Paneling over a wet wall hides the stain and keeps hiding what grows behind it. My placement rules for the panel are the ones from my other guides: conditioned rooms yes, bathroom walls outside wet zones yes with sealed edges, inside a shower no.
Fireplaces separate the two materials cleanly. Better Homes and Gardens lists heat resistance among travertine strengths – the stone handles high temperatures well, which is part of why it suits fireplaces and sunlit patios (Better Homes and Gardens). Mortar-set real stone is the lower-risk surround on heat grounds. The panel carries a care limit from its distributor guidance: keep it under 50 degrees C and away from heat sources over that line (Kosmos) – 50 degrees C is 122 degrees F. A fireplace surround can pass that limit near the opening, and I sourced no clearance numbers in this research, so I print none: clearances come from your specific fireplace manual and local code, checked before anyone installs anything. The full clearance and thermometer method lives in my fireplace accent wall guide.
One fire-language caution belongs here, because fireplace walls attract it. The B1 grade on the panel spec sheet is a Chinese GB 8624 classification. It is a separate system from the American ASTM E84 test and does not convert into an American Class A rating – a technical bulletin from ALPOLIC Americas warns that national fire systems are not interchangeable and that a foreign rating gives no assurance of passing US tests (ALPOLIC Americas). In my research for this article and the one before it, no ASTM E84 report for this panel family was found. Ask for the report for the exact product before anyone uses fire words on your project.
The honest cost picture: published stone prices, one factory price, and a gap
TL;DR: US guides put installed real travertine tile at $5 to $47 per sq ft (Angi), with standard-grade work at $17 to $35 per sq ft installed (HomeGuide) – wide ranges, because grade, finish, pattern, and region move the number. For travertine-look composite panels, the only documented price is a China factory price of US$2.35 to $4.32 per sq m (E-Well). No US installed price for the panel was found, so this article invents none: your panel number comes from a local quote.
Real stone numbers first, with their sources and their limits attached. Angi, in its 2026 cost guide updated July 9, 2026, puts travertine tile installation at $5 to $47 per sq ft depending on tile quality and finish, and $600 to $3,200 for a 100 sq ft project (Angi). Its labor band is $3 to $17 per sq ft, and its material bands run from commercial tile at $2 to $4 per sq ft through standard at $5 to $15 to premium at $5 to $30 (Angi). Finish moves material cost inside those bands: tumbled and honed at $5 to $15, polished and brushed at $8 to $30, filled at $10 to $20 per sq ft (Angi). Removal of an existing surface and substrate repairs sit outside the headline number, at $1 to $7 and $2 to $10 per sq ft in the same guide (Angi).
HomeGuide lands in a similar place by a different route. Standard-grade travertine material runs $7 to $15 per sq ft, and installed cost runs $17 to $35 per sq ft – $1,700 to $3,500 for 100 sq ft (HomeGuide). Its grade table puts premium tile at $20 to $50 per sq ft installed and commercial grade at $14 to $27 installed (HomeGuide). Its labor band, $10 to $20 per sq ft, sits higher than the Angi band, and I flag that disagreement instead of picking a winner: neither guide is a South Florida wall quote. Better Homes and Gardens gives the widest simple version: tile at $3 to $30 per sq ft, with professional installation adding $5 to $15 per sq ft, and an explicit warning that prices vary widely and local quotes are the way to pin yours down (Better Homes and Gardens). These are tile guides written mostly around floors and general tile work. Vertical feature walls add cutting, trim, and layout time, so treat every figure here as a budgeting range for real stone, never as a quote.
Why do the ranges run so wide? The guides name the same drivers: grade, finish processing, pattern complexity, color rarity, tile size, and substrate preparation (Angi; HomeGuide). Common beige and cream sit at the affordable end, gray and gold in the middle, and rare red, black, and blue at the top (HomeGuide). A honed, filled, beige vein-cut wall in a straight layout and a polished rare-color wall in a complex pattern are both "travertine" in a search box and entirely different projects in a quote.
Now the panel price, kept to its proper scale. The travertine carbon crystal line lists at FOB US$2.35 to $4.32 per sq m, at a 50 sq m minimum order (E-Well). FOB means the price at the factory gate in China, in bulk. It leaves out freight, duty, US warehousing, breakage, trim, adhesive, labor, and the installer who stands behind the finished wall. Placing that factory figure next to the Angi installed range would be a rigged comparison, and any site that does it is selling you something. The honest statement is the gap itself: no credible US installed price for travertine-look composite panels – material plus labor, per sq ft or per wall – turned up in this research. What drives yours is knowable: wall size and prep, number of sheets and joints, trim, shelves, LED coves, and cable work, priced by a local crew looking at your actual wall. For the verified published benchmarks across panel types generally, see my wall panels cost guide, and get this project priced as a written, itemized quote.
One lifespan note belongs in a cost section, because sellers use it as a price argument. Angi claims properly installed and maintained travertine can last 75 to 100 years (Angi). Better Homes and Gardens gives the more modest version: over 25 years with consistent care (Better Homes and Gardens). Both are conditional statements about maintained stone, and neither is a warranty – no lifespan warranty for real tile was found in my research. On the panel side, the enforceable promise is the warranty: 3 years on the E-Well travertine lines (E-Well). Compare promises at their true weight: a century-scale claim with conditions, against a short written warranty on a wall that costs far less to build and asks far less of you each year.
Care, year five and beyond: what each wall asks of you
TL;DR: Real travertine asks for a routine: dust and grit kept off the surface, spills wiped fast, pH-neutral cleaner only, and the water test once in a while to check the sealer. The panel asks for a damp cloth, a diluted neutral cleaner, and an annual look at its edges and joints. Neither wall is maintenance-free. The difference is a calendar against a cloth.
For real stone, the routine is documented and consistent across sources. Clean with a pH-neutral product made for natural stone, rinse well, and dry with a soft towel (MSI). Keep acids away from the surface entirely – no vinegar, no lemon-based cleaners, no ammonia or bleach products (MSI; Nest Tile). Wipe spills promptly, because a porous surface gives liquids a head start (Better Homes and Gardens). In wet areas, prefer the honed or brushed finish you chose in the finishes section: it is the practical face for water and soap (Nest Tile). And run the water test from the sealing section when you think of it – water darkening fast means the sealer has worn and the next coat is due (Tile Armor).
What ages first on a real travertine wall is predictable, and this part is trade opinion. The grout goes before the stone: joints darken, hold dust, and ask for cleaning and resealing attention while the tiles themselves still look new. Etch marks collect near the splash and cleaning zones. Filled pits can come to read a little differently from the surrounding stone as years of cleaning pass over them. None of that is failure – it is the patina of a natural material, and a deep clean with honing can refresh a tired surface, which is part of how Angi supports its long lifespan claim (Angi). Buy real stone because you want that living surface, with its upkeep attached.
The panel routine fits on an index card. Distributor care guidance for this panel family: wipe with a damp cloth and a diluted neutral-pH solution, keep hard brushes and sharp objects off the face, hold the room in a normal humidity band, and keep the panel away from heat over 50 degrees C (Kosmos). My own addition, from watching panel walls age: check the edges and joints once a year. The face is the last thing to age on a panel wall. An unsealed cut edge near a sink, a bottom edge meeting mop water weekly, a joint planned too tight – those are the places that show age first, and all three are planning details, fixed on the drawing or not at all. A downsides guide for PVC and WPC panels – products that share the film face with this class – names the same weak points from the other side: scratches, dents, and dullness in high-traffic areas as panels age (Coohom). Gentle cleaning and honest expectations cover most of it.
The sample tests I want you to run before you buy
TL;DR: Test both materials the same way: the light test at a window and under a warm lamp, the distance test at 10 to 12 feet, the pore and repetition test with pieces butted together, the edge test, the lift test, the tap and touch test, the water test on the real stone sample, and the direction test for vein cut. Ten minutes with real samples tells you more than a month of product photos.
Never approve either wall from a photo. Printed finishes mislead at small scale, and real stone varies enough that one tile can flatter the whole batch. These eight tests need no equipment beyond the samples themselves.
- The light test. Tilt the sample against daylight at a window, then check it under a warm indoor lamp. On the panel, a cheap print fails here: the pores flatten into gray dots, or the warm beige shifts cool and greenish. On real stone, this is where you learn how much tonal movement your batch carries.
- The distance test. Hold the sample at arm length, then have someone hold it across the room, 10 to 12 feet away – how the wall will actually be seen. The panel has to read as travertine from across the room, and the real tile has to read as calm, not busy. A pattern that only convinces at six inches will not convince on a wall.
- The pore and repetition test. Butt two panel sheets or offcuts together and look for the pore pattern restarting – the same cluster of pits marching across the joint is the number one giveaway of a print, and that is trade opinion I weigh above every other test. With real tiles, do the reverse check: lay out pieces from several boxes, because shade and veining vary, and retailers advise ordering the full quantity at once and blending boxes for exactly this reason (Nest Tile).
- The edge test. Look at the cut edge of each sample. Real travertine shows stone through its full thickness, pits included. The panel shows its composite core under a film skin. Neither answer is wrong – the test exists so the edge never surprises you on install day, and so you can ask how every cut edge on your wall will be finished and sealed.
- The lift test. Pick up one real 12x24 tile and one panel offcut of a similar face size. At 6.00 lb per sq ft the tile is about 12 lb in your hands (Nest Tile), and the panel piece feels like a different species of object. This is the installation difference, the shipping difference, and part of the price difference, in one gesture.
- The tap and touch test. Tap each face with a knuckle and rest your palm on it. Real stone sounds dense and feels cool. The panel sounds like a panel and sits at room temperature. Run this now and your expectations are set honestly before anyone opens a wall.
- The water test, on the stone sample only. Put a few drops of water on the real travertine sample and watch: fast darkening means the surface is drinking, which is what sealer slows down (Tile Armor). Then, if the seller agrees, the acid lesson from Use Natural Stone – a drop of lemon juice on a sacrificial corner, checked after a few minutes for a dull spot – teaches more about travertine care than any brochure (Use Natural Stone). Do not run either test on the panel face and expect stone behavior. It has no pores to drink with.
- The direction test, for vein cut. Lay vein-cut tiles or sheets side by side and turn one piece 90 degrees. The wall changes completely. Decide the direction on samples, at full layout, before ordering – horizontal for width, vertical for height (Karimi Stone) – because a vein-cut wall with mixed directions reads as a mistake, not a pattern.
Bring the samples home and live with them against the actual wall through a morning and an evening. The wall you choose at 9 in the morning under showroom light is not always the wall you want at dinner.
My verdict for South Florida homes
TL;DR: Choose real travertine when the wall is a fireplace surround, when you want a surface that ages as geology for decades, and when you accept the sealing calendar as part of ownership. Choose the travertine-look panel when the wall is a large living room or TV wall in a conditioned home, when a grout grid is the look you are escaping, and when you want the travertine read with a damp-cloth upkeep. Both choices are defensible. The indefensible choice is buying either one from a photograph.
Here is how I call it on real jobs. For a living room, dining room, entry, or primary bedroom across Palm Beach, Broward, or Miami-Dade, the panel is the wall I install first, for practical reasons. The format runs floor to ceiling in large sheets, so the wall reads as one continuous stone surface with a few planned joints in place of a grout grid. The weight keeps the job a routine install on normal residential walls. The upkeep is a cloth, not a calendar. And warm matte travertine is – in my trade opinion – the easiest of the stone-look finishes I install to live with at full-wall scale: it hides dust and fingerprints better than a polished marble read, and it pairs with the warm LED light at 2700K to 3000K that these rooms already have.
Choose real stone where stone earns its cost. A fireplace surround is the clearest case: heat resistance is a documented strength of the stone, and the panel carries a 50 degree limit I will not design around (Better Homes and Gardens; Kosmos). A small, special wall – a powder room, a niche, a single column of real geology – is the second case, where the weight and the wet trade stay proportionate to the area. And choose real stone if the sealing routine genuinely pleases you. Some owners love caring for natural material, and for them the calendar is a ritual, not a chore.
What I will never tell you: that a panel is real stone, that a B1 grade equals an American fire rating, that a factory price predicts your installed cost, or that real travertine takes care of itself. Run the sample tests, ask for the spec sheet and the warranty for the exact product, get the installed price as a written local quote, and either wall will serve you well.
Sources
- Wikipedia, Travertine (freshwater limestone deposited around mineral springs, calcium carbonate precipitation, colors white, tan, cream, rusty). en.wikipedia.org
- US Geological Survey, Travertine – Yellowstone hydrothermal timekeeper (calcite and aragonite as calcium carbonate, precipitation on carbon dioxide release). usgs.gov
- Natural Stone Institute handout, Travertine Voids (voids from trapped gases, filled or unfilled in fabrication, cementitious or resinous filler ground level). stonehouseink.net
- Use Natural Stone, How to Be Your Own Stone Sleuth (calcite stones etch from common acids, lemon and vinegar test at 5 to 10 minutes, sealers do not protect from acid). usenaturalstone.org
- Better Homes and Gardens, What Is Travertine? (colors, thickness 3/8 to 1/2 inch, install sequence, care and annual reseal in text vs 3 to 5 years in FAQ, over 25 years with care, shower sealing, heat resistance, tile $3 to $30 per sq ft with installation adding $5 to $15). bhg.com
- Angi, How Much Does It Cost to Install Travertine Tile? 2026 data, updated July 9, 2026 (installed $5 to $47 per sq ft, $600 to $3,200 per 100 sq ft, labor $3 to $17, material and finish bands, removal and repairs, lifespan claim 75 to 100 years). angi.com
- HomeGuide, How Much Does Travertine Tile Cost? 2026 (standard material $7 to $15, installed $17 to $35 per sq ft, premium installed $20 to $50, commercial installed $14 to $27, labor $10 to $20, seal before and after grout, reseal 1 to 2 years). homeguide.com
- Nest Tile, travertine product pages and FAQs (weight 6.00 lb per sq ft for a 12x24 tile, filled as color-matched cement epoxy vs unfilled open cavities, seal before grouting and after cure, reseal 1 to 2 years, wet-area suitability when sealed). nesttile.com and nesttile.com
- Shades of Stone, Tuscany Classic 12x24 honed filled tile spec (0.5 inch thick, 12 lb per piece over 2 sq ft) and Types of Finishes and Edges (honed matte, polished glossy, unfilled exposed holes). shadesofstone.com and shadesofstone.com
- Solidshape, Nysa 12x24 filled honed travertine tile (0.38 inch thick) and travertine collection (ivory and cream most popular, silver gray, walnut brown). solidshape.com and solidshape.com
- Why Tile, Traverse – Dreamy Travertine-Look Tile (cross cut cloudy and swirled vs vein cut linear and striped, travertine-look comeback framing). whytile.com
- Acemar Stone, Roman Travertine vein cut and cross cut (vein cut parallel veins for wall cladding, beige to light brown, brushed slightly textured; cross cut across bedding planes, homogeneous face). acemarstone.com and acemarstone.com
- Karimi Stone, beige travertine vein cut (vein direction horizontal for width, vertical for height). karimistone.com
- AGL, Travertine Tiles 101 (tumbled softened corners and edges, worn antique appearance). aglasiangranito.com
- Hackrea, Modern Bathroom Accent Wall Ideas – 2026 Trends (stone drenching: large unbroken stone surfaces, minimal grout, travertine named as a leading material). hackrea.net
- Home Depot, natural stone installation guide (penetrating sealer before grouting, grout after 24 hours, grout haze cleaned immediately, wet saw cuts). images.thdstatic.com
- MSI, Tips From the Trade – How to Easily Seal and Clean Travertine Tile (seal once a year, more often for lighter tile, pH-neutral cleanser, no ammonia, vinegar, or bleach). msisurfaces.com
- Tile Armor, Travertine Sealer Guide (reseal every 1 to 3 years by traffic and exposure, water darkening and fast absorption as reseal signs). tilearmor.com
- E-Well, travertine carbon crystal bamboo charcoal listings (films PP, PVC, PET, and metal; layered-pore travertine description; 3-year warranty; FOB US$2.35 to $4.32 per sq m at 50 sq m minimum). e-well.en.made-in-china.com and e-well.en.made-in-china.com and made-in-china.com
- Mossen Decor, PVC marble wall panel listing (panel family weight 3.0 to 6.0 kg per sq m). mossendecor.en.made-in-china.com
- Kosmos, bamboo charcoal panel product page (care: damp cloth, diluted neutral-pH solution, keep under 50 degrees C and away from heat sources over 50 degrees C). en.kosmos.vn
- Coohom, PVC Wall Panels Disadvantages (moisture trapped behind paneling and hidden mold, citing CDC guidance; scratches, dents, and dullness as PVC panels age – PVC and WPC guide pains, labeled as such). coohom.com
- ALPOLIC Americas, MCM Combustibility and the Building Code technical bulletin (national fire systems are not compatible or interchangeable, a foreign rating gives no assurance of passing US tests). alpolic-americas.com
- WOW Walls Studio, Bamboo Composite Wall Panels: What They Are and Why They Last (2026).
- WOW Walls Studio, Marble-Look Wall Panels: Calacatta Styles, Honest 2026 Guide.
- WOW Walls Studio, TV Accent Wall with Wood Slats and LED: 2026 Install Guide.
- WOW Walls Studio, Fireplace Accent Wall with Panels: Heat Rules and Design (2026).
- WOW Walls Studio, Wall Panels in Florida Humidity: MDF vs PVC (2026).
- WOW Walls Studio, How Much Do Wall Panels Cost in 2026? Materials + Install.