Kitchen Wall Panels: Heat, Grease and Easy-Clean Finishes (2026)
Kitchen wall panels in 2026: honest heat clearances by the stove, grease-resistant easy-clean finishes, kitchen island cladding and Florida steam care.
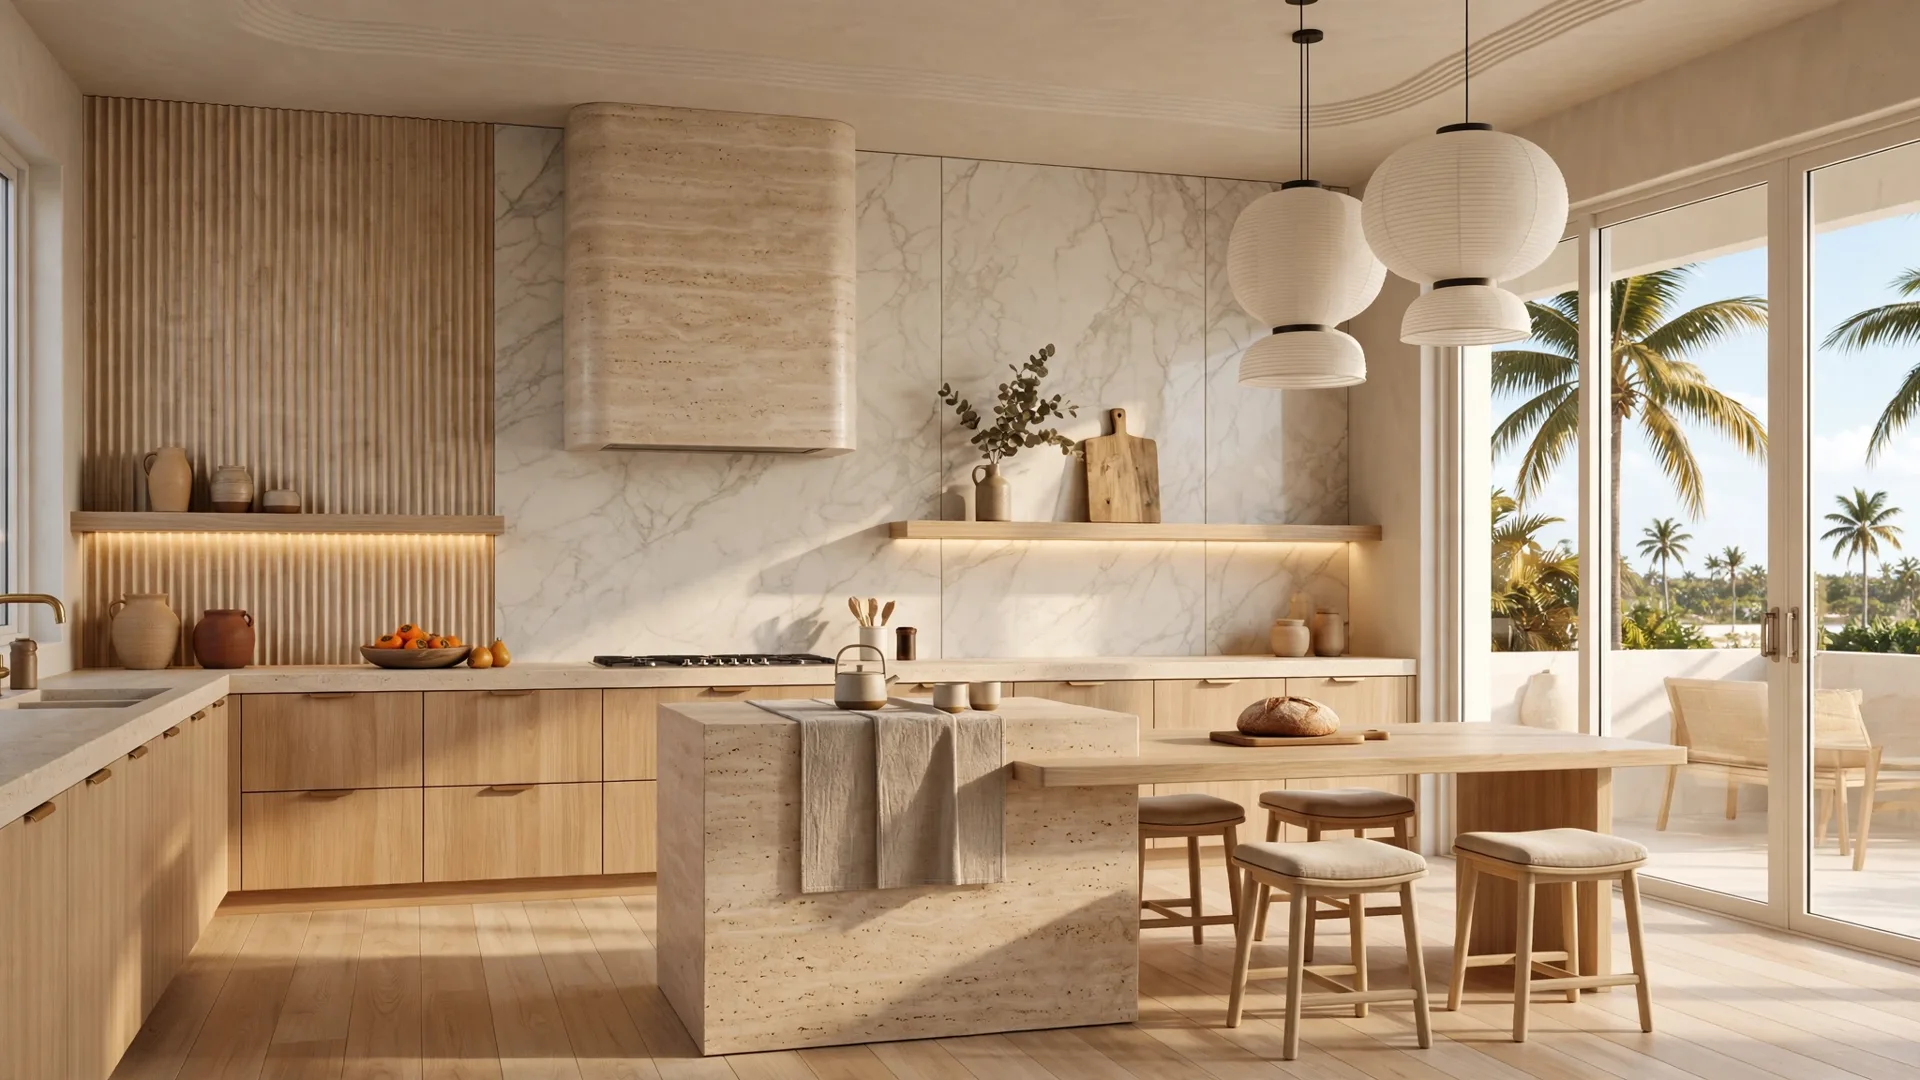
A kitchen is the hardest room I put panels in. A living room wall has to look good. A kitchen wall has to look good next to a boiling pot, under a film of cooking grease, in steam, in Florida humidity, and it has to wipe clean on a Tuesday night when nobody feels like scrubbing. Clients ask me about kitchen wall panels with three worries in the same breath: heat by the stove, grease on the finish, and cleaning that turns into a weekend project. This guide takes those three worries in order and gives you the honest version of each, including the places where I tell people to use a different material.
I install large-format composite panels for WOW Walls Studio here in South Florida. On a kitchen job, the material earns its reputation or loses it. These are the rules I work by on site: what the code and the stove makers actually say about heat, why grease defeats grout (the filler packed between tiles) and loses to a smooth sealed face, where panels belong in a kitchen, and where they do not.
What kitchen wall panels actually are
TL;DR: A kitchen wall panel is a large-format composite sheet – a bamboo-fiber composite body carrying a finished surface such as a marble look, a travertine look or a large-format porcelain look. One sheet covers what dozens of tiles cover, so the wall has few seams, and the finish on the face decides how it handles grease and cleaning.
Start with the sheet itself. The panels I install are a bamboo-fiber composite: plant fiber in a polymer composite body, made as whole large-format sheets and trimmed on site to fit your wall. The visible surface is a finish on that body. In a kitchen the finishes that make sense are the stone family: marble look for the classic veined wall, travertine look for a matte, warm texture, and the large-format porcelain look that reads most native in a cooking space. The same sheet system carries the stone looks in my travertine accent wall panels guide and my marble-look wall panels guide – a kitchen simply grades those finishes against heat, grease and steam.
I keep two finishes from the wider range out of the cooking zone. Real-wood veneer is a dining-side finish, lovely on the wall the kitchen opens into, and I keep it away from the cooktop and the sink splash zone. Leather and velvet are soft finishes for quiet rooms; a greasy, steamy wall is the opposite of their care profile.
The geometry matters as much as the material. A standard backsplash runs about 18 inches from the countertop to the bottom of the upper cabinets (A Grateful Kitchen). Tiled, that strip is a grid of grout lines. In large-format sheets, that same strip – or a full-height wall – takes one or two sheets. The joints you would otherwise scrub shrink to a few seams, and I place them deliberately: away from the burner centerline, away from the worst splash, drawn on paper before anything is cut.
Heat: how close to the stove can panels go?
TL;DR: The code rule is vertical: the 2021 International Residential Code requires 30 inches of clearance above the cooking top to unprotected combustible material, reducible only per the listing of a range hood or an oven with integral exhaust (IRC M1901.1). Range makers require wall coverings around a range to withstand heat up to 194 to 200 degrees F (Samsung; GE Appliances). Composite panel guides cap continuous exposure around 158 degrees F, so the burner strip gets a non-combustible surface and panels work the walls around it.
Here I refuse to freestyle, and you should refuse any installer who does. I check three layers on every kitchen job: the code, the stove maker's listing (the certified installation rules in its manual), and the panel maker's own limits. All three have to pass.
The code layer. The 2021 IRC, Section M1901.1, sets a vertical clearance above the cooking top of not less than 30 inches to unprotected combustible material, with reduced clearances permitted only in accordance with the listing and labeling of range hoods or ovens with integral exhaust (ICC). Section M1901.2 adds that the appliance is installed in accordance with the manufacturer's instructions (ICC). In plain terms: the stove's own manual is part of the rulebook for the wall around it.
The stove maker's layer. GE Appliances states the same 30-inch rule for its ranges, reducible to 24 inches only with specified protection, and its installation instructions require that wall coverings, countertops and cabinets around the range withstand heat up to 200 degrees F (GE Appliances). Samsung's electric range guidance sets the design limit at 194 degrees F for the wood cabinets around the range and warns that a covering that cannot take that heat can discolor, delaminate or melt (Samsung). GE also approves 0-inch spacing at the back of the range and below the cooktop, which is why a backsplash surface can sit flush behind a listed range – the regulated zone is above and beside the burners, where heat and steam rise (GE Appliances).
The panel maker's layer, and the honest limit. Wood-plastic composite (WPC) guides put the continuous-heat ceiling for this panel family well below the stove makers' numbers: prolonged exposure above 70 degrees C (158 degrees F) near stoves or heaters may cause slight deformation (Made-in-China Insights WPC guide). One care guide holds panels at least 300 mm (about 12 inches) clear of cooktops and open flames. It warns that prolonged surface temperatures above about 60 degrees C can cause distortion (Ecolux Interiors). A Home Depot care sheet for PVC marble sheets says the same thing in one line: avoid direct heat behind stoves. Bamboo-fiber panels are quoted as flame retardant up to Class B1 (Insoul Household). That is a flame-retardant claim from a panel maker. It does not make the material non-combustible like tile, porcelain, stainless steel or glass.
My layout rule is simple, and I keep it strict. The strip directly behind and above open burners gets a non-combustible surface – ceramic tile, porcelain, natural stone or stainless steel sheeting, the backsplash materials the clearance guidance names (Engineer Fix). Panels take the rest of the kitchen: the wall runs beside the cooking zone, the splash wall behind the sink and prep counters, the full-height feature wall, the island. I apply the same clearance thinking I use at a fireplace in my fireplace accent wall panels guide: the heat source sets the geometry, and the drawing respects it before a single sheet is cut. If a panel behind your stove ever gets scorched or heat-damaged, you can replace one sheet without redoing the whole wall. But the layout's job is to make sure it never comes to that.
Grease: why kitchen walls get filmy and what resists it
TL;DR: Cooking grease is airborne oil that lands on the wall and builds into a stubborn film; it defeats porous surfaces because oil penetrates and does not evaporate the way water does (A Grateful Kitchen). Grout is the worst offender – porous by nature, it absorbs moisture, traps grease and stains over time (Shanko). A smooth, sealed, non-porous panel face gives grease nowhere to go, so it sits on the surface and wipes off.
Watch a pan of oil on a hard sear and you can see the problem leave the stove. Fine oil droplets ride the steam up and out, land on the nearest cool surface, and settle. Water-based splashes dry. Oil does not. Once it penetrates a porous surface, it travels deeper into the material and spreads along it – which is why an old grease stain in grout survives surface cleaning (A Grateful Kitchen). Week after week, the wall behind and beside a cooktop builds a film that holds dust and dulls any finish it can grip.
That is why the classic tiled backsplash ages the way it does. The tile face itself is usually glazed and wipes fine. The problem is the grout network between tiles: porous by nature, it absorbs moisture, traps grease, and stains or discolors – worst in the busy zone behind a stove or sink, and worst of all in light-colored grout (Shanko). Epoxy grout is the exception that proves the rule: it is non-porous and rarely stains (A Grateful Kitchen), which is a materials way of saying the joint was the problem all along.
A panel face answers the same chemistry differently. Its finished surface is sealed and non-porous, so grease lands on top instead of soaking in. And the wall carries a few placed seams instead of a grid of joints. Two honest qualifications. First, texture: a deep fluted or embossed profile (ridges and pressed relief) gives grease and dust grooves to sit in, and those grooves need a soft brush worked along them – flat and smooth is the easy-clean choice near cooking, a point the cleaning section returns to. Second, edges: I seal cut edges and seams carefully, because the face is only half the system. A joint that lets greasy steam reach the body of the panel undoes what the face does well.
One more finish note, because clients ask about it: gloss releases grease more easily than matte. Matte finishes have a rougher texture that gives grease and food particles more places to grip, while glossy surfaces are smoother and easier to wipe clean (A Grateful Kitchen). A matte travertine look is still a practical kitchen finish – it hides the daily splash pattern visually between wipes – it simply earns a slightly more regular wipe than a polished marble look does.
Easy-clean finishes: what wipes clean and what it takes
TL;DR: The easiest backsplash surfaces to clean share one profile – a smooth, non-porous face with few or no grout lines, cleaned with a mild cleaner and a soft cloth (Engineer Fix; A Grateful Kitchen). For composite panels the manufacturer routine is warm water, a soft cloth and mild soap or a pH-neutral detergent (a gentle cleaner with no acid or alkali bite), dried right away; abrasive pads, bleach, ammonia, solvents and steam cleaners are prohibited because they dull, discolor or soften the surface film (Ecolux Interiors; Leadflow).
Here is how kitchen surfaces rank by the cleaning they actually ask of you. A full sheet of tempered glass or a solid surface panel like quartz is the easiest class: no grout lines, a non-porous face, oil and stains off with a mild cleaner and a soft cloth (A Grateful Kitchen). In my work, a smooth, sealed composite panel face behaves the same way – grease sits on top and wipes off, as long as the seams and cut edges stay sealed. Tile with standard grout sits at the hard end, for the grout reasons above. Stainless steel is non-porous and shrugs off heat and grease, but it shows every fingerprint, so it trades scrubbing for frequent light wiping along its grain (Modernize; A Grateful Kitchen).
The daily routine on a panel wall is short. Dust and fresh splashes come off with a soft or microfiber cloth. Cooking film comes off with warm water and mild soap or a pH-neutral detergent on a damp cloth, worked along any texture, then wiped with clean water and dried immediately (Leadflow). Wipe fresh oil at seams and edges the same day: panel makers are blunt that oils, dyes and wine left overnight can stain a surface that shrugs them off when fresh (Leadflow). That is the whole routine: wipe, rinse, dry.
The prohibited list matters more. Most panel damage I get called to look at is cleaner damage. For composite and WPC-type panels the care guides prohibit abrasive pads, scouring powders and steel wool, which dull or scratch the finish; bleach, ammonia, acetone, thinners and solvent or citrus-based cleaners, which can discolor or soften the surface film; and steam cleaners and pressure washers, which drive heat and moisture into the joints (Ecolux Interiors; Leadflow). Laminate faces carry the same abrasives ban from their own makers – Formica prohibits abrasive cleaners, steel wool and scouring pads, and cleaners containing acid, alkali or sodium hypochlorite (Formica). When in doubt, start mild on any finish, and test anything stronger on a hidden spot first.
So where does that leave the three kitchen finishes? The porcelain look and the marble look, with their smooth sealed faces, are the wipe-and-done finishes. The travertine look, matte and lightly textured, wipes clean with the same routine – it just asks a touch more patience in its texture. All three beat any grouted surface on weekly effort, because the joints, the part that actually held the grease, are mostly gone.
Beyond the backsplash: full walls and island cladding
TL;DR: Panels earn their keep in a kitchen well past the 18-inch backsplash strip: full-height walls beside the cooking zone, sink and prep walls, and island faces. An island takes no burner heat, so its enemies are kicks, chair scrapes and mop water – island side panels protect against accidental damage (ShunShelter), and permanent fixing is what survives shoes on the seating side (Hunker).
The backsplash strip is where panel conversations start, and it is the smallest job panels do in a kitchen. The larger pattern I install is a full-height feature wall on the side of the room away from the burners – the wall the kitchen table sits against, or the run that carries the tall units – in the same stone finish as the splash zone, so the room reads as one material decision. Sink and prep walls take the sealed face well: water splashes wipe off, and there is no grout at the counter joint to darken.
The island is the second big surface, and it plays by different rules. Cladding here just means a finished skin over a surface: the island gets a panel skin the way a wall does. Island side panels conceal the structure, finish the look, and protect the faces against accidental damage (ShunShelter). The loads there are mechanical: shoes and stool feet at the seating side, chair legs, vacuum and mop strikes at the floor line. That is why the fixing method decides whether an island wrap lasts. Panels on the seating side hold up to kicks and wear when they are fixed permanently, with construction adhesive or mechanical fixing, rather than removable strips (Hunker). My island layouts add a hard toe-kick zone (the recessed strip at floor level where your toes tuck under the island) and keep the panel face smooth or shallow-profiled on the seating side, so knees and shoes slide instead of catching.
One last island point: clearances. Cladding adds thickness, and kitchen aisles are measured from the finished face: NKBA planning guidelines call for work aisles of at least 42 inches for one cook and at least 48 inches for two or more (Fine Homebuilding, summarizing NKBA). A panel face is thin, but on a tight island I still measure the aisle off the finished panel face. The inch you plan is the inch you walk through.
A note on range-adjacent runs, to close the loop with the heat section: panels on the wall run beside the cooking zone, at counter level and beyond the burner strip, live in the splash and steam zone, not the flame zone. That is honest panel territory – as long as the layout respects the stove maker's side clearances. On electric ranges, GE recommends 6 inches of spacing to surfaces less than 15 inches above the cooktop to reduce exposure to steam, grease splatter and heat; its gas ranges carry a different rule – 6 inches minimum to each side wall, and 18 inches minimum height to the cabinets above the counter (GE Appliances).
Florida kitchens: steam, humidity and mold discipline
TL;DR: Cooking adds moisture to a room that, in South Florida, starts humid: the EPA names cooking and stoves as indoor humidity sources and sets the target at below 60 percent relative humidity, ideally between 30 and 50 percent (EPA). A panel wall fits that discipline when its face is non-porous, its joints and edges are sealed so steam cannot reach the wall behind, and the hood over the stove vents outside and actually gets used.
Florida kitchens fight moisture from two directions. Outside, the summer baseline is high. Inside, every boiled pot and dishwasher cycle adds steam to the room – the EPA lists cooking and combustion stoves among the activities that raise indoor humidity, and advises venting moisture-producing appliances outside and using exhaust fans whenever cooking (EPA). My full climate case for wall materials sits in my Florida humidity guide; the kitchen version comes down to three working rules.
First, hold the number. Keep indoor humidity below 60 percent, ideally between 30 and 50 percent. If you want certainty, measure it with an inexpensive humidity meter (EPA). Air conditioning does most of that work in a South Florida home; the hood does the rest at the source. That is why a hood that vents outside – and gets switched on before the pot boils – belongs to the wall system as much as the panels do.
Second, keep steam out of the wall. The EPA warns that hidden mold grows on the back side of drywall, wallpaper or paneling when moisture gets behind them (EPA). A panel wall is built against exactly that failure: a non-porous face that wipes dry, plus joints, cut edges and the counter line sealed at installation, so cooking steam has no path to the body of the panel or the wall behind it. Interior panels are cladding only – there is no waterproof membrane in the system – so I wipe splashes promptly and never let water pool at the panel base (Leadflow).
Third, respect the clock after a leak. If wet materials are dried within 24 to 48 hours of a leak or spill, mold will generally not grow (EPA). A sealed panel face helps in a practical way: a dishwasher or sink leak shows on the surface and wipes dry fast, instead of soaking quietly into grout and board. But it never excuses ignoring the leak. The panel is the alarm, not the fix.
What drives the price of a kitchen panel job
TL;DR: Four drivers: how much wall the panels cover (a backsplash strip, full height, or walls plus island), the finish you choose, the number of cuts and interruptions in the field, and the heat-zone work the layout requires around the stove. A kitchen quote that skips the burner strip decision has skipped the line item that decides whether the job is done right.
Coverage first. An 18-inch strip is the smallest version of the project. A full-height wall multiplies the sheet count, and adding island faces adds a second surface, with its own fixing and toe-kick work. The drawing sets the coverage, and the coverage sets the sheet count. I price every room the same way: openly, from the layout.
Finish second. The marble look, travertine look and porcelain look sit on the same panel system, and the finish choice moves the quote less than coverage does – but the heat-zone materials are their own line: the tile, porcelain, stone or stainless strip at the burners gets specified and priced openly as part of the kitchen design.
Interruptions third. Kitchens are the most interrupted walls in a house: outlets, switches, under-cabinet light runs, the hood, window trim, cabinet returns. Every one means a cut in a large-format sheet, and kitchen cuts cluster exactly where the splash is worst. So layout and fitting take longer per interruption here than in a living room. My broader breakdown of how panel pricing is built lives in my wall panels cost guide.
That is why I quote a kitchen from a drawing and a clearance check, never from a photo alone. Send the photo, and I mark three things on it first: the burner strip, the seams and the island faces. The number follows from those decisions.
Questions I get about kitchen wall panels
TL;DR: The short answers: panels stay out of the direct burner strip, where code clearances and the stove maker's listing rule; grease wipes off a sealed non-porous face and defeats porous grout instead; cleaning is mild soap, a soft cloth and no abrasives, bleach or steam; and in Florida the wall holds up when humidity stays below 60 percent and steam is vented outside.
Can wall panels go directly behind a gas stove?
Not in the direct burner strip in my layouts. The 2021 IRC requires 30 inches of vertical clearance above the cooking top to unprotected combustible material (IRC M1901.1), range makers require surrounding coverings to withstand up to 194 to 200 degrees F (Samsung; GE Appliances), and composite panel guides cap continuous exposure around 158 degrees F (Made-in-China Insights). The burner strip gets ceramic tile, porcelain, natural stone or stainless steel; panels take the walls around it.
Are kitchen wall panels easy to clean?
Yes – when the face is smooth and sealed. The easiest surfaces to clean are smooth, non-porous and free of grout lines, wiped with a mild cleaner and a soft cloth (Engineer Fix; A Grateful Kitchen). A panel wall's standing routine is warm water, mild soap or a pH-neutral detergent, then dry – with abrasives, bleach and steam cleaners prohibited by the makers' care guides (Ecolux Interiors).
How do you get cooking grease off wall panels?
Fresh grease wipes off the sealed face with warm water and mild soap on a microfiber cloth. What makes grease hard is time and porosity: oil penetrates porous materials like grout, does not evaporate, and travels deeper, which is why old grout stains survive scrubbing (A Grateful Kitchen). On a non-porous panel face the oil stays on the surface, so a same-day wipe is the whole job.
Which finish is best for a kitchen: marble look, travertine or porcelain look?
For pure wipe-down ease, the smooth porcelain look and marble look lead, because gloss and smoothness release grease more easily than matte texture (A Grateful Kitchen). The travertine look is the matte option: it hides the daily splash pattern between wipes and cleans with the same mild routine, with a little more patience in its texture. All three sit on the same panel system – the choice comes down to sheen and pattern within one material class.
Can panels clad a kitchen island?
Yes – the island is one of the best panel surfaces in the kitchen, because it takes no burner heat. Island panels protect the faces against accidental damage (ShunShelter), and on the seating side they need permanent fixing to stand up to kicks and shoe wear (Hunker). Add a hard toe-kick at floor level and keep the profile smooth where stools slide in.
Do kitchen wall panels handle Florida humidity and steam?
On a ventilated, air-conditioned wall, yes. The EPA target is indoor humidity below 60 percent, ideally 30 to 50 percent, and cooking steam should be vented outside with the hood (EPA). Sealed joints and edges keep steam from reaching behind the panels, where the EPA warns hidden mold can grow on the back of paneling (EPA). A wall with a known leak history gets fixed first – panels are cladding only, with no waterproof membrane behind them.
What cleaners will damage composite wall panels?
The makers' prohibited list: abrasive pads, scouring powders and steel wool; bleach, ammonia, acetone, thinners and solvent or citrus-based cleaners; and steam cleaners or pressure washers, which drive moisture into the joints (Ecolux Interiors; Leadflow). Stick to a soft cloth, warm water and mild soap or pH-neutral detergent, and test anything stronger on a hidden spot first.
What happens if a kitchen panel is damaged?
You can replace one sheet without redoing the whole wall: the field is individual large-format sheets, fitted and trimmed on site. A scorched, stained or struck sheet comes out and a matching sheet goes in. That is one reason the layout keeps panels out of the burner strip in the first place – replacement stays the backstop.
My verdict on kitchen panels for South Florida homes
TL;DR: Choose kitchen wall panels when you want the stone look without a grout network to maintain, when the layout keeps a non-combustible surface at the burner strip and respects the stove maker's clearances, and when the room's steam gets vented and its humidity held under 60 percent. Placed that way, panels give a Florida kitchen its easiest wall to live with.
Here is how the kitchens I install across Palm Beach, Broward, and Miami-Dade actually divide. The cooking wall is two jobs wearing one finish: a heat job at the burners, governed by the code and the stove manual, and a grease-and-steam job everywhere else, governed by the surface. Panels win the second job outright: a sealed face, a handful of seams, a quick wipe. Tile, steel and stone keep the first job, and I will not sell you a panel layout that pretends otherwise.
And here is what I will never tell you: that a composite panel is heat-proof behind open gas burners; that flame-retardant means non-combustible; that a textured groove cleans itself; or that any cleaner on the shelf is safe on the finish. Send me a photo of your kitchen and tell me how you cook – hard sears every night, or a quiet prep kitchen – and the drawing comes first: burner strip, seams, island, clearances. The finish and the number follow from it.
Sources
- ICC, 2021 International Residential Code, Chapter 19 (Section M1901.1: vertical clearance above the cooking top of not less than 30 inches to unprotected combustible material, reduced clearances only in accordance with the listing and labeling of range hoods or ovens with integral exhaust; M1901.2: appliances installed in accordance with the manufacturer's instructions).
- GE Appliances, Range – Minimum Clearance Requirements (30 inches to combustible material, reducible to 24 inches with specified protection; 0-inch spacing approved at the back of the range and below the cooktop; for electric ranges, 6-inch spacing recommended to surfaces less than 15 inches above the cooktop to reduce steam, grease and heat exposure; for gas ranges, 6-inch minimum spacing to each side wall and 18-inch minimum height to cabinets above the counter).
- GE Appliances, electric slide-in range installation instructions (wall covering, countertop, flooring and cabinets around the range must withstand heat up to 200 degrees F).
- Samsung electric range installation guidance (range designed to comply with maximum allowable wood cabinet temperatures of 194 degrees F; coverings that cannot withstand the heat can discolor, delaminate or melt).
- Engineer Fix, freestanding range backsplash guidance (acceptable non-combustible backsplash materials behind a cooktop: ceramic tile, porcelain, natural stone, stainless steel sheeting; easiest backsplash to clean has a smooth, non-porous surface with minimal opportunity for contaminants to penetrate).
- Made-in-China Insights, indoor WPC wall panels guide (prolonged exposure to high temperatures above 70 degrees C near stoves or heaters may cause slight deformation).
- Ecolux Interiors, WPC wall panels care and maintenance guide (keep panels at least 300 mm (about 12 inches) clear of heaters, open flames and cooktops; prolonged surface temperatures above about 60 degrees C can cause distortion; prohibited: abrasive cleaners, bleach, ammonia, acetone, thinners, solvents, citrus-based cleaners, steam cleaners, pressure washers, saturation).
- Home Depot / THD panel use and care instructions (for indoor PVC marble sheet: clean with a damp cloth, avoid direct heat behind stoves; acclimatise panels 48 hours before use).
- Insoul Household, WPC fluted panels (bamboo fiber panels can be flame retardant up to Class B1).
- Shanko, best material for a kitchen backsplash (grout is porous by nature, absorbs moisture, traps grease and stains or discolors, especially behind a stove or sink; large-format porcelain slabs, quartz, back-painted glass and pressed metal reduce or eliminate grout lines).
- A Grateful Kitchen, backsplash cleaning and grout guides (a full sheet of tempered glass or a solid surface panel is the easiest to clean – no grout lines, non-porous; oil does not evaporate like water and penetrates grout deeper over time; epoxy grout is non-porous and rarely stains; matte finishes give grease more places to grip, glossy surfaces wipe easier; standard backsplash height about 18 inches from countertop to upper cabinets).
- Leadflow, WPC embossed panels guide (dust with microfiber; deep clean with a damp cloth and mild pH-neutral detergent along the texture, wipe with clean water and dry; never abrasive pads, strong solvents, thinners or bleach; never pressure-wash interior walls; panels are interior cladding only, never a waterproof membrane – prevent standing water at the panel base and wipe oils promptly).
- Formica, use, care and maintenance guidelines (do not use abrasive cleaners, steel wool, sandpaper or scouring pads; never use cleaners containing acid, alkali or sodium hypochlorite).
- Modernize, stainless steel backsplashes (durable, non-corrosive, tolerates high temperatures; susceptible to scratching with abrasive tools; fingerprints show and wipe off).
- ShunShelter, kitchen island side panels (side panels conceal structure, enhance appearance and protect against accidental damage).
- Hunker, kitchen island refresh with slat panels (panels on the seating side hold up better to wear and inadvertent kicks with a permanent installation method such as construction adhesive and/or brad nails rather than removable strips).
- Fine Homebuilding, how to design a kitchen island (NKBA planning guidelines: work aisles at least 42 inches for one cook and at least 48 inches for two or more cooks).
- EPA, Mold Course and A Brief Guide to Mold, Moisture and Your Home (keep indoor relative humidity below 60 percent, ideally between 30 and 50 percent; cooking and stoves add to indoor humidity; vent moisture-producing appliances outside and use exhaust fans when cooking; dry wet materials within 24 to 48 hours of a leak or spill; hidden mold can grow on the back side of dry wall, wallpaper or paneling).
- WOW Walls Studio, Travertine Accent Wall Panels: Real Stone vs Composite (2026).
- WOW Walls Studio, Marble-Look Wall Panels: Calacatta Styles, Honest 2026 Guide.
- WOW Walls Studio, Fireplace Accent Wall with Panels: Heat Rules and Design (2026).
- WOW Walls Studio, Wall Panels in Florida Humidity: MDF vs PVC (2026).
- WOW Walls Studio, How Much Do Wall Panels Cost in 2026? Materials + Install.