
TV Wall Panels: Sizing, Materials, Cables and Cost (2026)
TV wall panels sized right: viewing distance, mounting height, matte materials, cable rules and 2026 installed costs for South Florida homes.
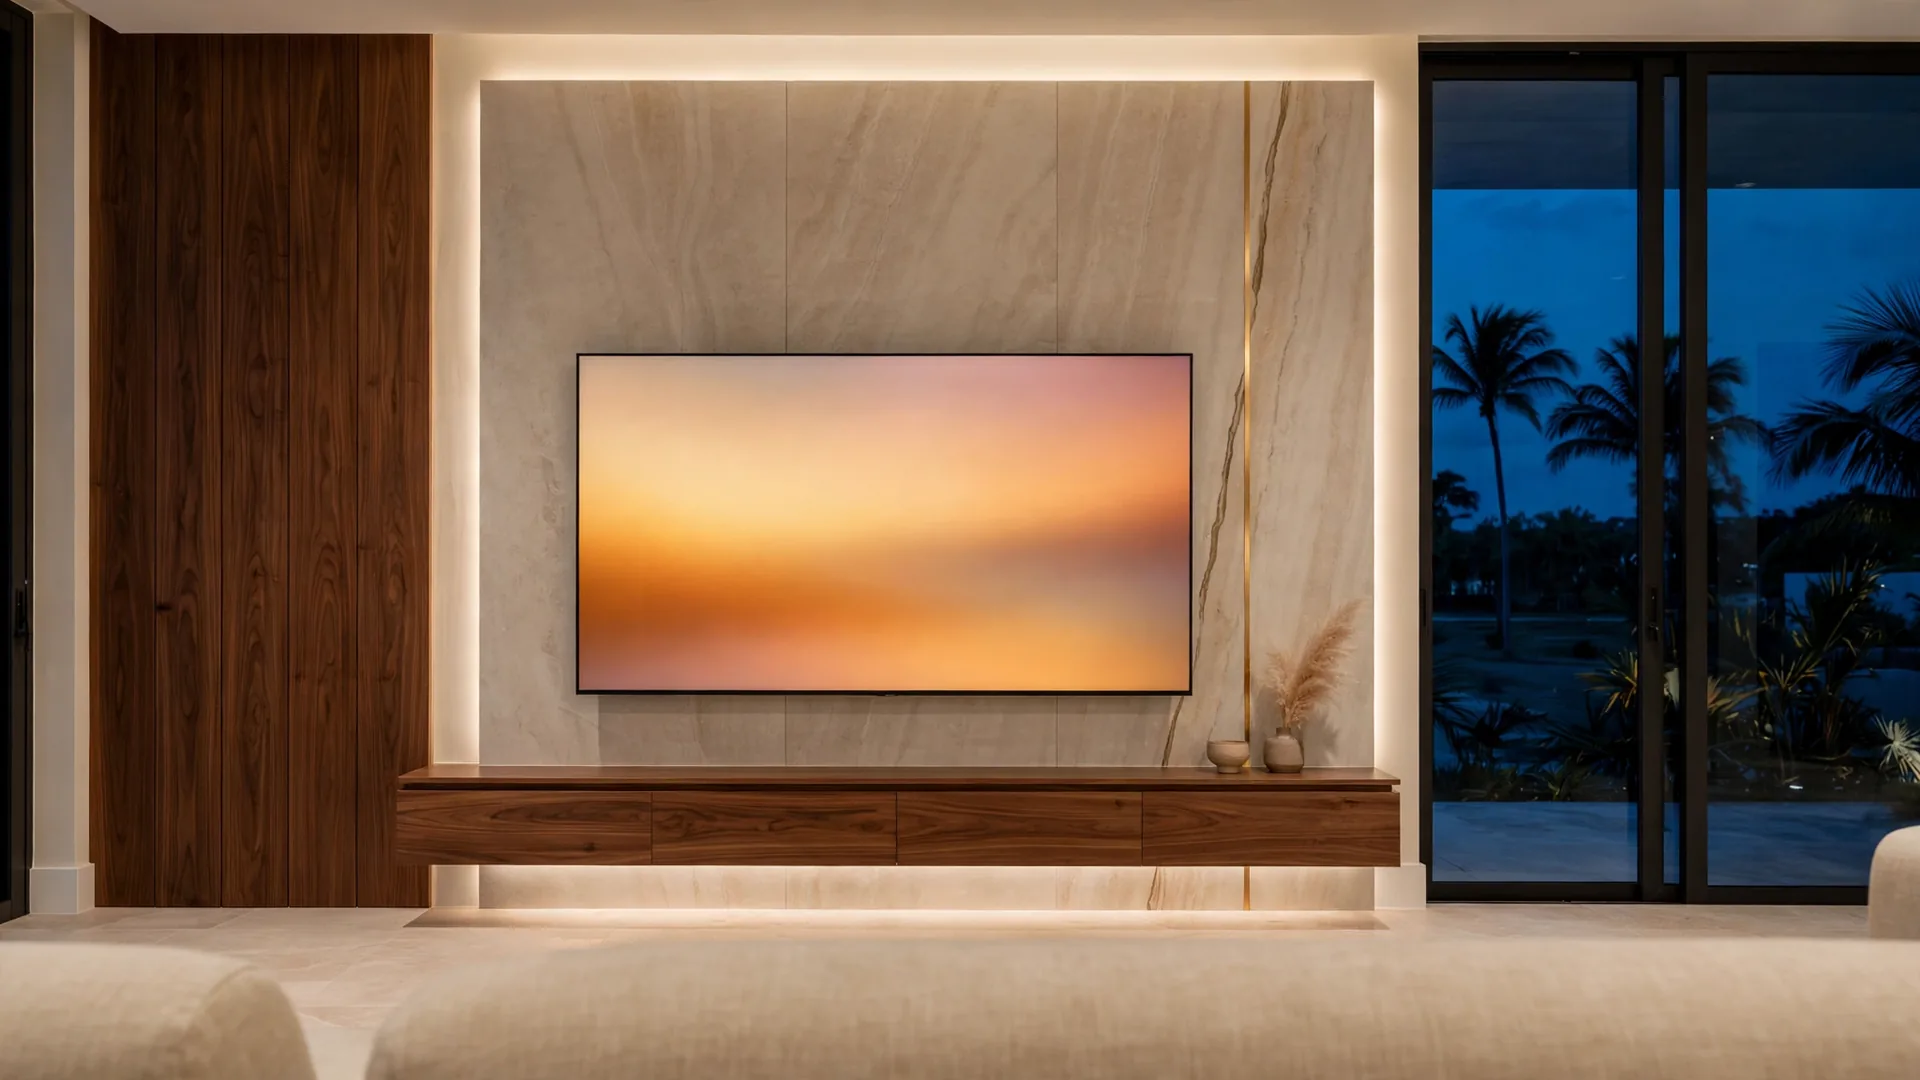
A TV wall fails in a predictable order. The screen is picked from a sale page, the panels are ordered to fill whatever wall is there, and the cables are left until last, usually ending with a cord pushed somewhere it should never go. The result: a screen mounted too high, a panel field too narrow for the TV, and a reflection from the sliders (sliding glass doors) where the picture should be. All three are planning problems, and all three are decided before a single panel reaches the room.
I run a South Florida studio that designs and installs large-format panel walls (big single sheets, 48 by 108 inches), including TV wall panels. This guide works in project order: seat first, screen second, panel field third, then materials, mounting, cables and cost. Where a figure comes from a manufacturer, a code source or a marketplace, I name the source next to it; where a number is my studio's, I label it as mine. Room-level decisions around a TV wall are covered in my living room wall panels guide.
Start with the seat: viewing distance decides the screen size
TL;DR: Measure from your eyes on the sofa to the wall, then size the screen to that distance. Samsung's immersive guidance multiplies the diagonal by 1.2 to get the seating distance; Sony publishes a wider acceptable range of 2 to 5 times the diagonal. The two answer different questions.
The tape measure starts at your eyes, not at the front edge of the couch: seating-distance charts measure from where the viewer's eyes will be.
Samsung's guidance is the simplest version. The manufacturer says the most immersive experience comes when the screen fills 40 degrees of your field of view, and it turns that angle into simple arithmetic: multiply the screen size by 1.2 to get the suitable distance. A 75-inch TV, in Samsung's own worked example, puts the seat 90 inches away, about 2.3 meters. Run it backward and it becomes a buying rule: divide your eye-to-wall distance by 1.2 to get the diagonal the immersive target points to.
Sony publishes a different answer, and the difference matters enough to keep them separate. Sony's placement guide says the ideal distance is 2 to 5 times the diagonal, with your eyes level with the center of the screen. That is a broad acceptable range, not an immersive target. A 65-inch TV fits it anywhere from about 10.8 to about 27.1 feet (130 to 325 inches). Neither figure is a universal rule. I use them as written: Samsung for the immersive end, Sony for the outer limits. Sony's guide adds that the TV belongs where light does not shine directly on the screen, and that a wall-mounted set sits up to 15 cm (about 6 inches) from the wall.
A third framing comes from the standards bodies, reported through RTINGS and summarized by The Slick List (published October 24, 2026): SMPTE (the Society of Motion Picture and Television Engineers, the group that sets film and TV technical standards) works from a screen filling at least 30 degrees of view for everyday mixed viewing, while a 40-degree fill is the cinema-style setting associated with THX (a cinema quality standard for picture and sound) guidance. At 8 feet from eyes to screen, that chart's diagonal runs from 59 inches at the 30-degree end to 80 inches at the 40-degree end. One caution from that source is worth keeping: RTINGS treats its 30-degree size as the smallest set it would recommend for a given distance, not the perfect one.
Mounting height: center the screen at seated eye level
TL;DR: The center of the screen belongs at seated eye level, about 42 inches from the floor on a standard sofa (Express Mounting's mounting-height calculator), and that center does not move when the screen gets bigger. Work out the bottom edge from your own TV's height – center minus half the screen height.
Height is where finished walls most often go wrong. Two independent sources land on the same center figure. Express Mounting's mounting-height calculator (updated October 27, 2026) puts it this way: mount the TV so the center of the screen sits at your eye level when seated, about 42 inches from the floor for a standard sofa, and the same center covers every screen size – a 55-inch and an 85-inch both center at 42 inches, with the bigger panel reaching further above and below. Taskrabbit's mounting guide (updated February 17, 2026) confirms the center at around 42 inches.
The sources diverge on bottom edges, and the gap between them is instructive. Express Mounting's table, all centered at 42 inches, gives a 55-inch screen a bottom edge at 29 inches (screen height 27 inches), a 65-inch a bottom at 26 inches, a 75-inch a bottom at 24 inches, and a 98-inch a bottom at about 18 inches. Taskrabbit's figures run a few inches lower, because the tables assume different screen heights and bezels (the frame around the picture). The durable method is the formula both rest on: measure your actual TV's height, halve it, subtract that from your seated eye-level center.
Room type moves the center, within limits – Express Mounting lists a low sectional at 40 inches and home theater recliners at 38 inches – because the center follows the viewer's eyes in that room's furniture. THX and SMPTE guidance, as cited by Wall Panels World and The Slick List, keeps the line of sight within about 15 degrees of the screen's center. A set pushed high – over a raised fireplace is the classic case – breaks that limit even when the composition looks symmetrical, which is why my fireplace accent wall guide treats the shared TV-and-fireplace wall as a special case.
For a panel wall, the layout is drawn around that center: Wall Panels World's sequencing rule says to set the TV height before fixing rails (the horizontal trim pieces of a panel frame), dado (the lower wall band in traditional paneling) or picture molding (a thin trim strip set high on the wall), because seams and trim lines take their positions from the screen center once it is set.
Sizing the panel field around the screen
TL;DR: No standard sets how far panels should extend past a TV, so treat any margin as design practice, not a rule. Aaditya Interior's published practice puts roughly 300 to 450 mm (about 12 to 18 inches) beyond the screen on each side (labeled typical by the source itself); test it on your wall with painter's tape before ordering anything.
This is the thinnest evidence base in the entire subject of TV walls, and the guide has to say so upfront: no US industry standard, manufacturer standard or SMPTE/THX rule sets panel-field width around a screen. What exists is design practice, and the clearest published version comes from Aaditya Interior, an India-based studio whose TV wall dimension guide (published August 24, 2026) states it plainly: the panel should be visibly wider than the TV, roughly 300 to 450 mm (about 12 to 18 inches) beyond the screen on each side, so the TV looks placed on the wall, not stuck on it. Its worked table:
| Screen size | Approx. screen width | Panel field in that practice |
|---|---|---|
| 43 in | 960 mm (about 38 in) | 1500-1800 mm (about 59-71 in) |
| 50 in | 1110 mm (about 44 in) | 1700-2000 mm (about 67-79 in) |
| 55 in | 1230 mm (about 48 in) | 1800-2100 mm (about 71-83 in) |
| 65 in | 1450 mm (about 57 in) | 2000-2400 mm (about 79-94 in) |
| 75 in | 1680 mm (about 66 in) | 2300-2600 mm (about 91-102 in) |
| 85 in | 1900 mm (about 75 in) | 2500-2900 mm (about 98-114 in) |
Use the table the way its own label invites: as a starting point to tape out, not a specification to obey. Mark the screen outline at the center height you settled on and the field edges you are considering, then judge them from the sofa, at the size the screen will actually look from there.
My studio's own arithmetic works in sheets, as published in my other guides. The sheet I install runs 48 by 108 inches, so a 12-foot wall at 9-foot ceilings is three sheets and two vertical seams, and living room walls in the common project band typically run three to five big sheets fitted around a TV mount, outlets and a fireplace. Seams are placed, never accidental: a seam lands on a door casing line (casing is the trim around a door frame), a TV edge or a change of finish. The seam plan, drawn at the measure visit, settles each one, as the installation process guide sets out.
Once the width is set, the layout choice comes next, and Wall Panels World's guidance draws it clearly: panel the full wall when the room is large enough to carry it, and use a framed feature field behind the TV in smaller rooms, where full-wall paneling can make the room feel narrower. The same source ties pattern scale to screen scale – 75- and 85-inch screens work better with broader lines, wider fluting (grooved boards with a repeating vertical rhythm) and quieter layouts – because the bigger the picture, the quieter the field behind it should be: peripheral vision (what you see at the edges while watching the center) picks up busy patterns during dark scenes.
Height is the easier call, and my position is already published in the accent wall panels guide: full height is the default. A partial-height field, stopped at two-thirds, puts a hard horizontal edge and a step in the wall surface directly behind or below a large black rectangle, and you notice both every time the screen is off. A full-height field covers the whole wall surface, so the screen, the console and any shelves sit on one even surface. In open-plan rooms the field ends where the living zone ends, and a short return, the finish turning onto the side wall, can give the zone a clean edge.
Materials behind a TV: what each family does well and badly
TL;DR: The main TV wall families are acoustic slat panels, slat and fluted boards, panel molding, MDF (medium-density fiberboard – wood fibers pressed into a flat board) backing boards, PVC (polyvinyl chloride, a hard plastic) panels and large-format composite sheets. My studio installs the last of these – a bamboo-fiber composite sheet, 48 by 108 inches and 5 mm thick – and treats slats as a compared alternative.
Wall Panels World's TV guide compares the families a homeowner actually meets. Acoustic slat panels suit modern TV walls and slightly soften room echo, with one check: the bracket must fix through to the wall, not into the felt panel. Slat and fluted boards give wood-look lines and cleaner wipe-down surfaces for larger screens, with the warning that uneven walls show more on broad rigid panels. Panel molding fits traditional rooms and painted feature walls. MDF backing board (a flat fiberboard panel, primed and painted) suits painted back panels and routed cable channels. PVC panels offer marble, stone, tile, brick and plain matte finishes, with matte faces advised where glare is a concern.
Acoustic slat panels. The construction is consistent across sources: MDF slats, often veneered (faced with veneer – a thin layer of real wood over a core), fixed to a felt backing (Wall Panels World). WoodyWalls (February 25, 2026) describes the same build as wood strips on a dense, typically recycled felt backing that serves as the sound-absorbing layer.
The honest claim is narrow: slats reduce echo and reverberation (the lingering of sound in a hard room); they do not soundproof a room, a distinction The Panel Hub's slat guide also draws. NRC (noise reduction coefficient – how much sound a surface absorbs; 0 absorbs none, 1 absorbs nearly all) runs from 0.00 to 1.00, and a figure like the 0.85 The Panel Hub publishes for its own panel, verified by SGS (an independent testing company) for that product, belongs to that product alone. No acoustic rating attaches to my studio's sheet. The deep slat comparison lives in the slat TV wall guide; the general family survey sits in the wall paneling guide. Their vertical rhythm competes with the picture on large screens. My studio's position is published and unchanged: slats are a product we explain and compare; we do not install them as our own finish.
Large-format composite sheets – my studio's material. The sheet is a bamboo-fiber composite (a composite core made with bamboo fiber, not solid bamboo), 48 by 108 inches and 5 mm thick, carrying a finish: travertine look (travertine is a pale, pitted limestone), marble look, stone look, porcelain look, real-wood veneer, leather or velvet. One sheet covers a wide span with no horizontal seam, which is what lets a TV field read as one surface instead of a grid; the core gets its own treatment in the bamboo composite wall panels guide. The limits matter: the sheet is cladding, a decorative layer with no structural role; a look finish carries no water rating and no heat rating of its own; and the material belongs in conditioned living spaces (rooms with regular air conditioning) on a dry, flat, sound wall, with cut edges sealed.
Two neighboring materials deserve a sentence each, so quotes can be compared cleanly. Flexible or soft stone products, per an industry explainer from MR Building Materials, are typically only 1 to 3 mm thick and around 1.5 kg per square meter (about 0.3 lb per square foot), with specs varying by supplier; those are supplier-typical figures, not specs of anything my studio installs. Florida adds a humidity dimension to core choice, covered in the Florida humidity panel guide.
The finish decision that matters most: matte, glare and light
TL;DR: Behind a TV, choose matte or low-sheen (sheen = how shiny a surface is; low-sheen means nearly flat) finishes. Flat surfaces absorb light and minimize glare, while gloss throws a reflection back at the sofa – so matte travertine look, honed (smoothed to a soft, flat finish, not polished shiny) stone looks, matte veneer, and leather or velvet on request go behind screens without a fight, and a polished marble look earns its place beside the screen or on another wall instead.
This guidance is already published in my living room guide, and the TV wall is where it bites hardest: anything reflective around a dark screen shows up twice, once as a highlight on the panel face and once as a distraction competing with the picture. Sony's placement guidance makes the screen-side version of the point – position the TV where light does not shine directly on the screen – and Samsung's Frame page describes anti-reflection technology that reduces glare and anti-glare technology that reduces reflections from sunlight and ambient lighting. A panel finish cannot fix direct sun on the glass, but the wrong finish adds a second reflective surface around the first.
The finishes that behave behind a screen are the quiet ones. The travertine look (Serene Stone in my materials library) is the matte, warm workhorse, with its own travertine accent wall guide. Honed stone looks and matte veneer, covered in the veneer wall panels guide, stay flat under raking light (light striking a surface at a shallow angle, the kind that pours through sliders in the late afternoon). Leather and velvet, available on request, are the softest option for a media room, where the wall should disappear when the lights drop. The marble look wall panels guide covers the Calacatta family – white, gray-veined and gold-veined – and my guidance there is specific: a polished marble look directly behind a TV in a bright room fights the screen, while the same face in a band beside the screen, or on the fireplace or sofa wall, works well.
Fluted boards sit in between, and the fluted wall panels guide works through their TV behavior in full: groove rhythm gives a large black screen a textured field, deep grooves behind a wall-mounted TV leave the bracket nothing flat to sit against, and busy narrow flutes can fight the picture in peripheral vision. Wide flutes suit tall TV walls viewed from 10 feet or more, often as one fluted section inside a smooth stone-look field.
Do not choose any of this from a phone photograph. The sample test I publish settles the question in your room: hold the sample at the TV position, sit on the sofa at the brightest hour with the sliders open, and look at it – if the sample mirrors the room back at you, the wall will too.
Mounting through panels: the panel carries no weight
TL;DR: Decorative paneling is a finish layer and carries no TV weight at all. The bracket fixes through the panel and into the wall behind it – a stud (the vertical wood or metal frame piece inside the wall), masonry or a proper anchor – and fitting a TV mount through the panel into the studs is part of my studio's installation scope.
Wall Panels World states the load rule plainly: decorative paneling is a finish layer, not a structural substrate (the surface that carries the load), and the TV bracket should fix through the panel and into the wall behind it – masonry, concrete block, a stud, or a proper anchor for the wall type. WoodyWalls' installation steps say the same from the installer's side: the mount is anchored into the structural studs behind the panels, not just the panels themselves. The same source adds a useful benchmark: SANUS, a TV bracket manufacturer, publishes a five-times safety factor, meaning the wall should comfortably carry five times the combined weight of the TV and the bracket – the maker's factor, not a rating of any panel.
On my projects, the application is specific and limited, and the limits matter. At the measure visit, the specialist marks a TV mount position on the obstacle map, alongside outlets and switches, and every obstacle has to land inside a sheet, where the sheet is cut around it, or clear of a seam – decided on paper before fitting day. Fitting a TV mount through the panel into the studs is installation work, and it is in my scope; cutting around existing outlets and refitting their plates is panel work too. My studio has not set a public maximum screen size or weight for a panel wall, and I do not publish a backing spec beyond this: the fixings are planned into the wall's structure. An unusually large or heavy set calls for a measure-visit conversation about that wall's construction.
Two practical rules close the section. Timing: allow at least about 24 hours of adhesive cure (the time the glue needs to fully set) before the wall is loaded or drilled. Air: Sony's support guidance, as summarized in my sources, puts ventilation clearance at 2 to 6 inches behind the set and about 4 inches at the sides, and ventilation slots should never be blocked – and your TV manual wins over any general figure, including this one.
Cables, power and backlight: the short version
TL;DR: The TV's power cord never runs inside the wall – the National Electrical Code prohibits flexible cords as a substitute for permanent wiring – so power reaches the set through a proper recessed outlet behind the TV, installed by a licensed electrician, while signal cables use a low-voltage pass-through.
Power first, because it carries the one hard rule. The National Electrical Code (NEC), in section 400.12 as cited by licensed-electrician sources in my research, prohibits flexible cords from standing in for a building's permanent wiring, running through holes in walls, or being concealed inside walls, floors or ceilings. An extension cord, and the TV's own power cord dropped down inside the wall cavity (the hollow space inside a framed wall, between the studs), both break that rule.
The pattern that follows the code is the one used throughout my guides: the outlet moves behind the TV, into a recessed box, and listed (tested and certified for exactly this use by a safety lab) in-wall power relocation kits (such as the PowerBridge, DataComm and Sanus kits named in Express Mounting's cable guide) exist for exactly this job. New line-voltage work (work on the regular household-power wiring, as opposed to low-voltage signal and LED wiring) – a moved outlet, a new circuit – is a licensed electrician's line item in Florida, assessed on site, and it is not part of my studio's quick estimate.
Signal cables follow a lighter rule set. HDMI, ethernet and optical lines are low voltage, and they travel through a brush plate (a cover plate with bristles that cables pass through) or pass-through, ideally staying in the same stud bay (the space between two vertical studs) as the mount, with in-wall-rated cable such as CL2 or CL3 (in-wall safety ratings for low-voltage cable – the outer jacket is tested and approved for running inside a wall). Keep low-voltage and power runs separated, and plan a service path while the wall is still a drawing: drivers fail, HDMI standards change, and a wall with a removable section or planned channel can be serviced, while a sealed wall gets opened.
Backlight needs one distinction here. Warm mood light and TV bias light are different tools. The halo behind panels and shelves on my projects is warm, 2700 to 3000 K (K = kelvin, the scale for light color: low numbers are warm like a table lamp, high numbers are cool like daylight; 6500 K is the daylight-white standard, called D65), matched across the whole wall, with the driver (the power supply that converts household current to the strip's low voltage) kept accessible and ventilated in a console, a cabinet or a removable panel section, never sealed inside the wall. A bias light directly behind the screen is a viewing tool, and Wall Panels World's TV guide puts it at around 6500 K, the D65 reference white, because its job is to ease the contrast between a bright screen and a dark room. The full electrical plan – driver sizing, voltage drop (power lost along a long wire run, which can dim the far end of a strip), dimming, bench testing (testing the lights on a workbench before they go on the wall) – is written out in my LED backlit wall panels wiring guide rather than repeated here.
What a TV panel wall costs in 2026
TL;DR: Market figures separate into three piles that should never be mixed: paneling overall, TV mounting, and media-wall builds. Angi's 2026 data puts paneling projects at $1,200 to $6,000 and mounting labor at $160 to $360. My studio prices by project, not by the foot: a stock design from $850, a design fitted to your wall usually $2,200 to $2,700, and full custom turnkey (one price covers design, panels, delivery and installation) projects from $9,999, every figure preliminary until a specialist measures your wall.
The paneling market. Angi's wall paneling cost page (2026 data, updated October 30, 2026) puts a typical paneling project at $1,200 to $6,000 with an average around $2,800, and bands paneling at $5 to $25 per square foot by type – shiplap (overlapping horizontal boards) at $7 to $16, PVC at $7 to $20, fabric at $8 to $18 and laminate (panels with a printed surface layer) at $5 to $12 – with labor at $3 to $10 per square foot. A TV wall, with a mount, outlets and a screen to work around, sits at the demanding end of whatever band it lands in. The full market ladder sits in how much wall panels cost in 2026.
The mounting and cable market. Angi's TV mounting page (updated August 9, 2026) prices the TV side separately: mounting labor at $160 to $360, averaging about $260, brackets at $30 to $250 and up, cable covers at $10 to $40, and hiding cables inside the wall at up to $1,000 – a warning label in itself, since the cable work around a TV can cost more than the mounting.
Media-wall models, labeled as models. GetMediaWall's 2026 guide models builds from $500 do-it-yourself to $15,000 and up, with a $3,000 to $7,000 sweet spot for a build with an electric fireplace and LED lighting – one marketplace's own model, not an Angi or HomeAdvisor average, and never to be quoted as one.
My studio's figures. My studio publishes three project anchors, and a TV wall is priced through them like any other feature wall – there is no TV-wall price list and no per-square-foot studio price. A stock design, one of our finished designs installed as designed, starts at $850. A design fitted to your wall, a proven composition recomposed around your wall's proportions in the finish you choose, usually runs $2,200 to $2,700, and most single living room walls land in that fitted band. A full custom turnkey project, designed for your room, starts at $9,999. Design, panels, delivery and installation by our own crew are inside those figures. What moves a quote, in my published list, is wall size, the materials you choose, lighting, electrical or mounting needs, custom details and site conditions. Demolition, wall repair, new electrical circuits and permits are not part of the quick estimate; they are assessed on site and confirmed in your exact quote.
Mistakes that make a TV wall look wrong
TL;DR: The recurring failures are sizing the panels before the screen, centering the TV on the wall instead of at seated eye level, choosing a glossy finish for a bright room, running the power cord inside the wall, and sealing the wall with no service path behind it.
- Panels first, TV later. A field composed for the screen you own today strands the next, larger set. Decide the screen from the seat, then compose the field.
- Wall-centered height. A TV centered on the wall's height looks balanced in a photograph and makes for poor viewing from the sofa. The center belongs at seated eye level, about 42 inches, whatever the wall's proportions say.
- Gloss in a bright room. A polished face around a screen doubles every reflection the sliders send across the room. Use matte or low-sheen behind the screen.
- The cord in the cavity. Dropping the TV's power cord inside the wall breaks the electrical code. The outlet moves behind the TV, placed by an electrician, or a listed relocation kit does the job.
- No service path. A wall sealed with the driver, the pass-through and every connector entombed behind fixed sheets turns a failed driver or connector into an opened wall.
- Busy pattern, big screen. A narrow, high-contrast pattern behind a 75- or 85-inch screen fights the picture in peripheral vision during every dark scene. Bigger screen, quieter field.
How a studio TV wall project runs
TL;DR: You send a photo and get a free design preview of that wall in a new finish; a specialist then measures in person and fixes the exact price, the seam plan and the TV mount position; installation is turnkey, by the studio's own crew. Every electrical change is decided before fitting day, because after the sheets are up the wall is closed.
The sequence is the same one my installation process guide documents for any feature wall, with the TV decisions folded into the measure visit. At that visit, the specialist confirms the exact price and draws the obstacle map – the TV mount position, outlets and switches – and decides the cable route and the service path, so every obstacle lands inside a sheet or clear of a seam by decision rather than by luck. Fitting is turnkey: design, panels, delivery and installation by our own crew, with sheets trimmed on site; my studio does not sell a separate cutting service.
Two limits belong here. A full custom project with lighting, cabinetry and storage is a multi-visit build. I will not promise a TV-wall timeline in a guide, because a schedule is something your installer owes you in writing for your wall. The dividing line is clear: fitting around existing outlets is panel work, while moving an outlet or running a new circuit for backlighting is electrical work for a licensed contractor, decided before fitting day – backlighting decided late means a visible wire or a reopened finished wall. My studio serves South Florida – Palm Beach, Broward and Miami-Dade counties.
Frequently asked questions
TL;DR: Size the screen from your seat, center it at about 42 inches, keep the finish matte, fix the bracket into studs, keep the power cord out of the wall, and price the project through published project anchors, not a per-foot figure.
How big should my TV be for my room?
Work from your eye-to-wall distance. Samsung's immersive guidance divides it by 1.2 to reach a diagonal – 90 inches of distance points to a 75-inch screen – while Sony publishes a wider acceptable range of 2 to 5 times the diagonal.
How high should a TV be mounted over paneling?
Center the screen at seated eye level, about 42 inches from the floor on a standard sofa, for every screen size. Work out the bottom edge from your own set: center minus half the TV's actual height. Keep the line of sight within about 15 degrees of the center, per the THX (a cinema quality standard for picture and sound) and SMPTE (the Society of Motion Picture and Television Engineers, the group that sets film and TV technical standards) guidance cited in this article.
How far should wall panels extend past the TV?
No standard sets this. Aaditya Interior's published practice puts roughly 300 to 450 mm (about 12 to 18 inches) of panel beyond the screen on each side, labeled typical by the source – about 1800 to 2100 mm (about 71 to 83 inches) of field for a 55-inch screen and 2000 to 2400 mm (about 79 to 94 inches) for a 65-inch. Treat it as a starting proportion and tape the outline on your wall before committing.
What is the best finish for a TV wall, matte or glossy?
Matte or low-sheen. Flat surfaces absorb light and minimize glare, while gloss throws a reflection back at the sofa. Matte travertine look, honed stone looks, matte veneer, and leather or velvet on request all sit quietly behind a screen. A polished marble look works better in a band beside the screen or on another wall in a bright room.
Can a TV be mounted on wall panels?
Yes, with the load carried by the wall, never by the panel. The bracket fixes through the panel into studs, masonry or a proper anchor. On my studio's projects the mount position is marked at the measure visit, fitting the mount through the panel into the studs is part of the installation scope, and the wall cures at least about 24 hours before it is loaded.
How do you hide TV cables in a panel wall?
Power and signal take different routes. The power cord never runs inside the wall – the electrical code prohibits flexible cords as permanent wiring – so an electrician places a recessed outlet behind the TV, or a listed in-wall power kit does the job. HDMI and other low-voltage lines pass through a brush plate or pass-through, ideally in the same stud bay.
Do slat panels improve the sound of a TV room?
They soften it, within limits. Felt-backed slat panels absorb some sound and reduce echo and reverberation in a hard room; they do not soundproof the room. Published NRC (noise reduction coefficient – how much sound a surface absorbs; 0 absorbs none, 1 absorbs nearly all) figures belong to the specific product line tested – one maker's 0.85, verified for its own panel, says nothing about another maker's slats, and my studio does not install slats as its own finish.
How much does a TV panel wall cost in 2026?
Angi's 2026 data puts paneling projects at $1,200 to $6,000 and TV mounting labor at $160 to $360, with in-wall cable hiding up to $1,000. My studio prices by project rather than by the foot: a stock design from $850, a design fitted to your wall usually $2,200 to $2,700, and full custom turnkey projects from $9,999, every figure preliminary until a specialist measures your wall.
Sources
- Samsung Gulf Support, Recommended viewing distance for your TV – 40 degrees; screen size x 1.2. samsung.com
- Samsung Australia, Pick the right TV size – screen size x 1.2. samsung.com
- Sony Help Guide, Tips on Placement – distance 2 to 5 times the diagonal; eyes level with the center; no direct light on the screen. helpguide.sony.net
- Sony Community (Sony support answer), TV ventilation clearances – 2 to 6 inches behind, about 4 inches at the sides. us.community.sony.com
- The Slick List, What Size TV for Your Room? – SMPTE 30-degree and THX 40-degree framing via RTINGS; THX 15-degree line of sight. theslicklist.com
- Express Mounting, TV Mounting Height Calculator – center at seated eye level, about 42 inches. expressmounting.com
- Taskrabbit, How High to Mount TV for the Ideal Placement – center typically around 42 inches. taskrabbit.com
- Wall Panels World, Panelling Behind Your TV – panel families; bracket through panel to structure; bias light around 6500 K (D65); matte versus gloss. wallpanelsworld.co.uk
- Express Mounting, How to Hide TV Wires In the Wall – NEC Article 400; listed in-wall power kits; CL2/CL3 cable. expressmounting.com
- Eastside Electrical, Outlet Behind a Wall-Mounted TV – NEC 2023 sections 400.12 and 400.10. eastsideelectricalwa.com
- Samsung US, The Frame Design – anti-reflection and anti-glare technology. samsung.com
- The Panel Hub, Acoustic Wood Slat Wall Panels: The Complete Guide – slats reduce echo, do not soundproof; own panel NRC 0.85 (SGS). thepanelhub.com
- WoodyWalls, 9 Acoustic Panel TV Wall Ideas – felt-backed slats; mount into structural studs. woodywalls.com
- MR Building Materials, flexible stone wall panels explainer – typical 1 to 3 mm, about 1.5 kg per square meter. mr-buildingmaterials.com
- Aaditya Interior, TV Wall Design Ideas (With Dimensions) – panel margin 300 to 450 mm per side, labeled typical. aadityainterior.com
- Angi, How Much Does It Cost to Install Wall Paneling? (2026 data) – projects $1,200 to $6,000, average $2,800. angi.com
- Angi, Hire Someone To Mount TV – mounting labor $160 to $360; hiding cables up to $1,000. angi.com
- GetMediaWall, How Much Does a Media Wall Cost in 2026? – own model: $500 to $15,000 and up (a model, not an average). getmediawall.com