Dining Room Wall Panels: Full-Height, Protection and Finishes (2026)
Dining room wall panels explained: full-height vs chair-rail, which wall to panel, chair protection, finishes, light heights, cleaning and Florida air.
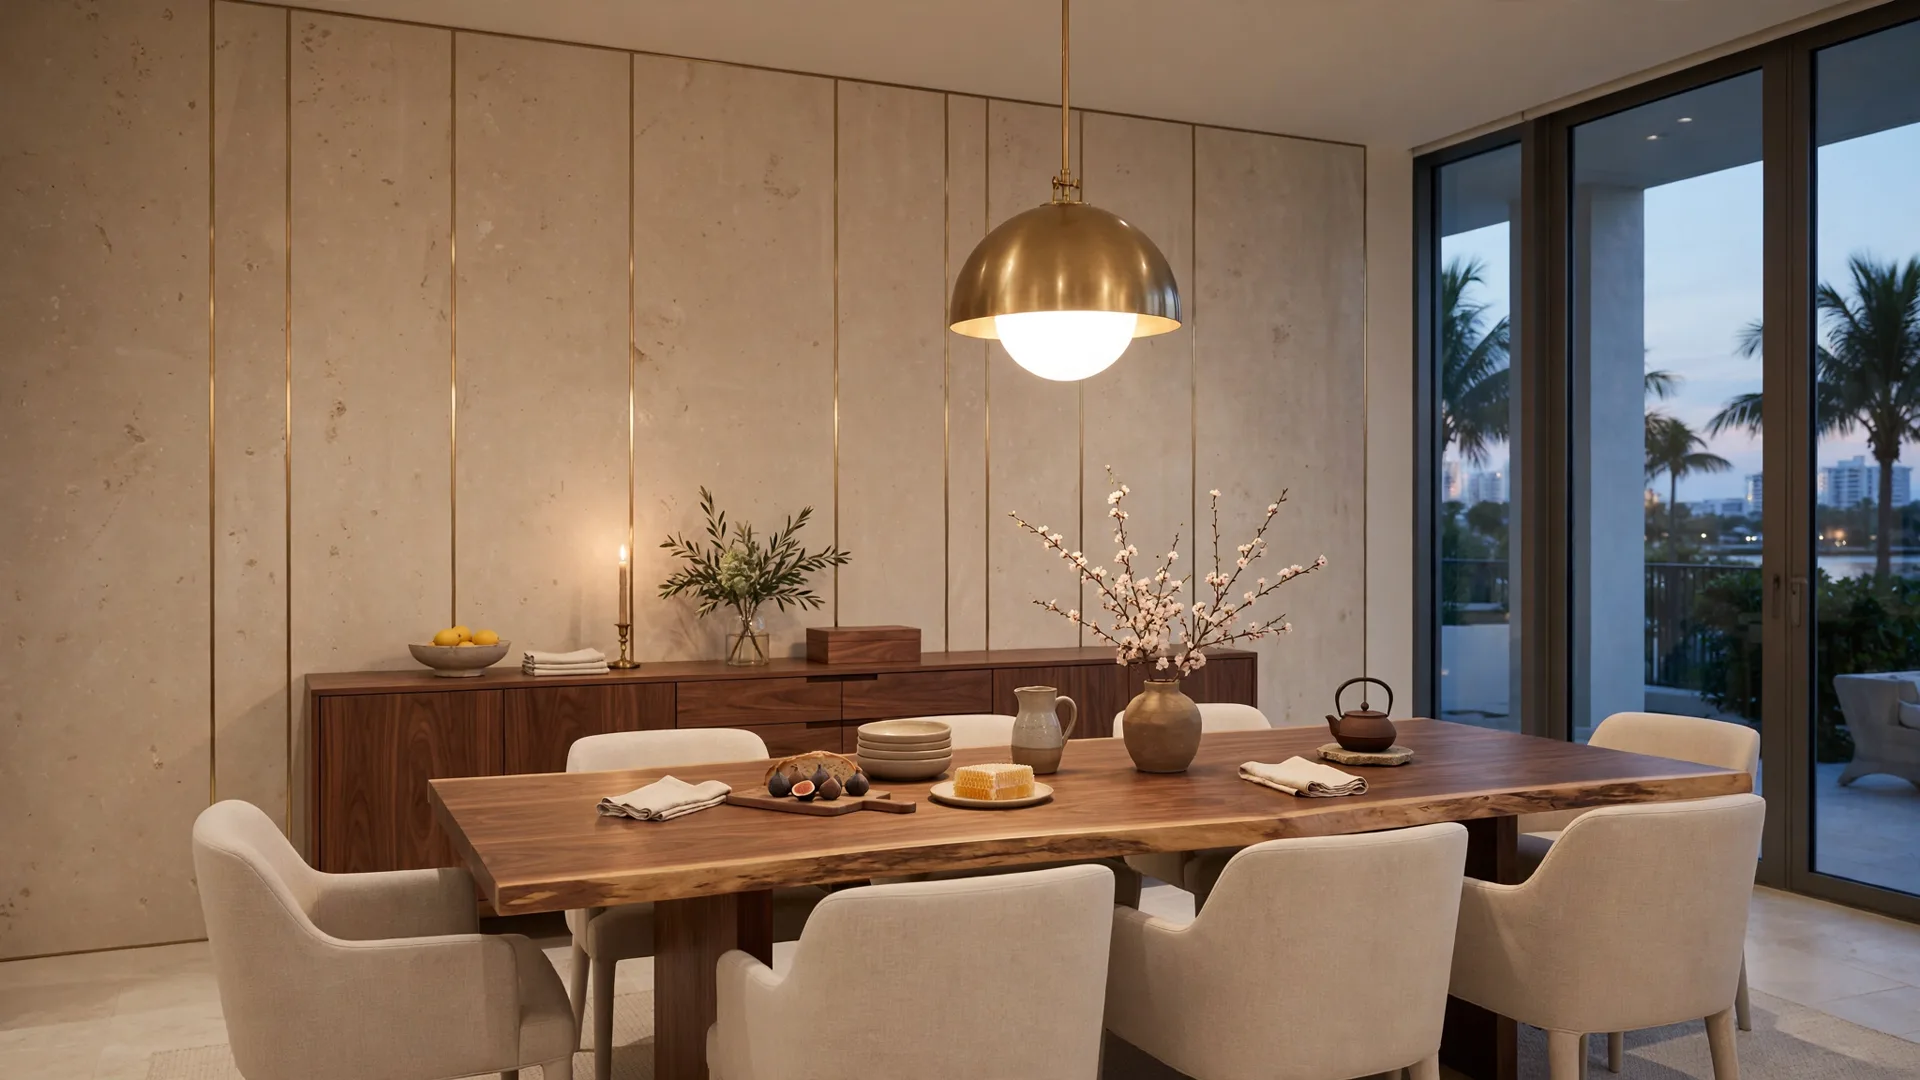
The dining room is the room where a wall takes the most honest abuse in the house. Chairs get pushed back. A sideboard (the low storage cabinet against the wall) has a door that swings. Someone carries a hot dish past a seated guest and brushes the paint. I install large-format dining room wall panels for WOW Walls Studio here in South Florida, and most clients start by asking about wainscoting – the traditional lower wall paneling with a chair rail on top. Sometimes that is the right job. Often what they actually want, once we stand in the room, is a full-height panel wall that changes how the whole dining space feels.
This guide separates those two purchases clearly. It covers which wall to panel, what to do in an open-plan dining area with no clear fourth wall, and chair protection stated honestly, with the clearance numbers that decide whether chairs reach the wall at all. It also covers finishes that behave in warm dining light, where a chandelier and sconces (the wall-mounted lights that flank a sideboard or a piece of art) sit against panels, how the wall handles food, wine and cleaning, the Florida humidity part, and what drives the price, without invented numbers.
A full-height panel wall and chair-rail wainscoting are different purchases
TL;DR: Traditional dining wainscoting is a low protective band, usually 32 to 36 inches high, capped by a chair rail (Builds and Buys; Why I Enjoy). A full-height panel wall is a different purchase: large-format panels floor to ceiling that become the room's main surface. Choose wainscoting height for protection and tradition; choose full height for a complete change of character.
Start with the traditional number, because it explains the name. Wainscoting guides put standard dining chair-rail height at 32 to 36 inches, following the rule of one-third of wall height – about 36 inches on a 9-foot wall and about 32 inches on an 8-foot wall (Builds and Buys; Why I Enjoy). The chair rail itself – the horizontal trim that caps the lower paneling – exists for a practical reason: it protects the wall behind chairs pushed back from the table (Tribune Content Agency). That is a protection detail, refined over centuries.
The panels I install work on a different scale. They are large-format composite sheets – a finish layer bonded over an engineered bamboo composite core (the build is covered in my bamboo composite wall panels guide) – with finishes that read as travertine, marble, stone, wood veneer (a thin real-wood finish layer), leather or velvet. Run floor to ceiling, they take over the whole visual job of the wall: backdrop for the table, surface for the light, and what appears in every photo taken at dinner.
Neither is a failed version of the other. If your room is traditional, your chairs are the risk, and you like the lower-third proportion, a chair-height treatment is coherent – my bathroom wainscoting guide covers the waterproofing side of that family in my wainscoting guide. If your dining room is a plain box with one long empty wall and you want it to feel designed, stopping at 36 inches will not get you there. Decide which purchase you are making before you compare finishes.
Which wall to panel: behind the sideboard, the long wall, or both
TL;DR: Panel the wall the table faces and the photographs catch: usually the long wall behind the sideboard, or the end wall the table points at. In open-plan spaces, panel the wall that defines the dining zone, and stop the field (the area of wall the panels cover) at a real architectural break – a corner, a column, a ceiling change – never mid-wall for no reason.
Behind the sideboard. This is the most common dining layout I panel. The sideboard gives the composition a base, the panels rise behind it, and sconces or art land on a surface with texture instead of flat paint. It also protects exactly the wall that serving dishes, bottle openers and chair backs threaten during a busy dinner.
The long wall. In a rectangular room, the long wall is what seated guests look at for two hours. Paneling it gives the room one clear material statement and leaves the other walls calm in paint. In open layouts this wall often continues into the living area, so the stopping point matters: end at a corner or a return, and let the living side stay painted.
Both, or a return. Wrapping a corner – main wall plus a short return – suits rooms where the table sits in a corner zone of an open plan. It reads as a dining alcove. What I steer people away from is paneling two facing walls in a narrow room; the material closes in, and dinner feels like sitting inside a sample board.
Open-plan dining areas. With no fourth wall, the panel field itself becomes the boundary. Keep the field to the dining footprint – roughly the table length plus the sideboard – and use the light to reinforce it: the pendant stays over the table, the panel wall stays behind it. The bedroom version of this framing logic, building a zone around furniture, is in my bedroom wall panels guide.
Tape the outline first. Mark the field on the wall with painter's tape, set the table and chairs back, and sit in the host seat. The view from that chair is the one you are buying.
Chair protection, honestly: what actually hits your wall
TL;DR: Chairs do hit dining walls, and that is exactly what a chair rail was invented for (Tribune Content Agency). Honest protection comes from two things together: enough clearance so chairs rarely reach the wall – spacing guides put the need at 30 to 36 inches between the back of a chair and the wall, 36 inches minimum from table edge to wall, and 42 to 48 inches where someone walks behind seated guests (Summerhill Homes; WoodFurnist) – and a hard, wipeable panel surface when they do.
Here is the clearance math I use in the room. Dining spacing guidance gives about 24 inches of table edge per person and a table at least 36 inches wide, with at least 30 to 36 inches between the back of each chair and the wall (Summerhill Homes), 36 inches minimum from table edge to wall where no one walks behind, and 42 to 48 inches if a person needs to walk behind a seated guest (WoodFurnist). Measure your room against those numbers first. If your table edge sits 24 inches from the wall, no finish on earth will save that wall from chair backs – the geometry fails before the material does.
When contact does happen, each material responds differently. Paint scuffs and shows every mark as a shine difference. Fabric and soft upholstery absorb the knock but hold the mark and the spill. A hard composite panel face meets a chair-back knock with a sound and stays intact where soft filler would dent, and it wipes clean. I will not promise you a panel cannot be damaged – a hard edge driven into any surface can chip it – but for the normal dining pattern of backs leaning, chairs scraping lightly and hands steadying on the wall, a hard panel is the lowest-drama surface of the three.
One design detail follows from this. If your clearance is tight, use a forgiving finish in the lower zone of the panel field – a matte stone-look or veneer that hides small marks – and save lighter, higher-contrast finishes for the wall chairs cannot reach. That is a layout decision; the product stays the same.
Finishes that work in dining light
TL;DR: Dining rooms live in warm evening light, and finishes should be chosen in it. Matte travertine-look stays calm and hides small marks; marble-look with soft veining suits a formal table; veneer brings the warmth wood furniture already speaks. The pairings that stay calm are quiet ones: cool stone against warm wood, with brass or dark metal present only as a line of trim or a sconce catching the light.
Travertine-look. The warm, matte limestone look is the finish I start most dining conversations with, for the reasons in my travertine guide: horizontal banding, low glare under a pendant, and a surface that does not show every fingerprint between courses.
Marble-look. A dining room can carry a marble look better than a bedroom can, because nobody sleeps in it and a formal table enjoys a little ceremony. Keep veining soft if the room is small, and let large formats keep it calm – large panels mean fewer joints and a cleaner, easier surface (RD Marble). I compare styles in my marble-look guide.
Veneer. If your table and sideboard are wood, a veneer panel wall in a related tone, a shade apart from the furniture, is the warmest option. Pale oak reads light and Scandinavian; walnut reads formal. Match the undertone and let the exact colour differ, or the room looks like a furniture showroom set.
Combinations, in designer language. The combinations that work at a dining table are quiet ones: cool travertine against warm walnut, because contrast is what makes a wall feel designed rather than decorated; or a stone field with a single veneer return that wraps the corner. A thin brass inlay or a dark metal trim is an accent that catches candlelight – jewellery for the wall, while the stone and the wood hold the room.
Judge every sample at night, under your own bulbs, with a plate and a glass on the table. Daylight showroom judgement is how people end up with a wall that looks perfect at noon and cold at dinner.
Light on panels: chandelier, sconces and the warm dim
TL;DR: Hang a chandelier or pendant 30 to 36 inches above the tabletop on an 8-foot ceiling, adding about 3 inches for each extra foot of ceiling, and centre dining sconces 60 to 66 inches from the floor (Residence Supply). On panels, plan those positions before cutting, use warm 2700K to 3000K light, and put the dining lights on a dimmer – dinner light is low light.
The pendant sets the room: everything orients to it. The 30 to 36 inch rule above the tabletop keeps it low enough to make a pool of light over the table and high enough that guests see each other under it (Residence Supply). On a panel wall, its glow should graze the texture softly – a matte stone-look finish rewards a low, warm pendant more than any other surface in the room.
Sconces on a panel wall are both light and composition. Centred at 60 to 66 inches from the floor, they sit just above seated eye level and flank a sideboard or a piece of art without glare (Residence Supply). Each sconce is a cut and a junction in a panel, so the pair is positioned on the drawing – centred on a panel or centred on a joint, on purpose – before anything is cut. The driver (the power-supply unit that feeds the light), dimming and wiring method behind backlit and sconce work is covered in my LED backlit wall panels guide.
Colour temperature – how warm or cool white light looks, measured in kelvin – matters more at a dining table than anywhere else. Warm light around 2700K to 3000K flatters food, faces and stone. Cooler light makes a travertine wall look grey and a dinner look like a meeting. Buy the dimmer and the bulbs as a pair and test them; a dining room that cannot dim is a dining room used at one mood only.
Food, wine and cleaning: the dining room test
TL;DR: Dining walls get splashed – wine, sauce, candle wax, children's hands. A hard composite panel wipes with a damp cloth and a pH-neutral cleaner (a gentle cleaner, neither acidic nor alkaline), and large formats mean fewer joints for spills to sit in (RD Marble). Real travertine and marble are porous and need sealing every 1 to 3 years with pH-neutral cleaning only (Accio) – the composite keeps the look without that cycle.
Here is the test in concrete terms. Red wine flicked from a glass does not soak into a sealed composite face the way it enters unsealed natural stone. Tomato sauce wipes off a smooth panel; in a grout line or a fabric it stays. That difference is why the large-format point matters at a dining table: fewer joints means fewer lines where a spill can sit, dry and stain (RD Marble).
Natural travertine is porous: unsealed pores take moisture and stains, and natural travertine cladding needs sealing on installation and re-sealing every 1 to 3 years, cleaned with pH-neutral products (Accio; Q-Furniture). Marble asks for the same discipline. If you love real stone and accept that routine, it is a fair choice. If you host often and clean quickly, the look without the sealing calendar is the practical one.
Daily care for the panel wall itself is short: dust with a soft cloth, wipe marks with a damp cloth and a pH-neutral cleaner, avoid abrasive pads. Veneer fields follow gentle wood care – dusting and no soaking. That is the whole routine, which is the point in a room used for eating.
Florida humidity and air conditioning
TL;DR: Keep indoor humidity below 60 percent, as Florida mold guidance advises (PuroClean; Markham Inspection Services). A dining room that cycles between hot humid air and strong air conditioning needs a dimensionally stable wall surface, and an engineered composite core moves less with moisture than solid wood – one reason it suits South Florida dining rooms.
Our dining rooms live a double life: doors open to a patio in humid air, then the AC pulls the room cold and dry for dinner. Mold guidance for Florida homes is consistent – the state is mold-prone from heat, rain and humidity, and indoor humidity should stay below 60 percent with ventilation and working AC (PuroClean; Markham Inspection Services). A wall finish cannot fix a humidity problem, but the wrong finish can become one: materials that hold moisture against the wall are the risk.
The point of the composite core is movement. Solid wood swells and shrinks as moisture changes, opening joints; engineered composites are more dimensionally stable. I make the full climate case, including what happens to MDF (medium-density fibreboard) and PVC (polyvinyl chloride) in this state, in my Florida humidity guide. For a dining room, the practical rules are simple: run the AC, watch indoor humidity, and do not panel a wall with an active leak or damp problem until that problem is fixed at its source.
What drives the price of a dining room wall
TL;DR: Four drivers: the area of the field you draw, the finish, the number of cuts for sconces, outlets and lighting, and whether the design wraps a corner or runs one flat wall. A single long wall in travertine-look and a two-wall wrap with sconces and a backlit detail are both "a dining room panel wall" – and they are different projects. The full cost structure is in my wall panels cost guide.
Area first. A field behind a sideboard on one wall uses a fraction of the material of a floor-to-ceiling wrap, and the count follows the drawing, so layout is the biggest lever. Finish second: each finish carries its own line in an estimate, and a book-matched marble-look centre – mirrored sheets whose veining reflects across the joint – adds selection and layout work. Third, interruptions: every sconce, outlet and switch is a cut and a fitting, and any backlight adds a lighting system on top. Fourth, geometry: corners, returns and ceiling details add cutting and trim time that a flat wall does not have.
That is why I do not quote a dining wall from a photo alone, and why you should be careful with anyone who does. From a photo, a table size and your clearances I can draw the field, count the cuts, and tell you which layout your room honestly is. The estimate follows the drawing. The general anatomy of panel pricing is in my wall panels cost guide.
Questions I get about dining room wall panels
TL;DR: The short answers: full height and chair-rail height are different purchases; panel the wall behind the sideboard or the long wall; keep 30 to 36 inches of clearance so chairs rarely reach the wall; choose matte stone-look or veneer for warm light; hang the pendant 30 to 36 inches above the table; and keep Florida humidity below 60 percent.
How high should dining room wainscoting be?
The standard is 32 to 36 inches, following the rule of one-third of wall height – about 36 inches on a 9-foot wall and about 32 inches on an 8-foot wall (Builds and Buys; Why I Enjoy). That is the traditional protective band capped by a chair rail. A full-height panel wall is a separate design choice with its own logic.
Which wall should I panel in a dining room?
Usually the long wall behind the sideboard, or the end wall the table faces. In an open-plan area, panel the wall that defines the dining zone and stop the field at a corner or another real break. Paneling two facing walls in a narrow room usually closes the space in.
Will dining chairs damage wall panels?
Chairs damage paint first, because paint scuffs visibly and offers no hard face. Clearance is the first protection – 30 to 36 inches between the back of a chair and the wall, 36 inches minimum from table edge to wall, and 42 to 48 inches where someone walks behind seated guests (Summerhill Homes; WoodFurnist). When a chair back does meet a hard composite panel, the usual result is a wipeable mark rather than a gouge in plaster, though a hard edge driven into any surface can chip it.
What finish is best for a dining room?
For most South Florida dining rooms I start with matte travertine-look for calm, low glare, or a travertine and veneer combination for warmth against a wood table. Marble-look with soft veining suits a formal room. Judge samples at night under your own warm light before deciding.
How high should a chandelier be over a dining table?
Hang it 30 to 36 inches above the tabletop on an 8-foot ceiling, and add about 3 inches for each extra foot of ceiling height (Residence Supply). Dining sconces centre at 60 to 66 inches from the floor (Residence Supply).
How do you clean dining room wall panels after a spill?
Wipe promptly with a damp cloth and a pH-neutral cleaner, and dust with a soft cloth between dinners. Large formats help because there are fewer joints for a spill to sit in (RD Marble). That contrasts with natural travertine and marble, which are porous and need sealing every 1 to 3 years (Accio).
Do dining room wall panels work in Florida humidity?
Yes, with the room managed: keep indoor humidity below 60 percent with ventilation and working AC, as Florida mold guidance advises (PuroClean; Markham Inspection Services). An engineered composite core is more dimensionally stable as humidity changes than solid wood, which swells and shrinks.
How much space should I leave between the dining table and the wall?
Leave at least 30 to 36 inches between the back of each chair and the wall so a chair can pull out (Summerhill Homes), and 36 inches minimum from table edge to wall where nobody walks behind. Where a person needs to pass behind a seated guest, plan 42 to 48 inches (WoodFurnist).
What affects the cost of dining room wall panels?
Four drivers: the area of the panel field you draw, the finish you choose, the number of cuts for sconces, outlets and lighting, and whether the design wraps a corner or runs one flat wall. A single long wall and a two-wall wrap with sconces are different projects, and the estimate follows the drawing – the full cost structure is in my wall panels cost guide.
My verdict for South Florida dining rooms
TL;DR: Decide first whether you are buying protection at chair height or a full-height material wall – they are different projects. Panel the wall behind the sideboard or the long wall, fix your clearances before you blame a finish, choose matte travertine-look or a quiet stone-and-veneer mix, and plan the pendant and sconces on the drawing. Do that, and the dining room stops being a painted box with a table in it.
Here is how I see it on real jobs across Palm Beach, Broward, and Miami-Dade. The dining room rewards honesty more than any other room. Its problems are physical – chairs, clearances, splashes, warm light, humid air – and every one of them is visible on the drawing before a panel is ordered. The failures I get called to fix are never exotic: a field that stops mid-wall, a pendant hung for the ceiling instead of the table, a porous stone nobody sealed, a table pushed so close that chair backs have been signing the paint for years.
What I will never tell you: that wainscoting and a full-height panel wall are the same purchase at different heights; that a finish can overcome bad clearance; that real stone needs no sealing; or that a price exists before the field is drawn. Send the photo, tell me the table size and the room measurements, and the drawing comes first – the finish, the light and the number all follow from it.
Sources
- Builds and Buys, Wainscoting Cost Guide (standard dining chair-rail height 32-36 in, rule of one-third of wall height). buildsandbuys.com
- Why I Enjoy, How to Install Wainscoting in a Dining Room (dining wainscoting height, one-third rule). whyienjoy.com
- Tribune Content Agency, Install Wainscoting (chair rail protects the wall behind chairs pushed back from the table). tribunecontentagency.com
- Summerhill Homes, Dining Room Decorating Rules (30-36 in between the back of each chair and the wall, about 24 in per person, table at least 36 in wide). summerhillhomes.com
- WoodFurnist, How Much Space to Leave Around a Dining Table (36 in minimum table edge to wall with no traffic, 42-48 in where people walk behind seated guests). woodfurnist.com
- Residence Supply, Dining Room Wall Lights and Dining Room Light Fixtures (chandelier and pendant 30-36 in above tabletop, add about 3 in per extra foot of ceiling, sconces 60-66 in from floor to centre). residencesupply.com
- RD Marble, Benefits of Large Panel Walls (large panel formatting means fewer joints, cleaner appearance, easier maintenance). rdmarble.com
- Accio, Travertine Marble Wall Cladding FAQ (natural travertine porosity, sealing on installation and re-sealing every 1-3 years, pH-neutral cleaning). accio.com
- Q-Furniture, What Is Travertine? (natural travertine properties and care). q-furniture.com
- PuroClean Zephyrhills via Medium, Why Florida Homes Are Prone to Mold (heat, rain, humidity; indoor humidity below 60 percent). medium.com
- Markham Inspection Services, Tips to Avoid Mold Growth in Florida Homes (humidity-priority rooms, ventilation and AC). cfmoldinspect.com
- WOW Walls Studio, Bamboo Composite Wall Panels: What They Are and Why They Last (2026).
- WOW Walls Studio, Travertine Accent Wall Panels: Real Stone vs Composite (2026).
- WOW Walls Studio, Marble-Look Wall Panels: Calacatta Styles, Honest 2026 Guide.
- WOW Walls Studio, LED Backlit Wall Panels: Wiring, Drivers and Dimming (2026).
- WOW Walls Studio, Wainscoting in the Bathroom: Waterproofing (2026).
- WOW Walls Studio, Bedroom Wall Panels Behind the Bed: Sizes, Finishes (2026).
- WOW Walls Studio, Wall Panels in Florida Humidity: MDF vs PVC (2026).
- WOW Walls Studio, How Much Do Wall Panels Cost in 2026? Materials + Install.